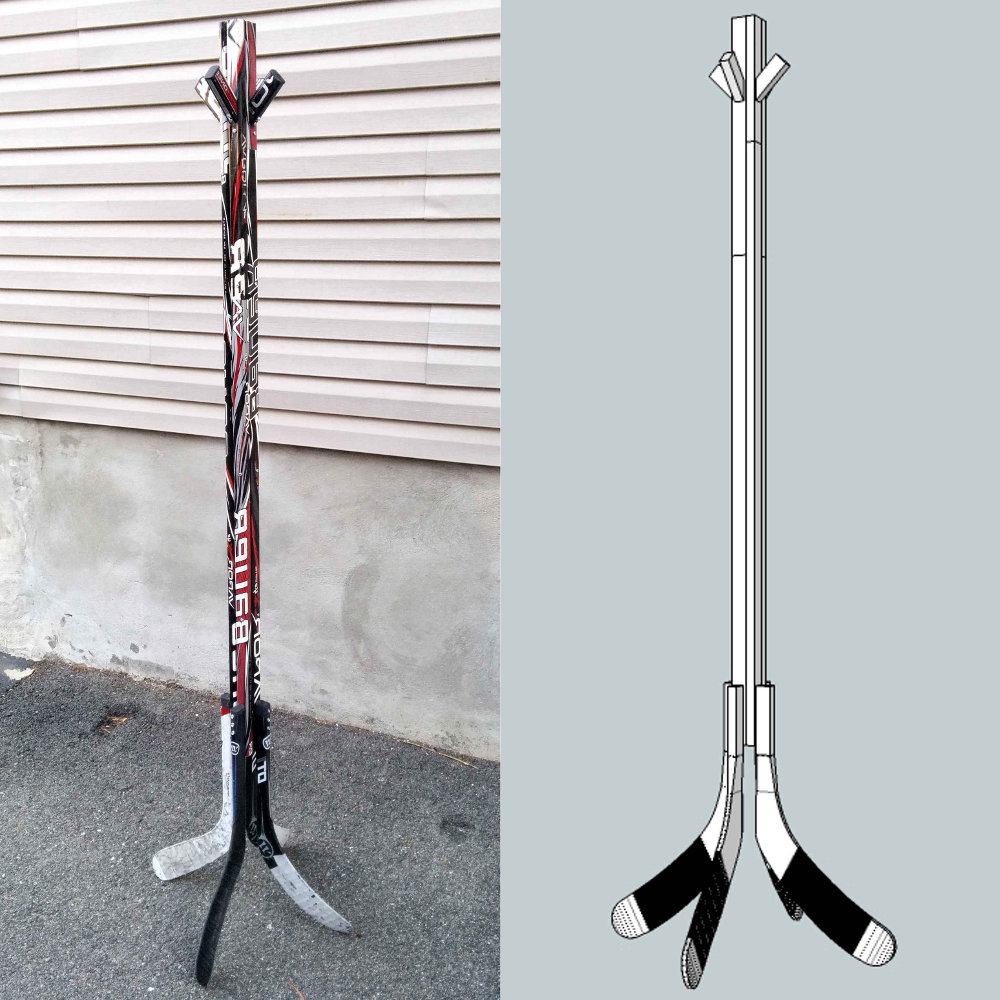
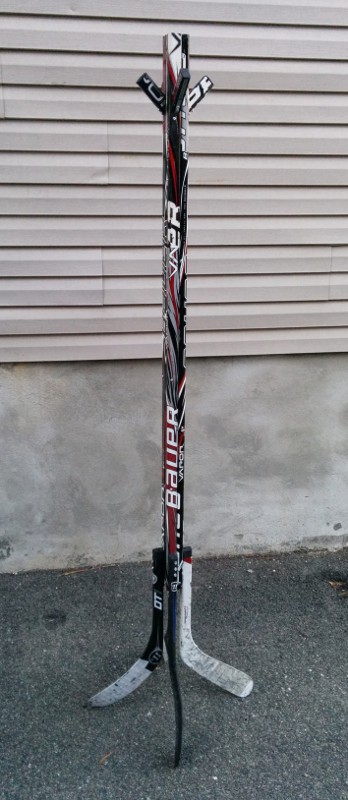
Hockey Stick Coat Rack
A standing coat rack built from 6-7 hockey sticks with blade feet and hanging posts. Great for entryways and mudrooms.
Before you start: Read the Building Guide for essential safety and technique information.
The coat rack is pretty simple to make, breaking down into just two main components.
Design Breakdown
- Main Stand — staggered-length sticks in a square arrangement
- Feet & Hanging Posts — blade feet and angled coat hooks
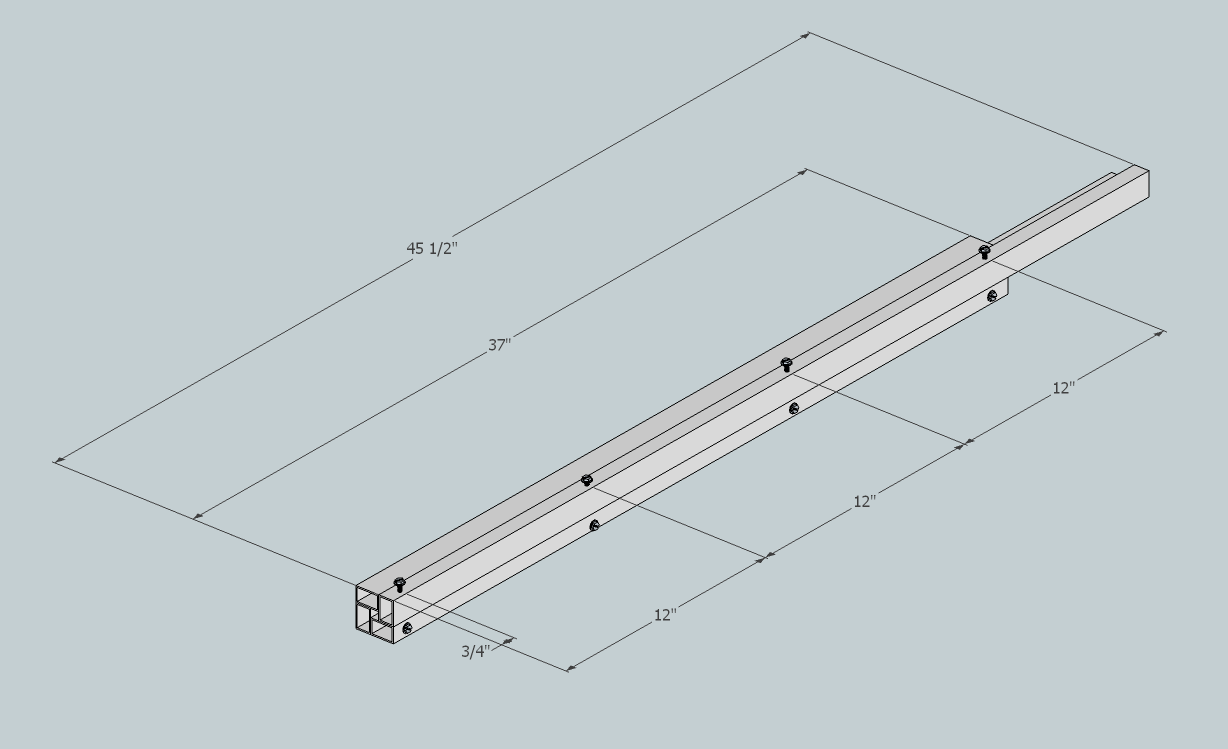
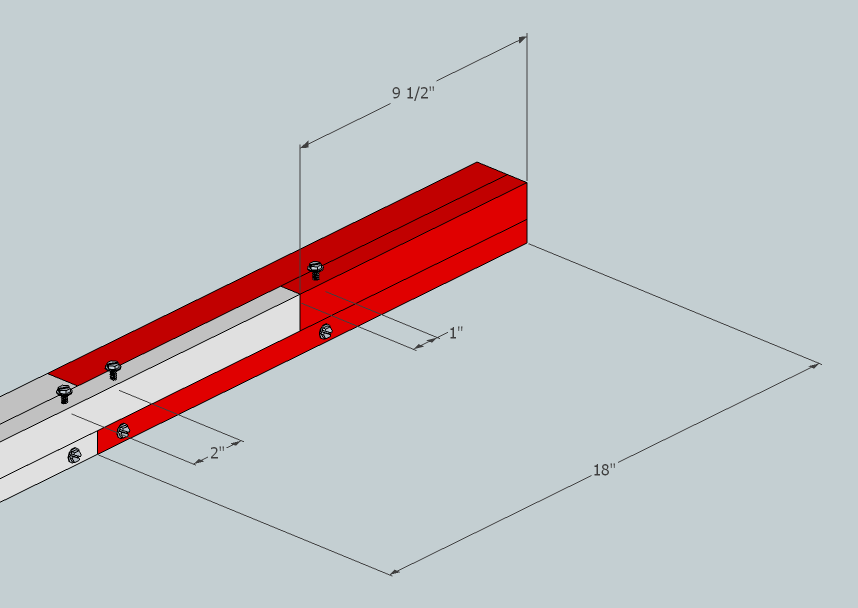
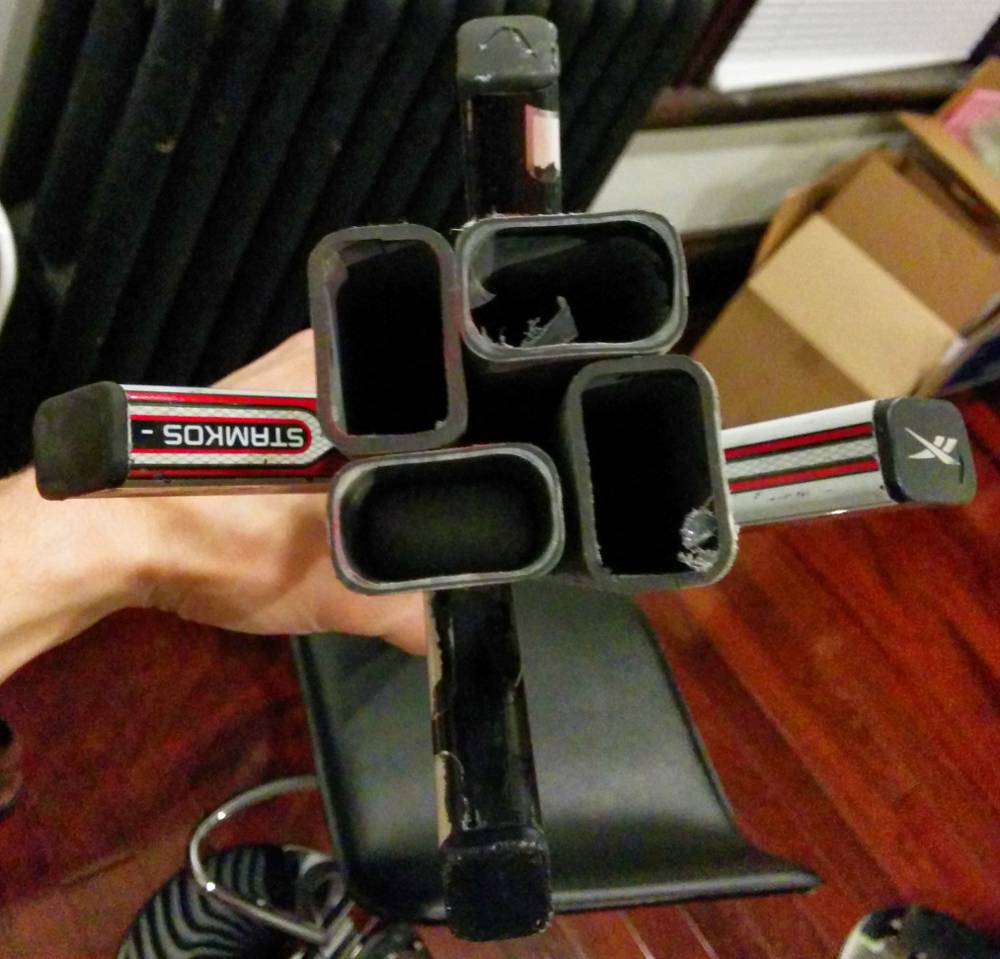
Main Stand
Since the coat rack is pretty tall, it’s unlikely you’ll have 4 unbroken sticks that are 70″ or longer even with blades attached.
- Take 5-6 sticks of differing lengths (sufficiently staggered) and arrange them in a square fashion
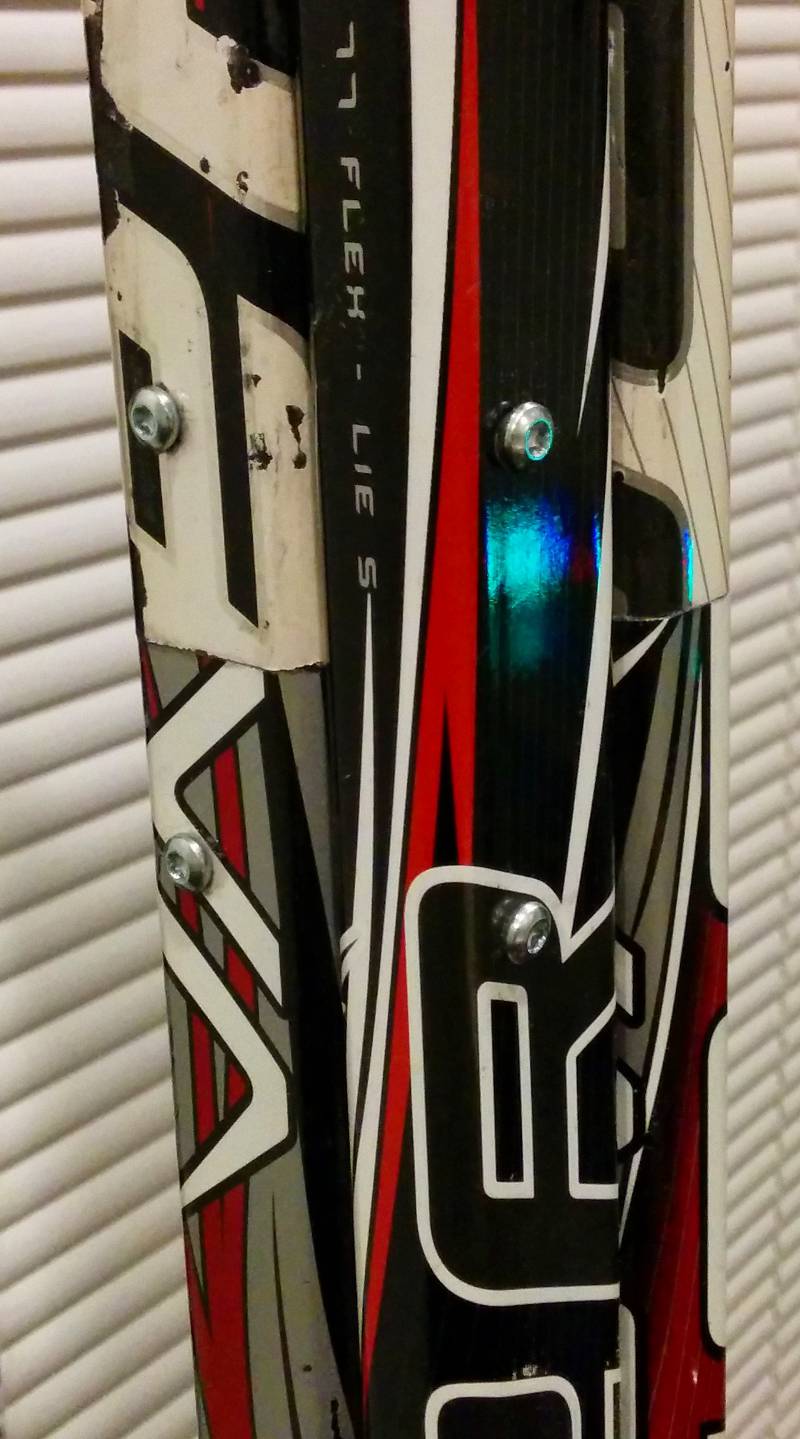
- Fasten them together using #8, 1.5″ sheet metal screws — screw through the short side stick first, then into the next stick. Do this on all 4 sides
- Add remaining pieces to the top end to reach the desired height. Use the same brand/type of stick for each top stick as the bottom stick it lines up against — this provides the cleanest look
The staggered design makes the stand much more rigid since screws affix sticks from the bottom portion to the top and vice versa.
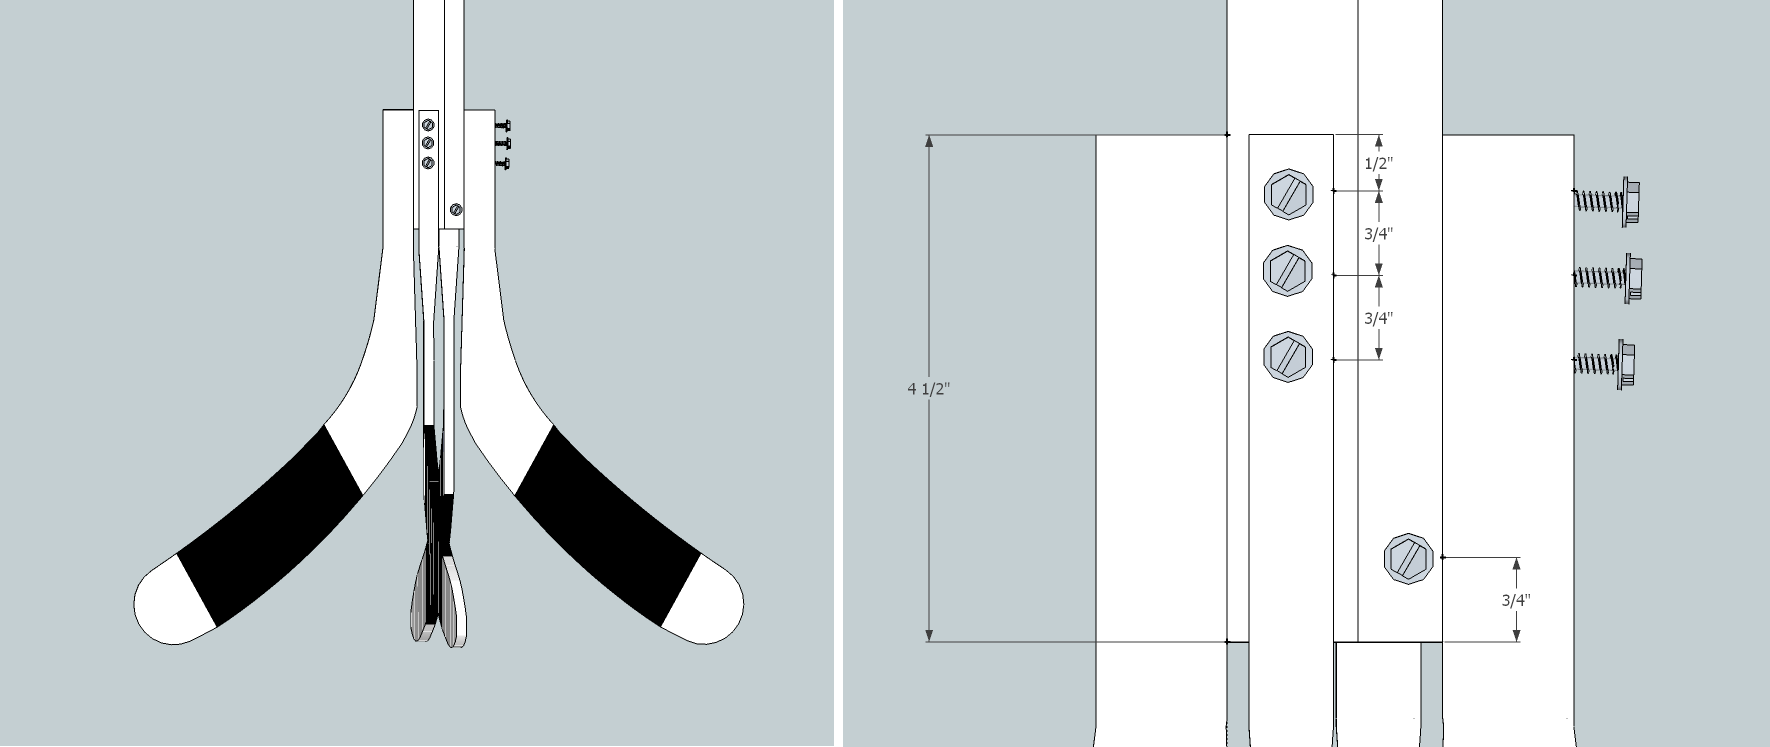
Feet
Important: you want 4 of the same curve direction — either all righty or all lefty. Don’t mix them or the coat rack won’t balance.
- Get about 4.5″ of the straight solid shaft just above the blade to lie flush with the center of the broad-sided stick
- Note: Center the blade on the broad side of the stick, not the side of the main stand
- With 4.5″ of flatness, the distance from the lowest point on the blade to the top is about 15.75″
- Cover the hole at the top of each shaft with hockey tape — it covers the unsightly hole and sheet metal screws while keeping that good hockey look
- Attach each blade to the main stand using three #6, 1.5″ sheet metal screws
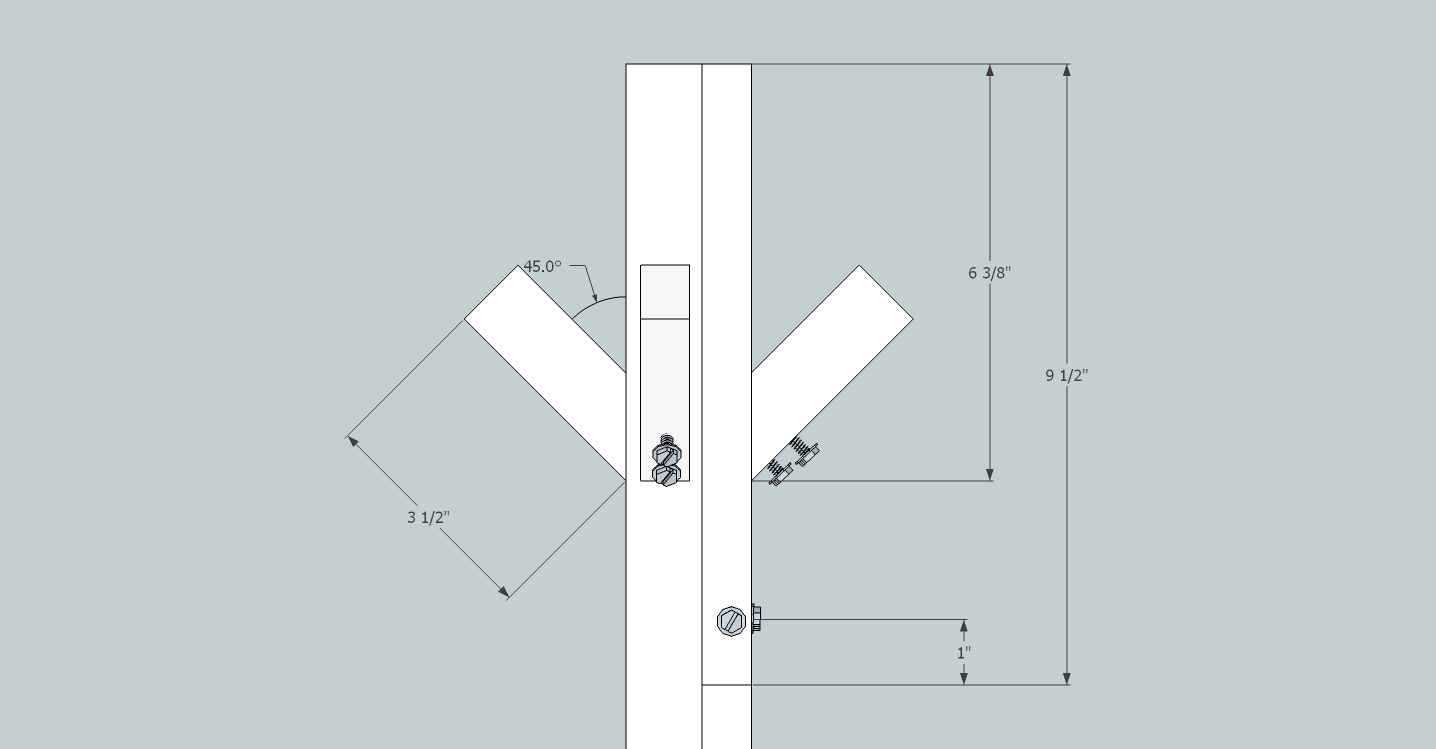
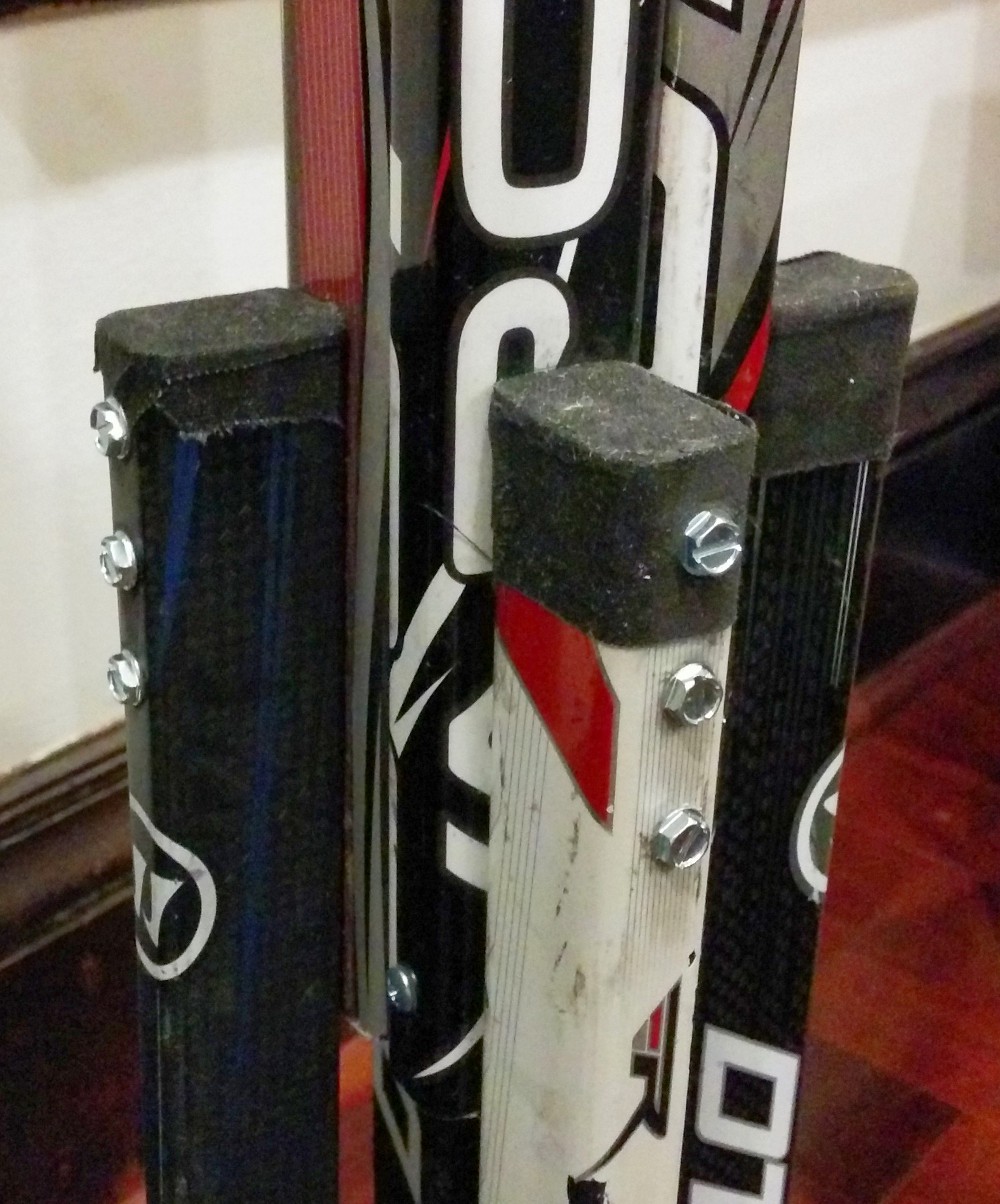
Hanging Posts
Depending on what you want to hang, you may wish to adjust post length. The length shown works well for hanging a single winter jacket.
- Cut 4 hanging posts to your preferred length using the mitre saw, including a 45° angle
- Glue the piece on first before attempting to screw it in
- Screw each post at an angle: 1 × #6, 1.25″ on bottom and 1 × #6, 1.5″ on top — the additional length helps cover the extra distance
- Once the glue dries, you’re all done!
For a full 3D model, visit the Models page.
Gallery (9 photos)
Related Projects
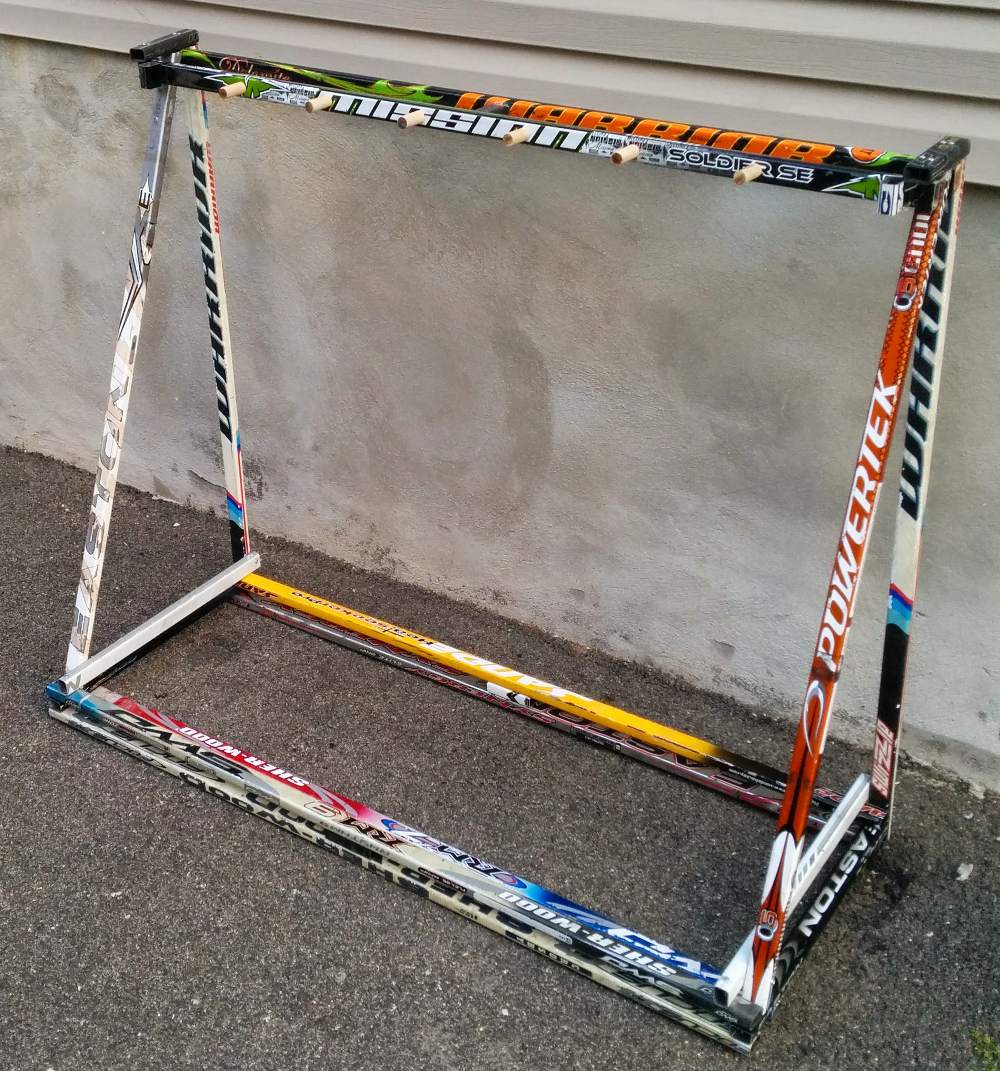
Hockey Stick Rack
A display rack for storing and showcasing hockey sticks. Built from 15 sticks with angled supports, dowel dividers, and a sturdy base.
 Preview
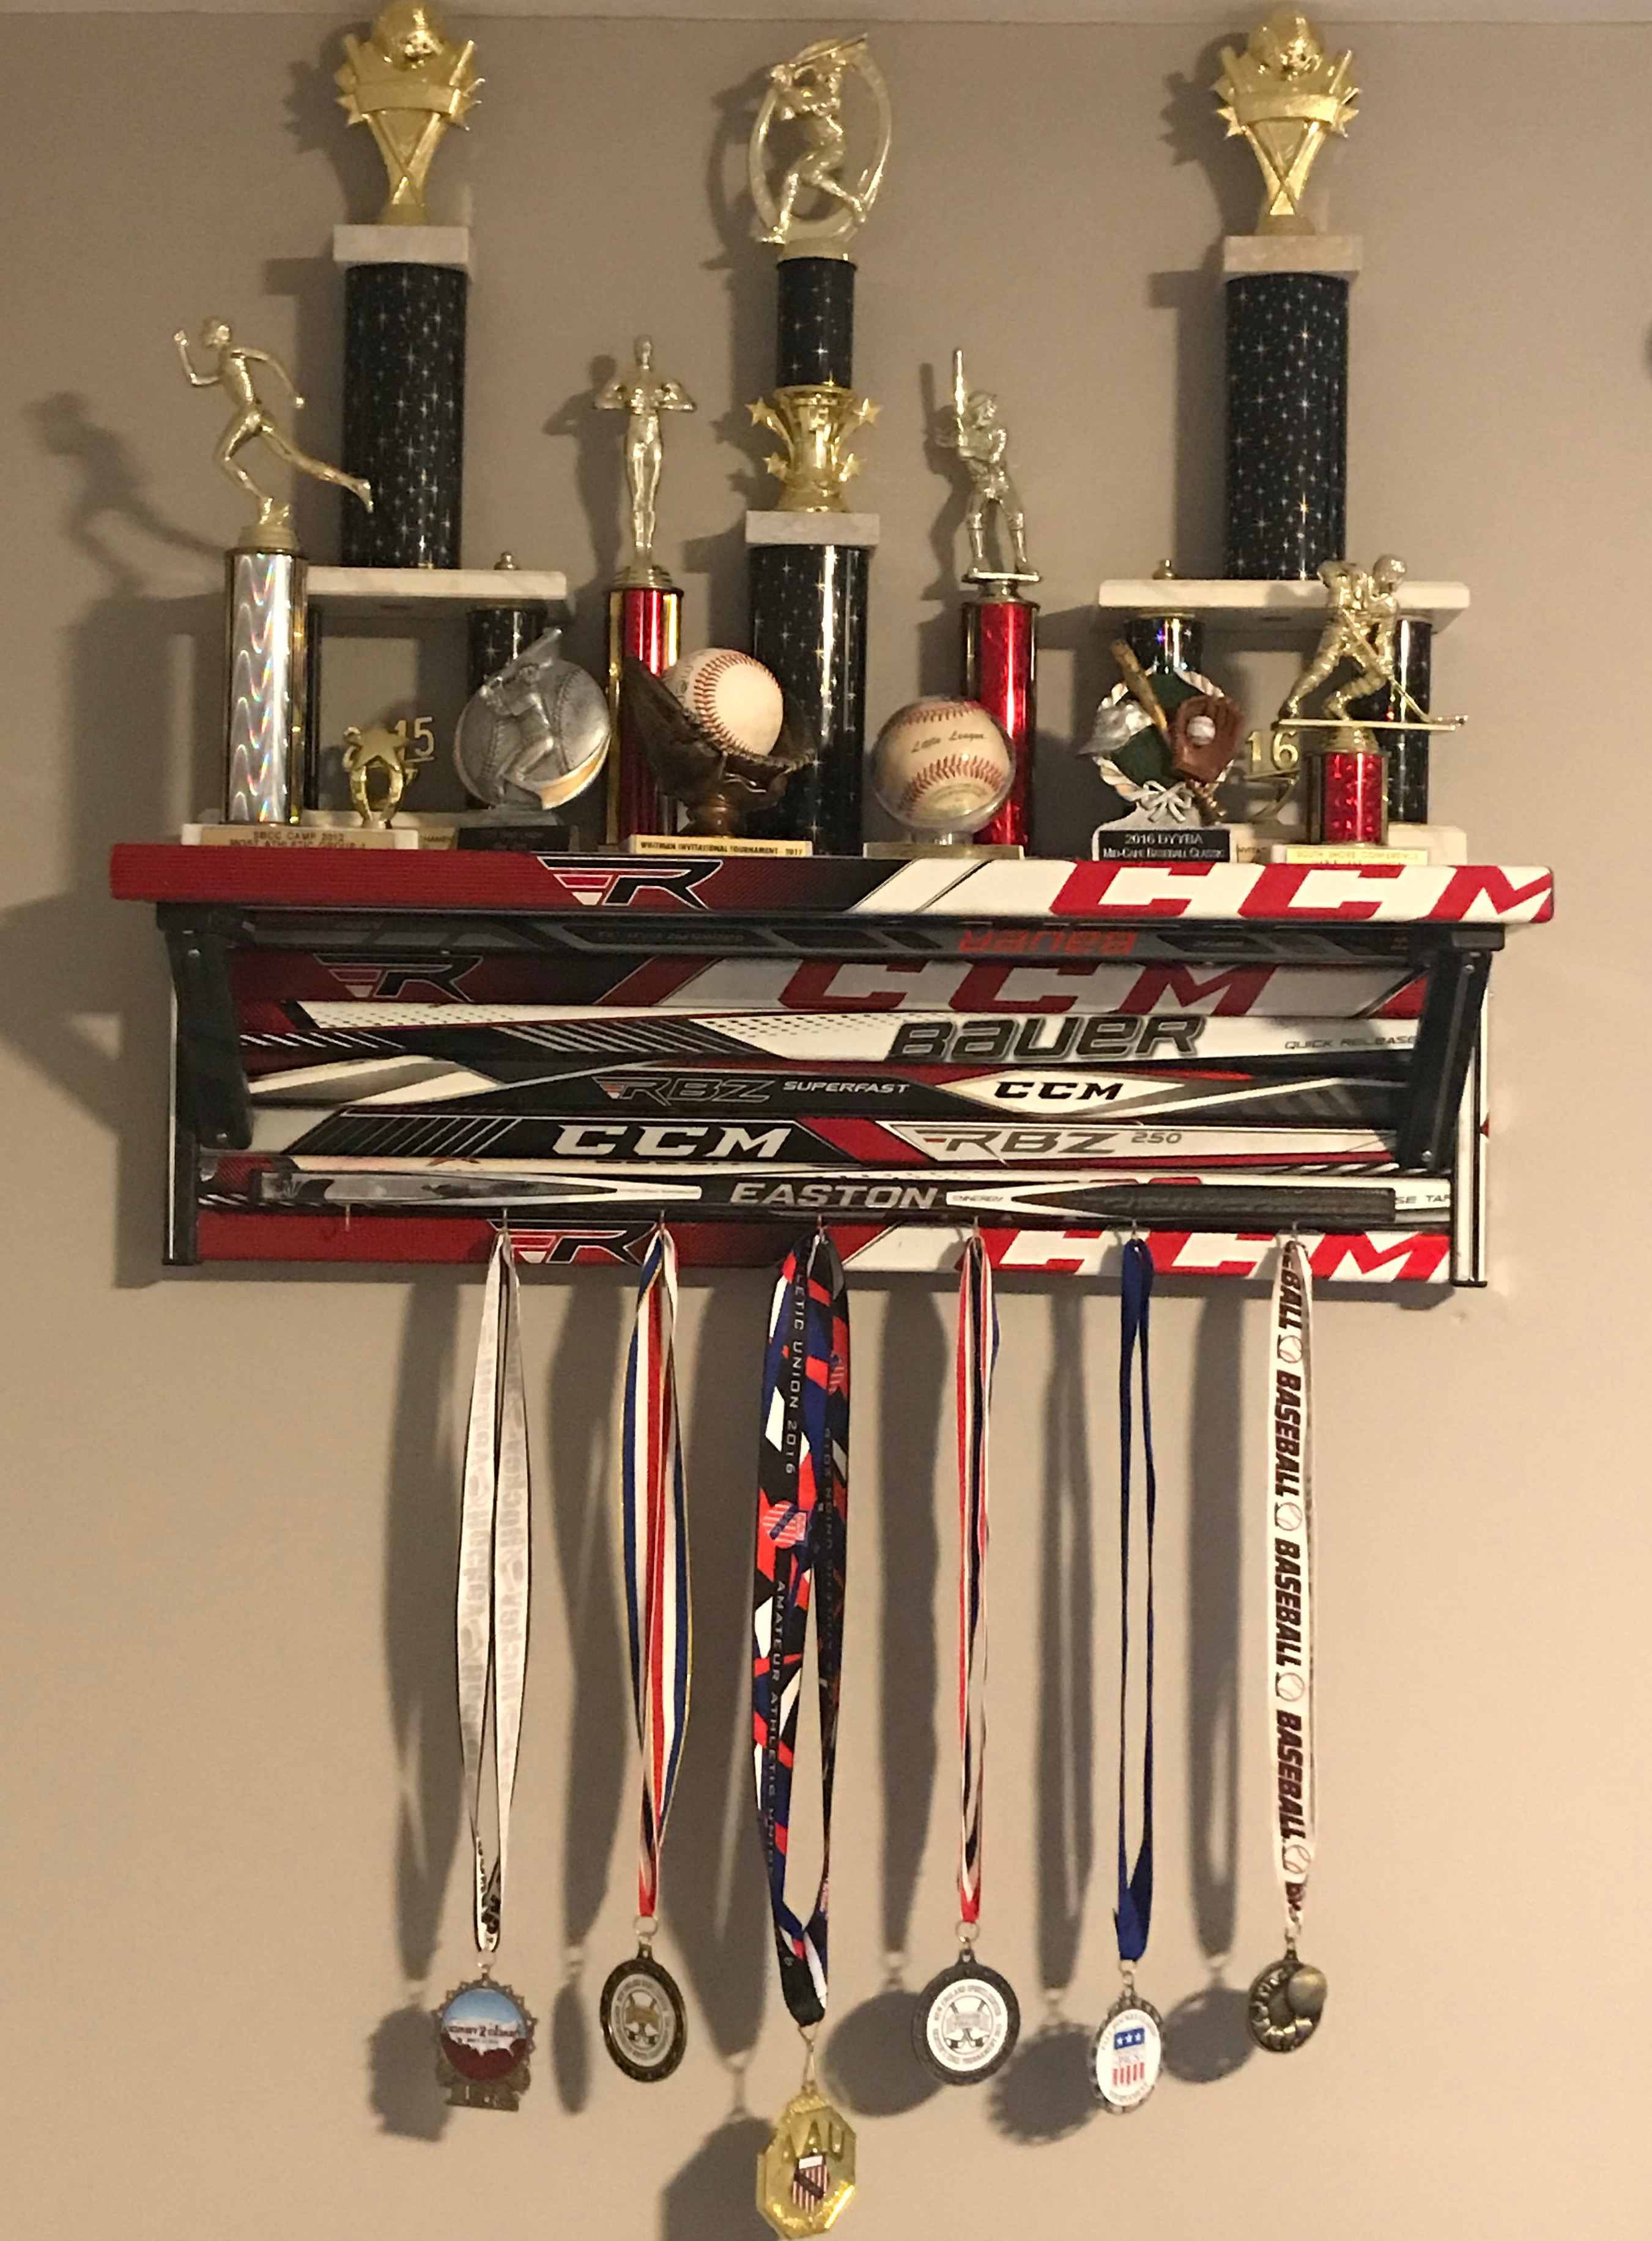
 Hockey Stick Shelf
A wall-mounted shelf built from hockey sticks. Great for displaying trophies, photos, and hockey memorabilia.
 Preview
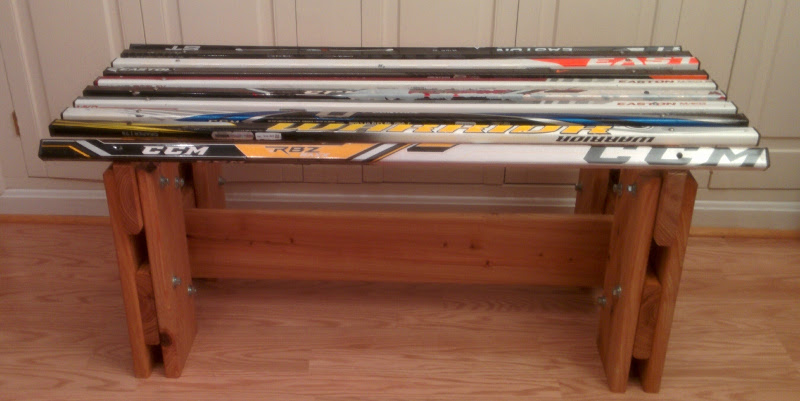
 Outdoor Bench
A hockey stick bench designed for outdoor use. Weather-resistant construction for patios and rinks.