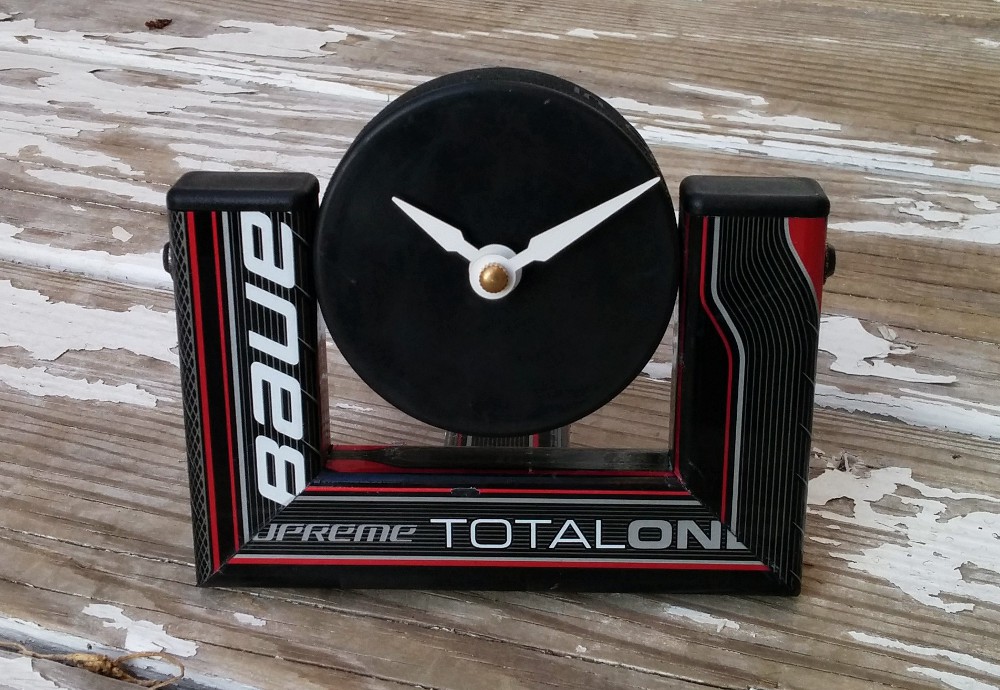
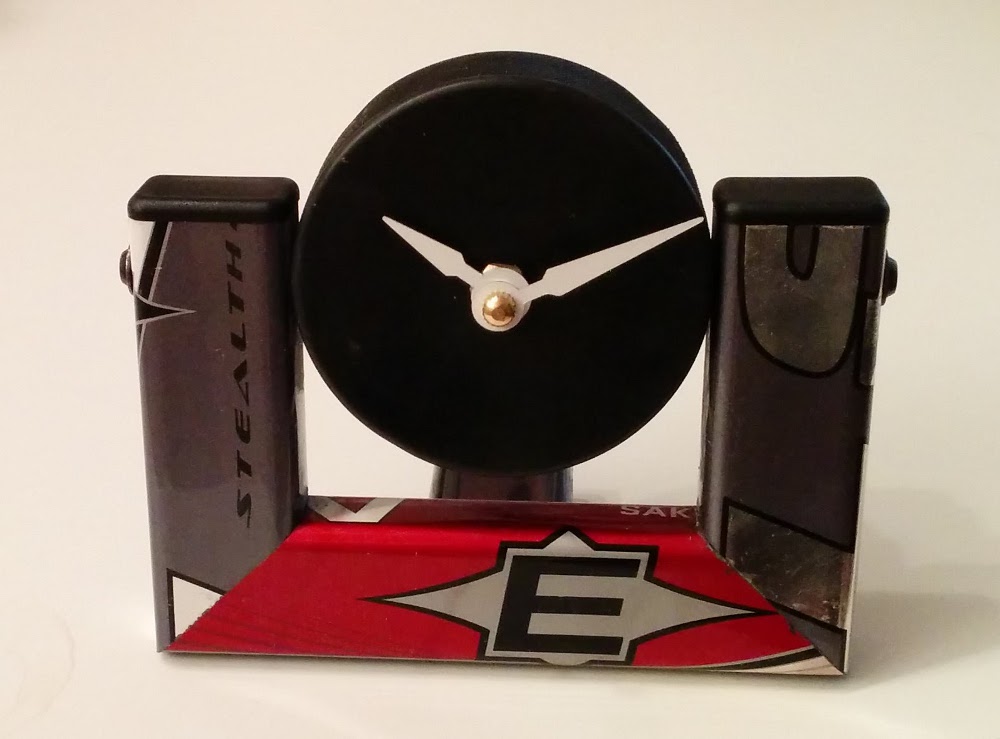
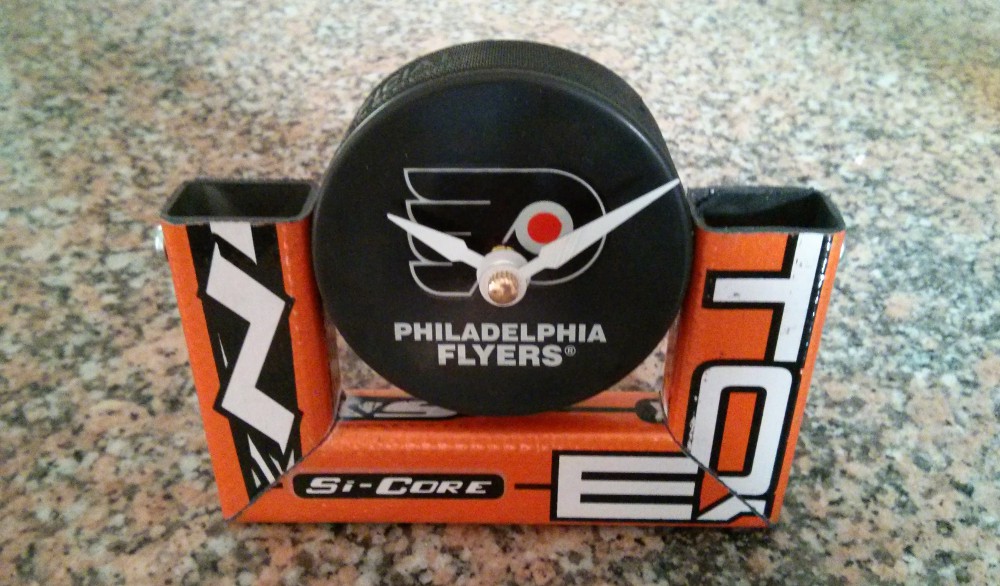
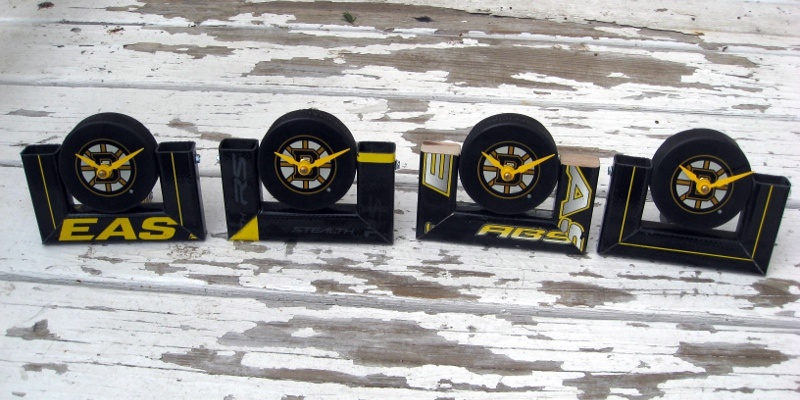
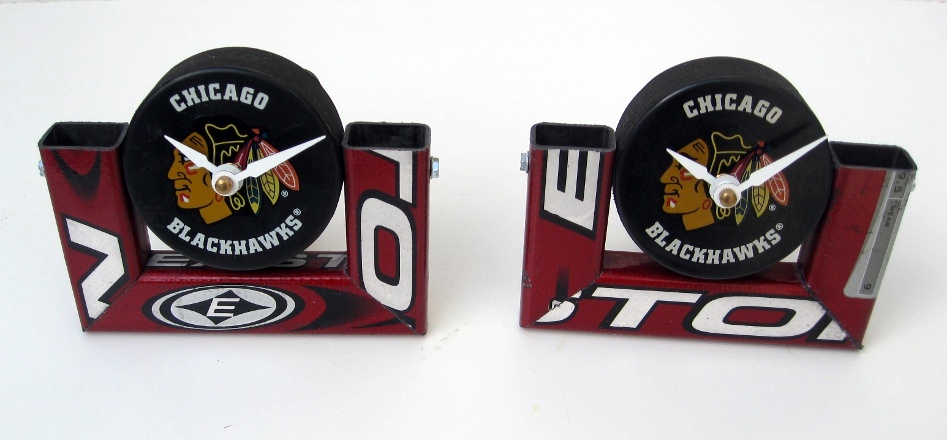
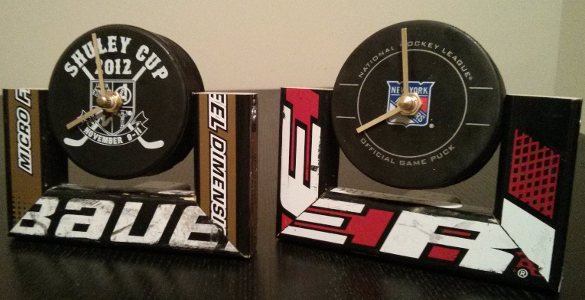
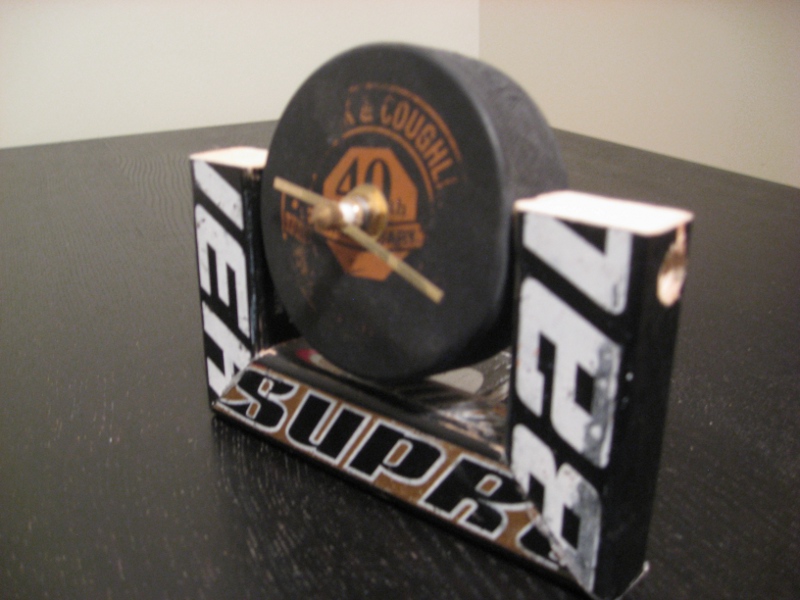
Hockey Stick Desk Clock
A compact desk clock using a single hockey stick and a hockey puck with clock movement. Great beginner project for clock-making.
Before you start: Read the Building Guide for essential safety and technique information.
Not much to discuss with this design — it’s very straightforward. The clock frame is easy to build, requiring a clamp or two and some patience. Routing the puck is the challenging component, but it makes a huge difference in how the clock looks and how well it’ll run.
Design Breakdown
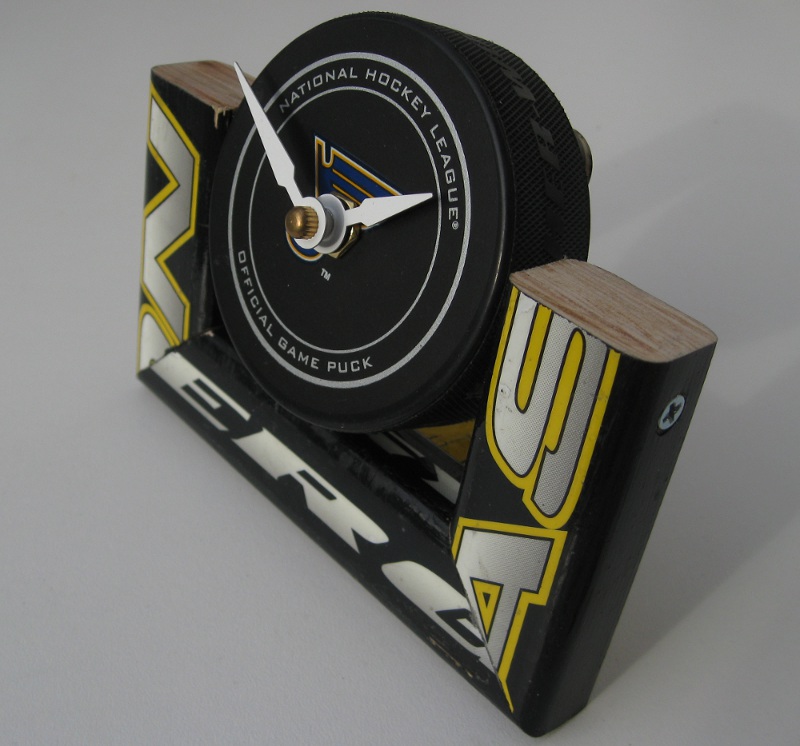
- Clock Frame — simple stick frame with 45° mitre joints
- Puck — routed for clock movement
- Assembly — mounting the puck in the frame
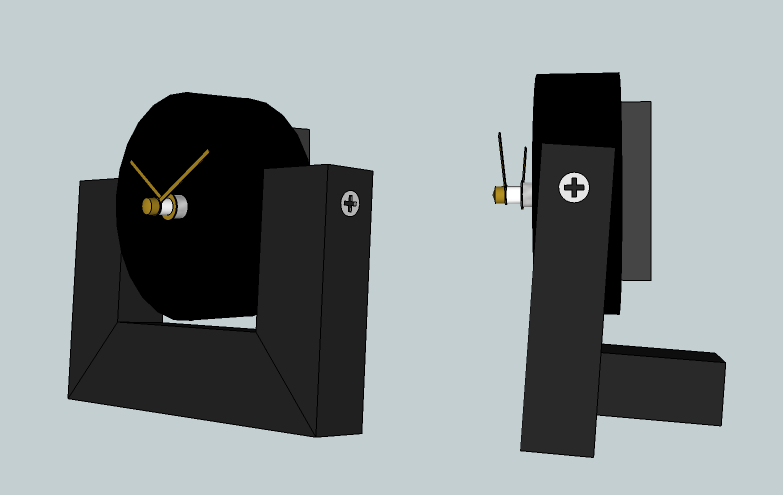
Clock Frame
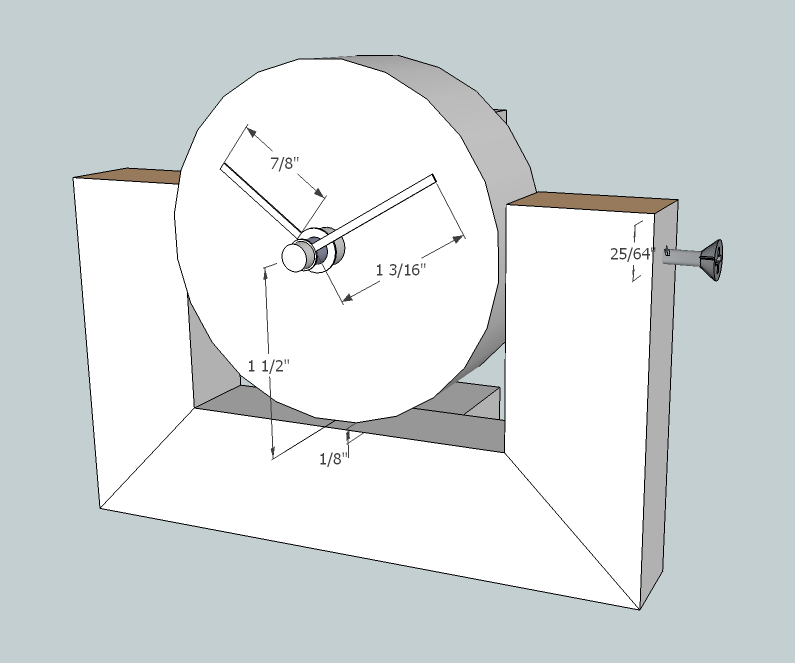
The clock frame dimensions should provide enough clearance between the posts to slide the puck in without a gap, but not so tight that the puck is difficult to turn or doesn’t fit.
Tips:
- Try making the bottom piece of the frame a little wider, then slowly shave it down to the needed length
- Use Liquid Nails to hold all the pieces together with a clamp — since the pieces are at 45° angles, they’ll tend to slip off each other as you press the clamp, so be careful
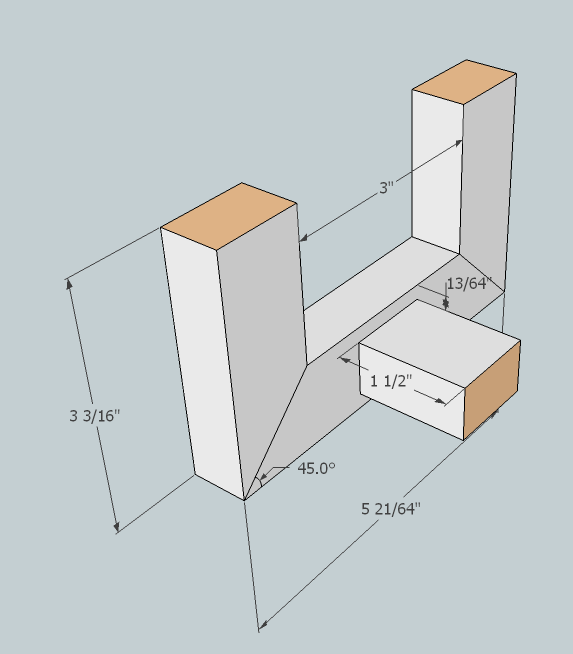
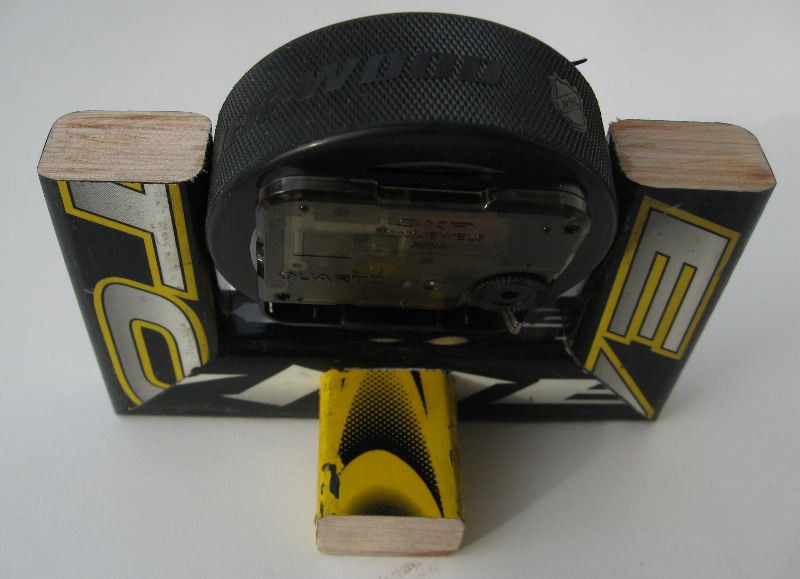
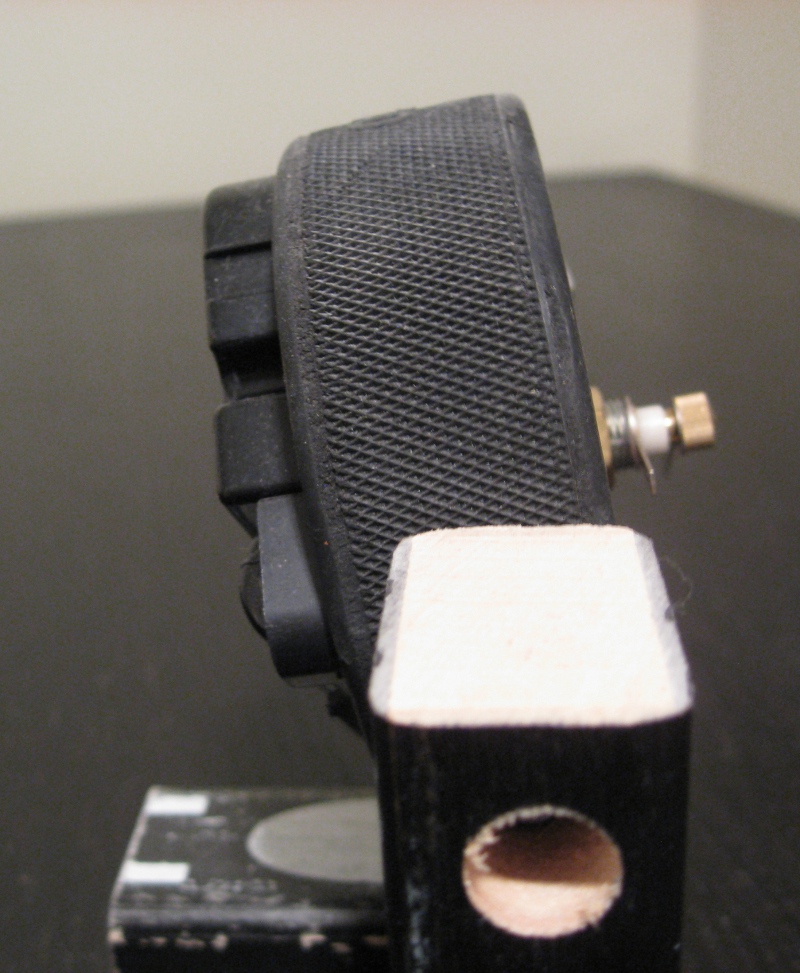
Critical stability detail: The 1.5″ support piece in the back should not lie flush to the table. By raising that small piece to about half the height of the bottom stick (13/64″), the clock will have a slight lean backward and be more stable. Otherwise a small nudge forward will cause it to tip.
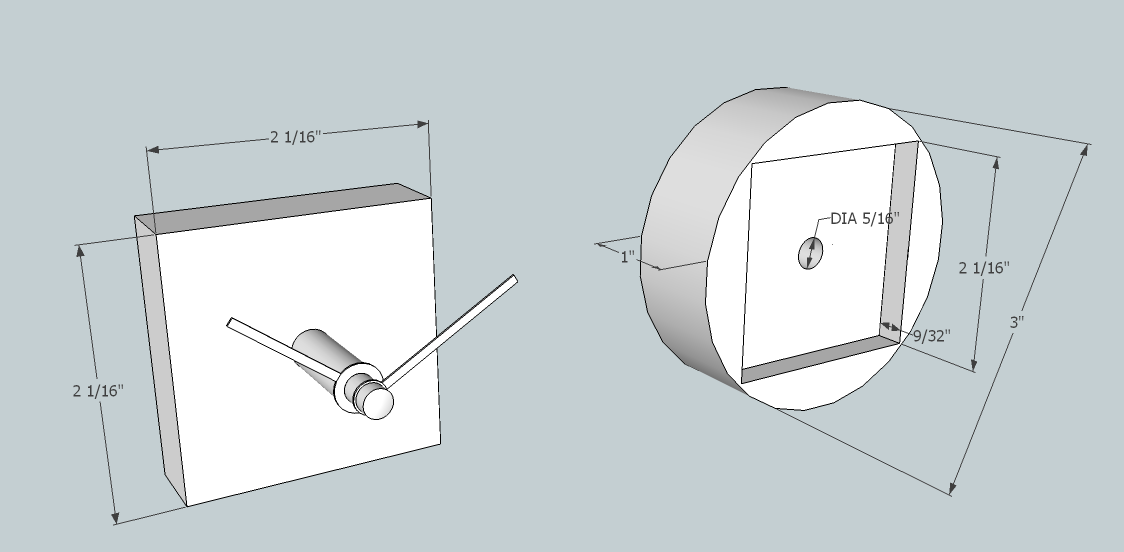
Puck
Get a movement with the thickest dial you can if you choose not to route. Route out 9/32″ of the back to fit the puck — this gives 3/16″ hand clearance from the face, which is plenty.
See the Building Guide — Clock Movements section for detailed routing instructions and safety precautions.
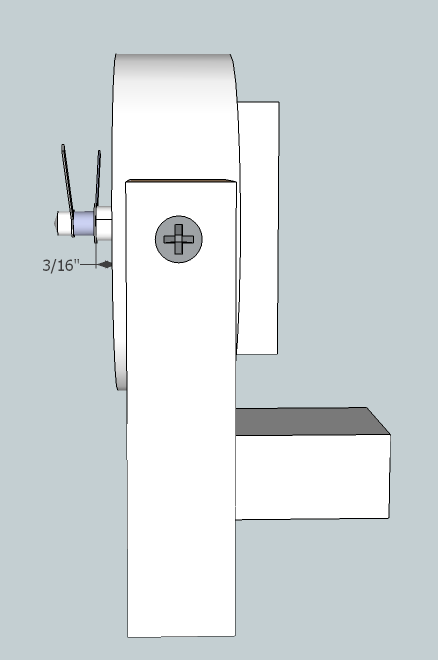
Assembly
- Insert one #6 1.5″ screw (or 1.5″ finishing nail) into each post to hold the puck in place
- The idea is to provide a point on either side for the puck to rotate about — make sure the screws or nails are as co-linear as possible along the diameter of the puck
- Raise the bottom of the puck slightly off the bottom piece (about 1/8″) to get the rotation you want — this puts the puck attachment screws/nails at about 25/64″ from the top of the side pieces
- Make sure it’s the same on both sides!
- Use the wrench to tighten the nut on the clock shaft to secure it to the puck
For a full 3D model, visit the Models page.
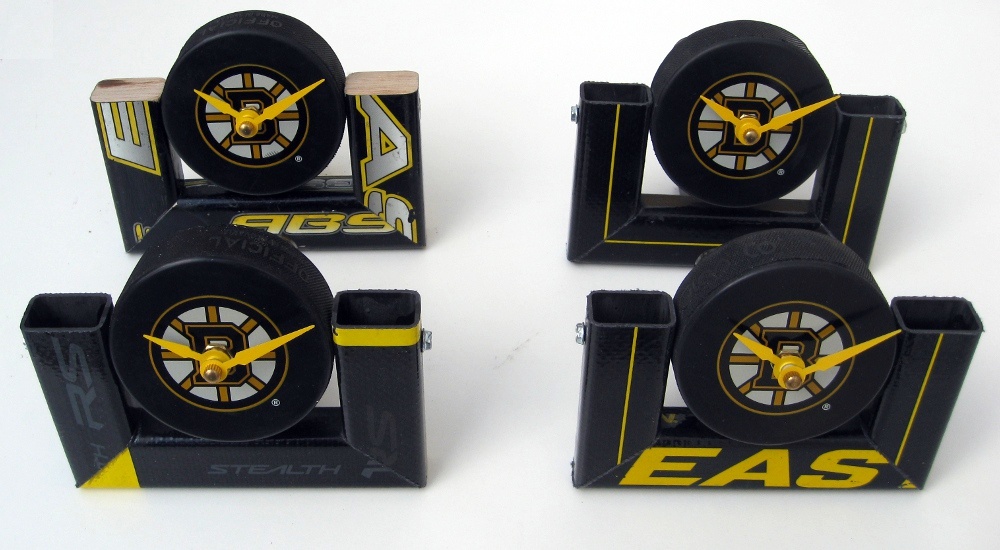
Gallery (17 photos)

Related Projects
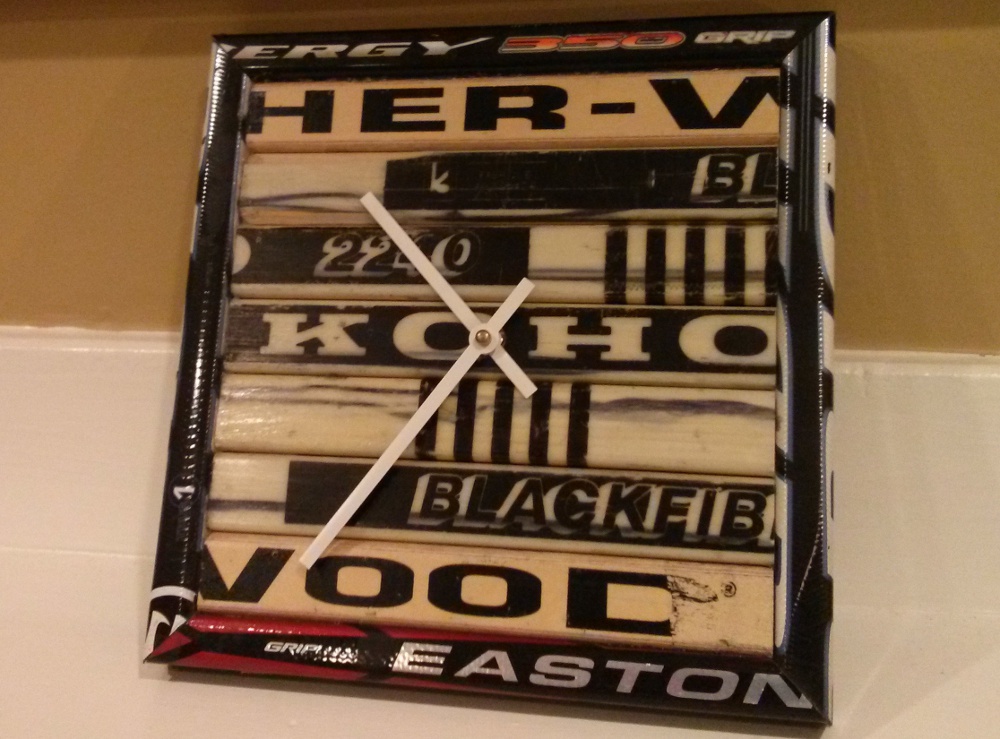
Stick Wall Clock
A classic wall clock built from hockey sticks with a framed face. Probably the easiest item to build — great for a first small project.
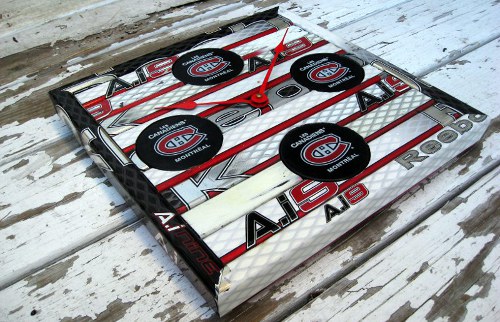
Hockey Puck & Stick Clock
A wall clock combining hockey sticks and pucks into a striking display piece. Available in team-themed variations.
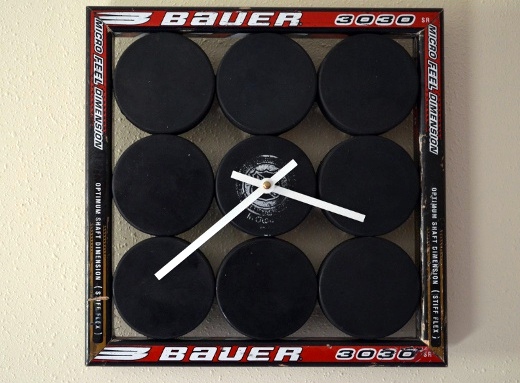
Hockey Puck Wall Clock
A wall-mounted clock made from hockey pucks with stick frame. Features a three-puck design with routed center for the clock movement.