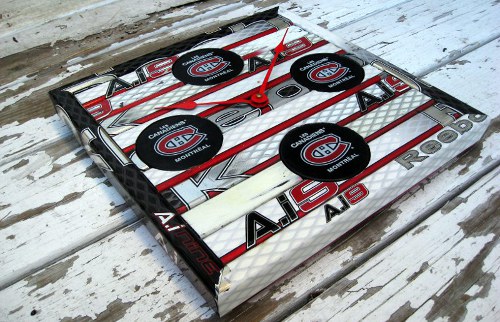
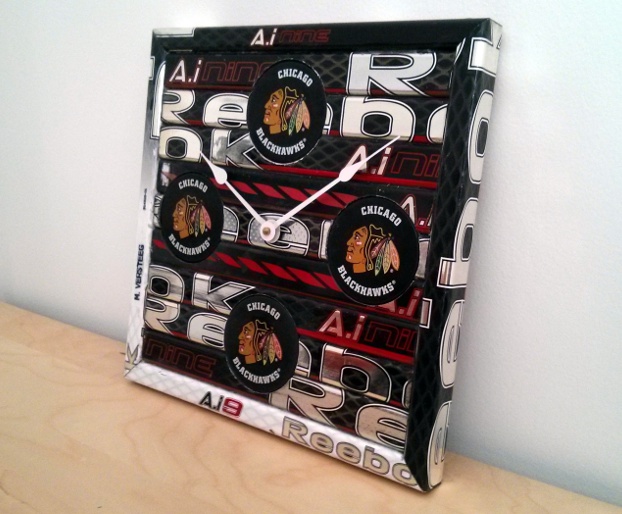
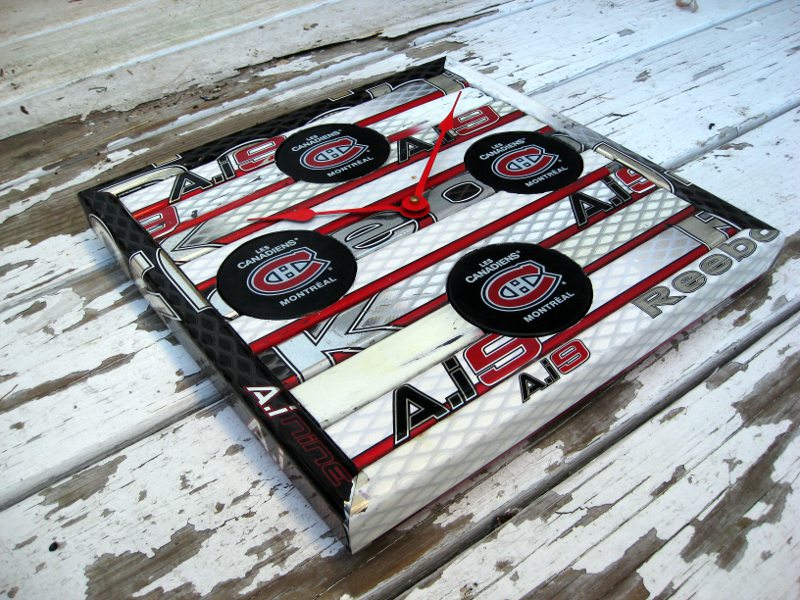
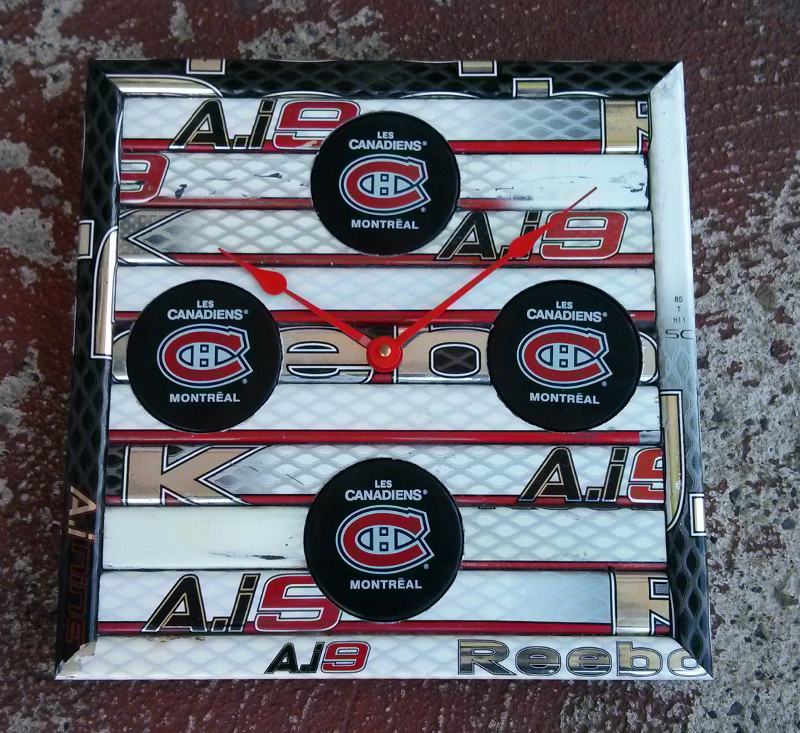
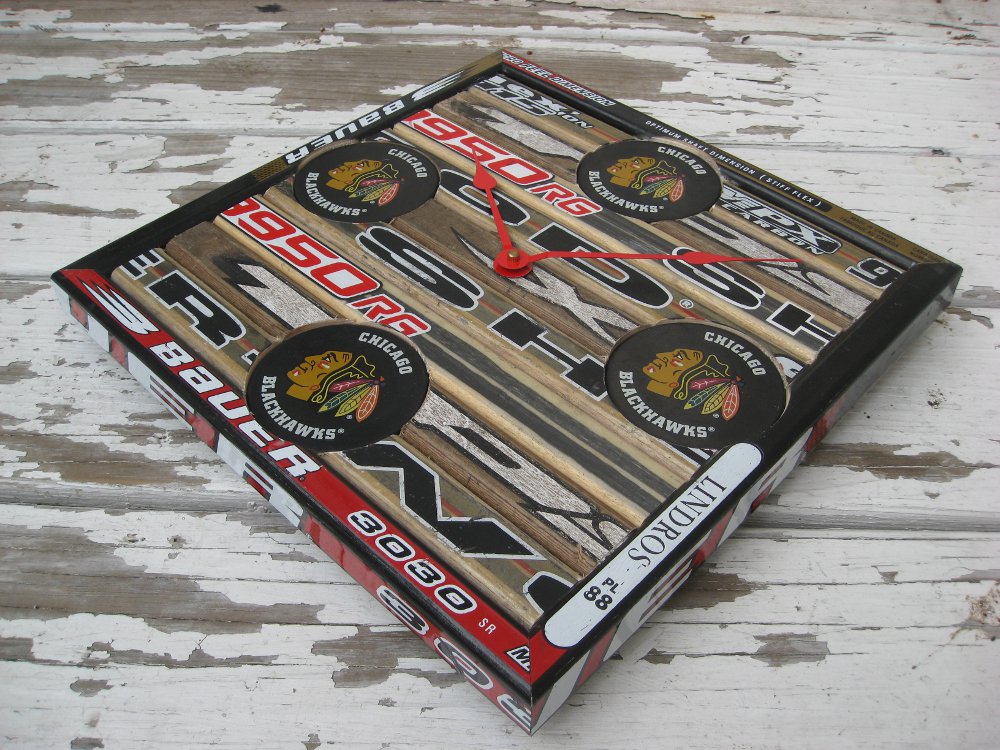
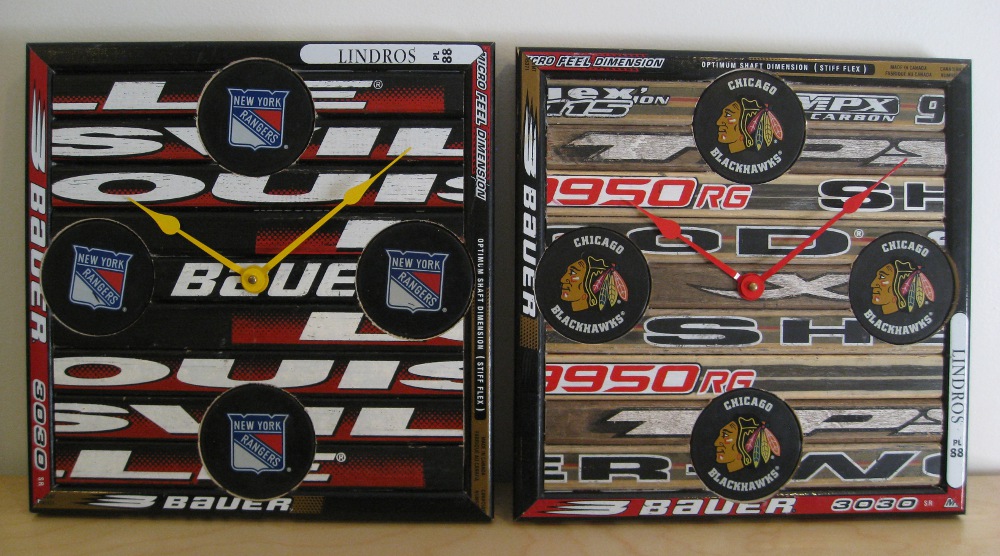
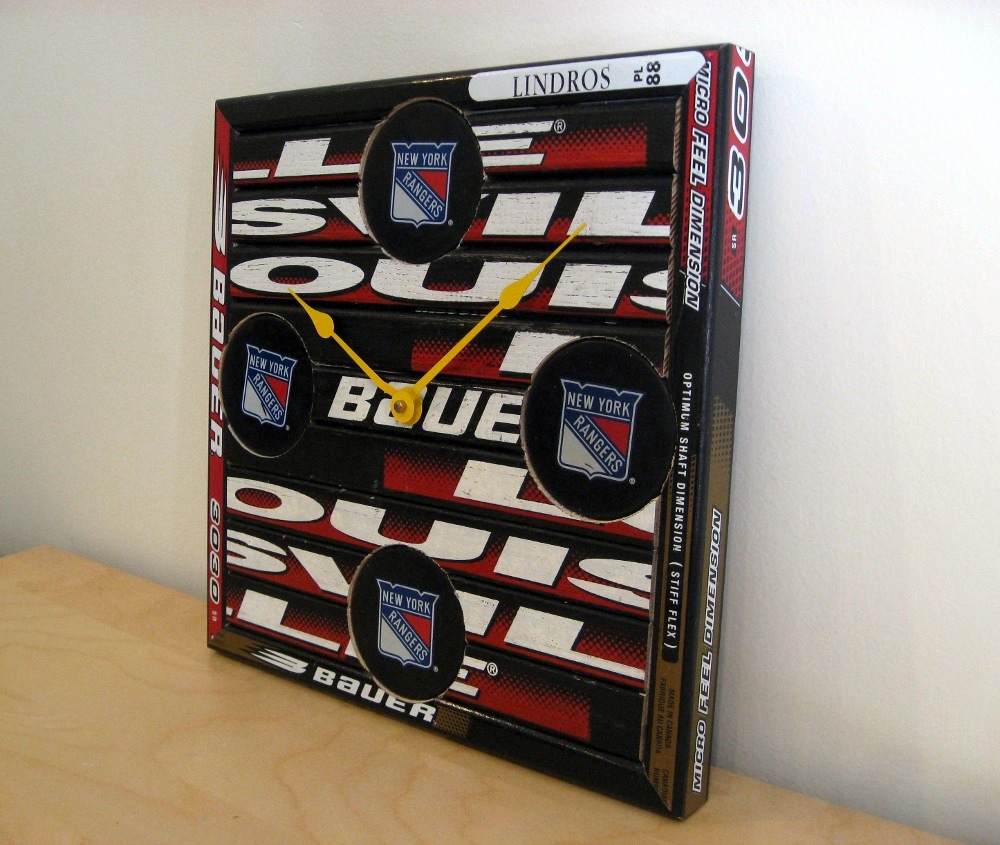
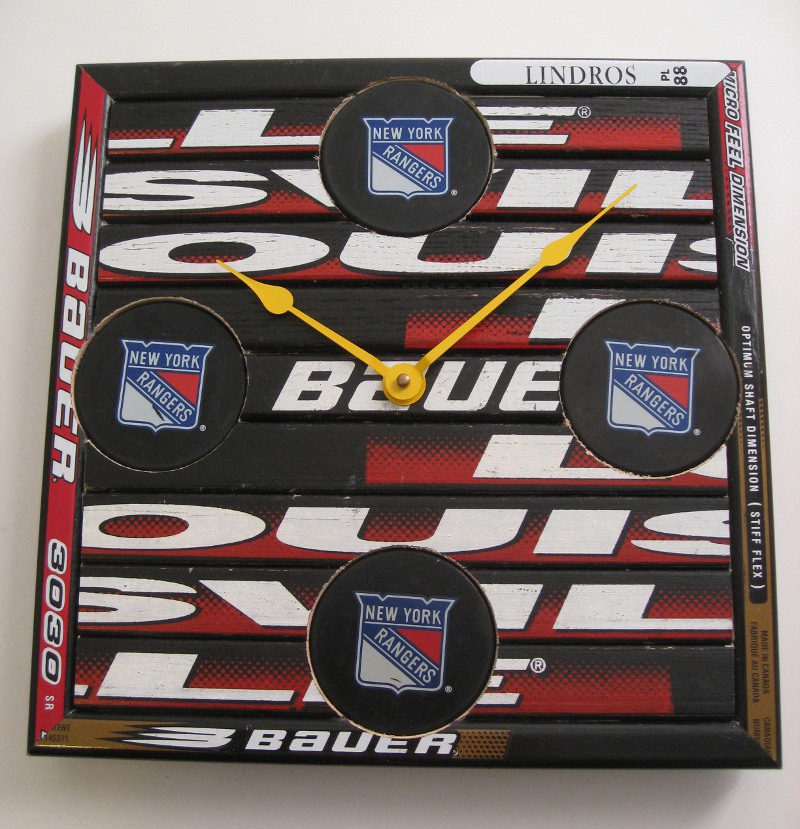
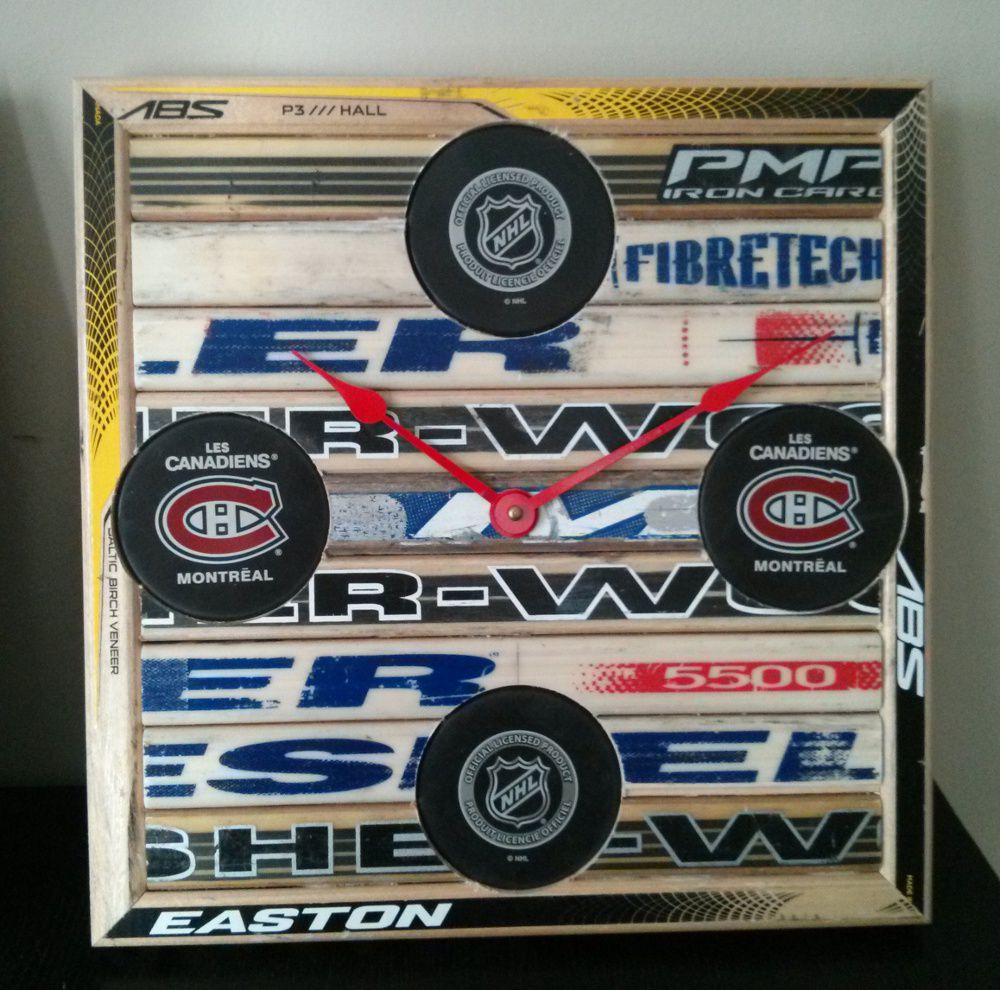
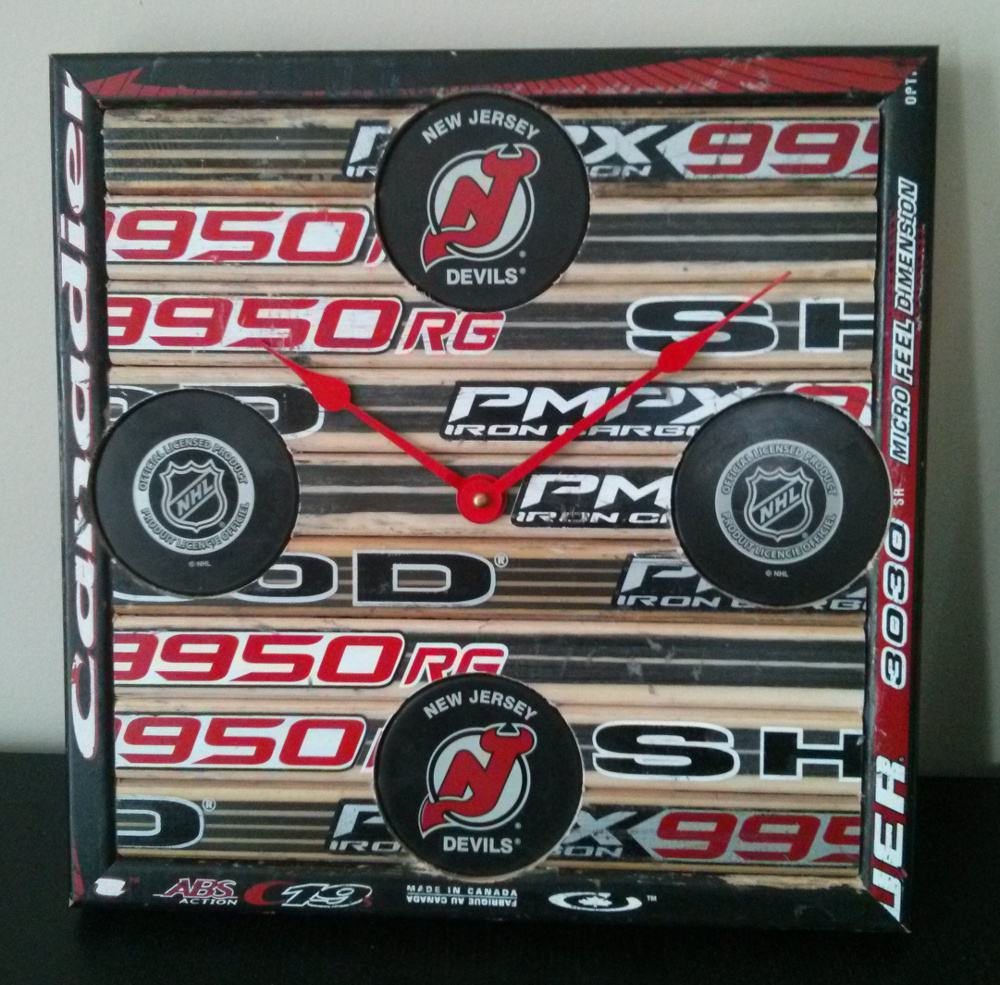
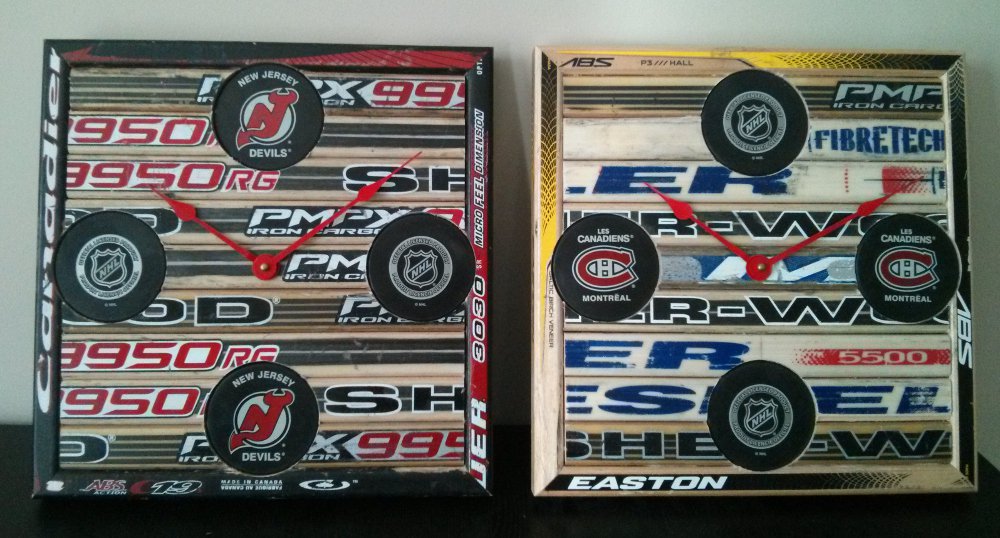
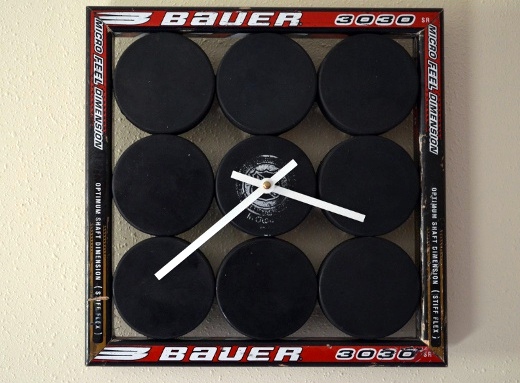
Hockey Puck & Stick Clock
A wall clock combining hockey sticks and pucks into a striking display piece. Available in team-themed variations.
Before you start: Read the Building Guide for essential safety and technique information.
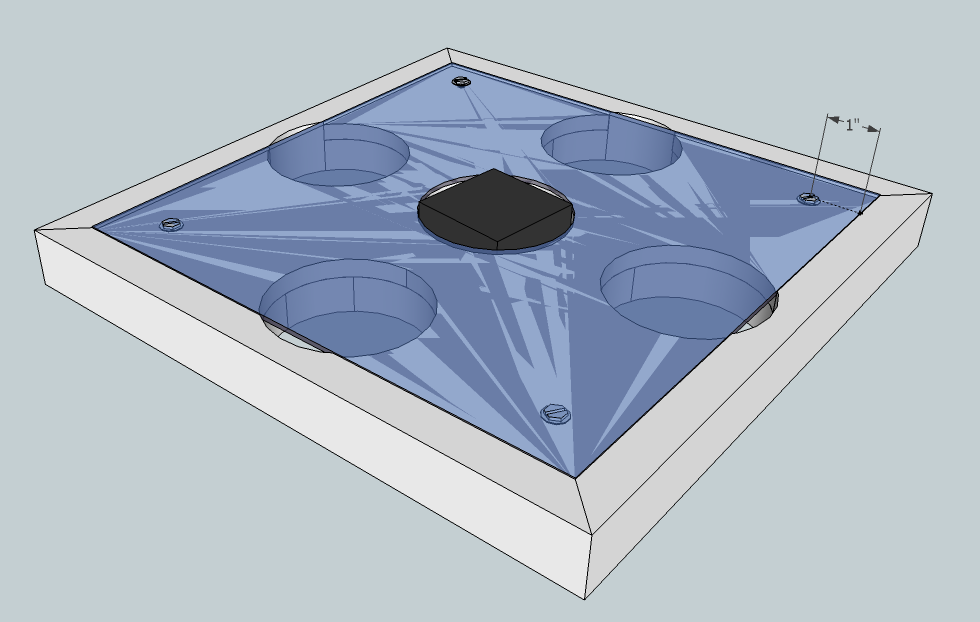
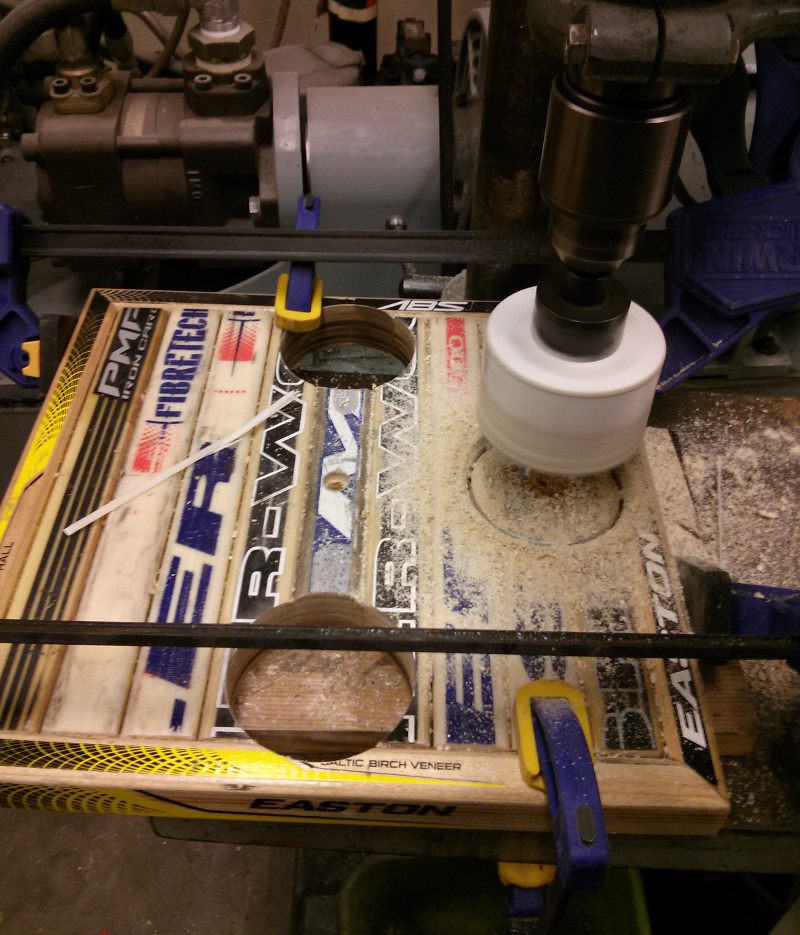
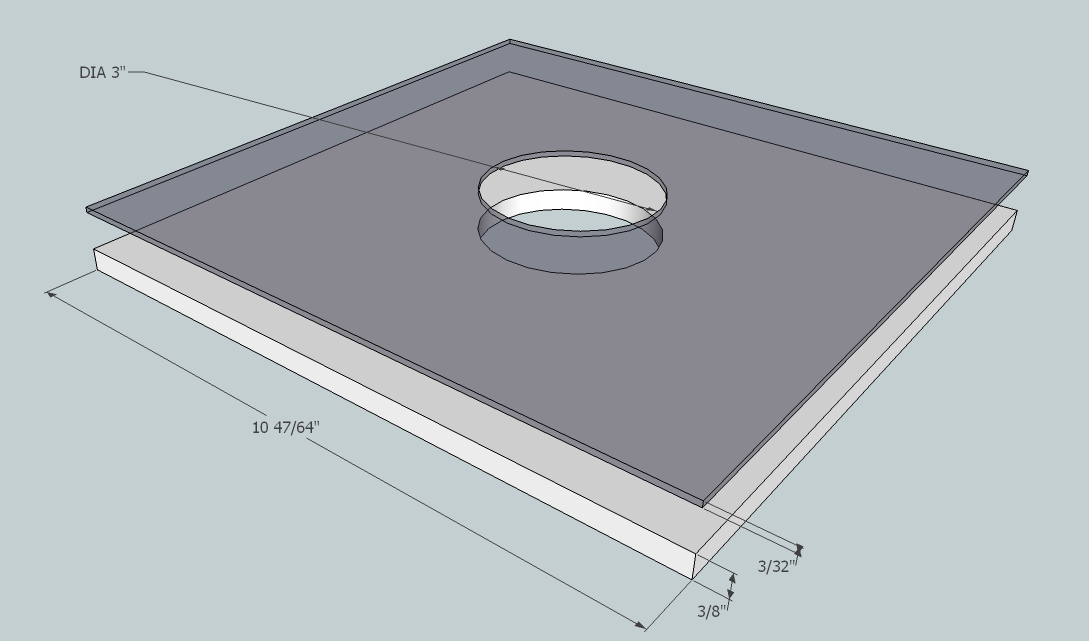
A straightforward breakdown makes this clock easy to build yourself. It’s a big clock — a little over 12″ square! A drill press is really recommended to get the puck holes right. You can do it by hand, but you risk angled holes.
Design Breakdown
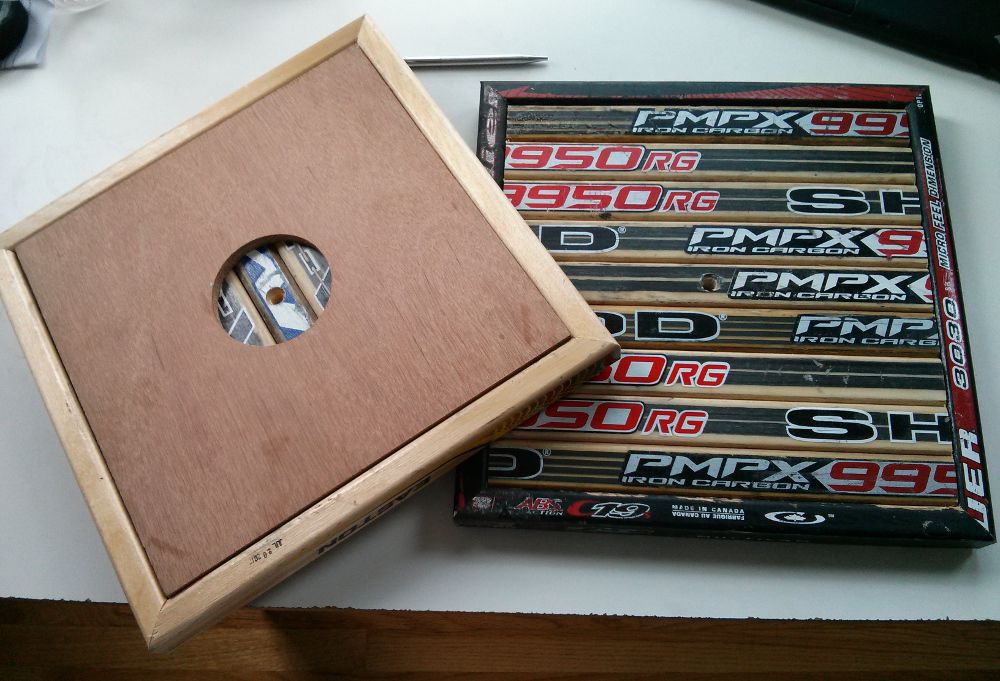
- Front/Backing — stick face glued to marine plywood
- Outer Frame — mitre-cut frame pieces
- Puck Holes — 3″ holes drilled through sticks and plywood
- Finishing Details — polycarbonate back, wire hanging, bumpers
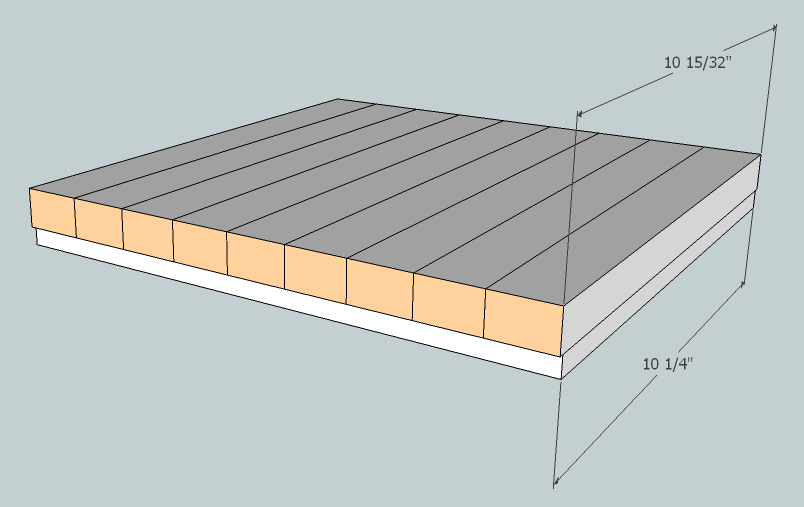
Front/Backing
- Cut 9 sticks to the height of 9 sticks so it’s square — about 10.5″. Clamp them all together before cutting!
- Cut the marine grade plywood and polycarbonate to a square slightly less than that
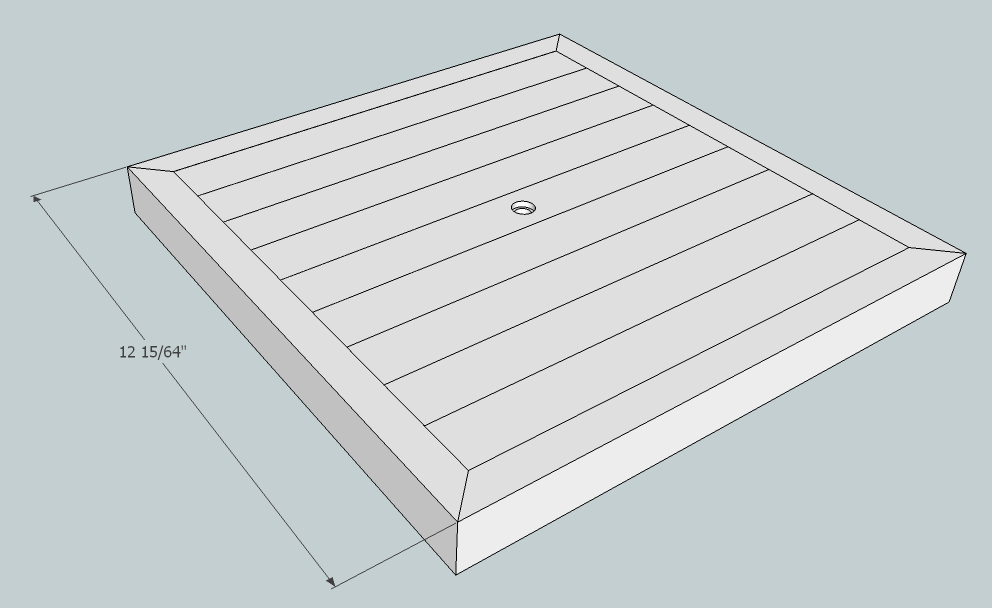
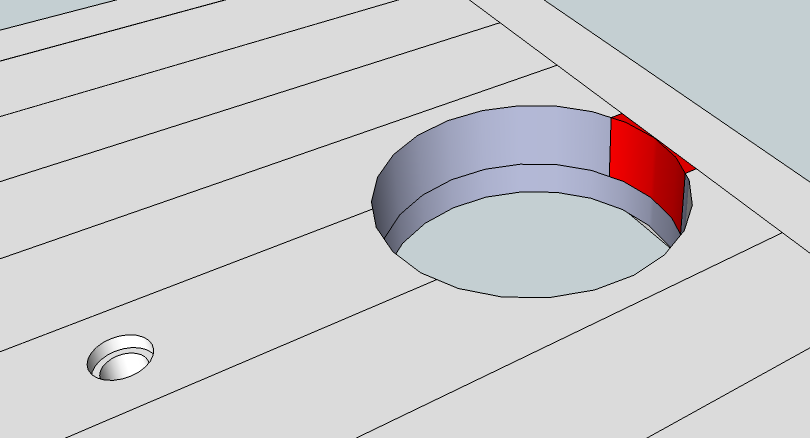
- Use the 3″ hole saw to cut a hole in the middle of both the plywood and polycarbonate — this fits the movement body and lets it recess into the clock
- Choose a middle stick and drill a 3/8″ hole for the movement shaft
- Glue the sticks down to the plywood with a single bead down the middle of each stick and compress together
Important: Put your center stick in the center and wait the entire cure time — only the glue holds the sticks to the plywood!
Use bar clamps to clamp the sticks between the plywood and polycarbonate. Don’t glue the polycarbonate — you’re just using it for uniform pressure.
Outer Frame
Cut the frame lengths close to size and slowly sand/shave off the necessary amounts to get it right. Add a bead of glue and clamp all 4 sides to the stick edges.
The undersized plywood matters here — it won’t interfere with the framing pieces. If the plywood were too large, the framing would sit awkwardly against it instead of the main sticks.
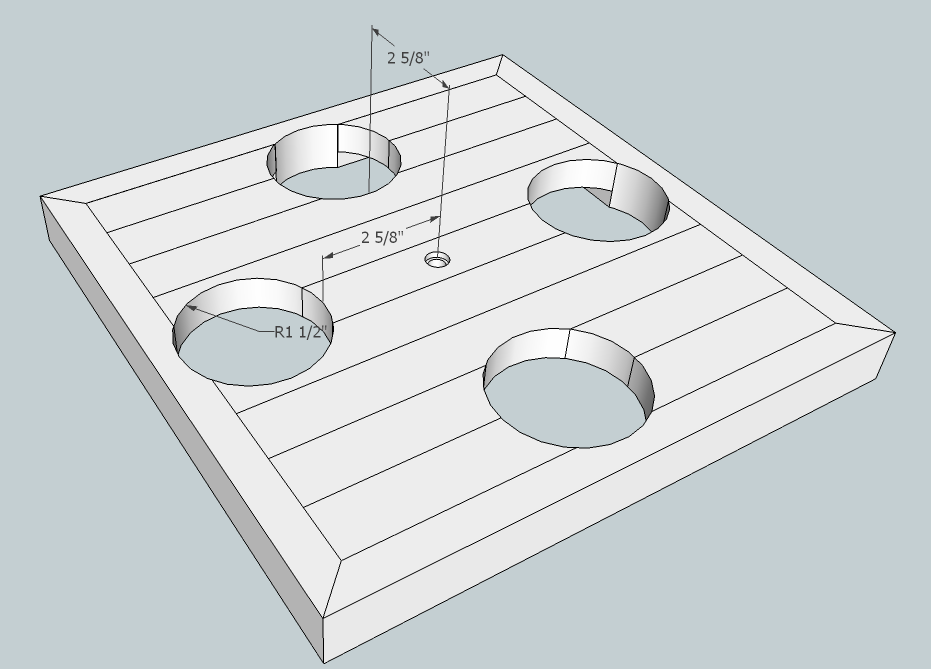
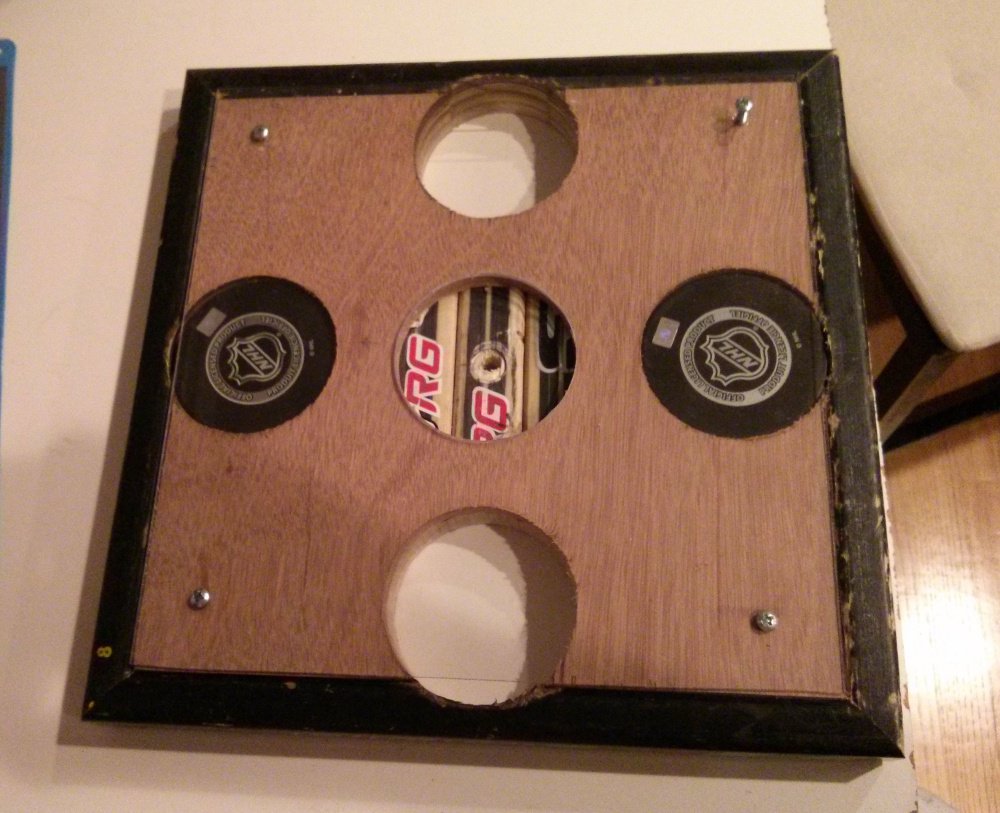
Puck Holes
We have to cut slightly into the edge pieces to avoid having tiny pieces of sticks left over.
- Drill 4 holes for each puck through the sticks and the plywood — do not drill through the polycarbonate (it serves as the back holding the pucks in)
- Go nice and slow when drilling — avoid delamination when the drill first engages the stick
- Clamp the relevant framing piece while drilling to ensure it doesn’t break off
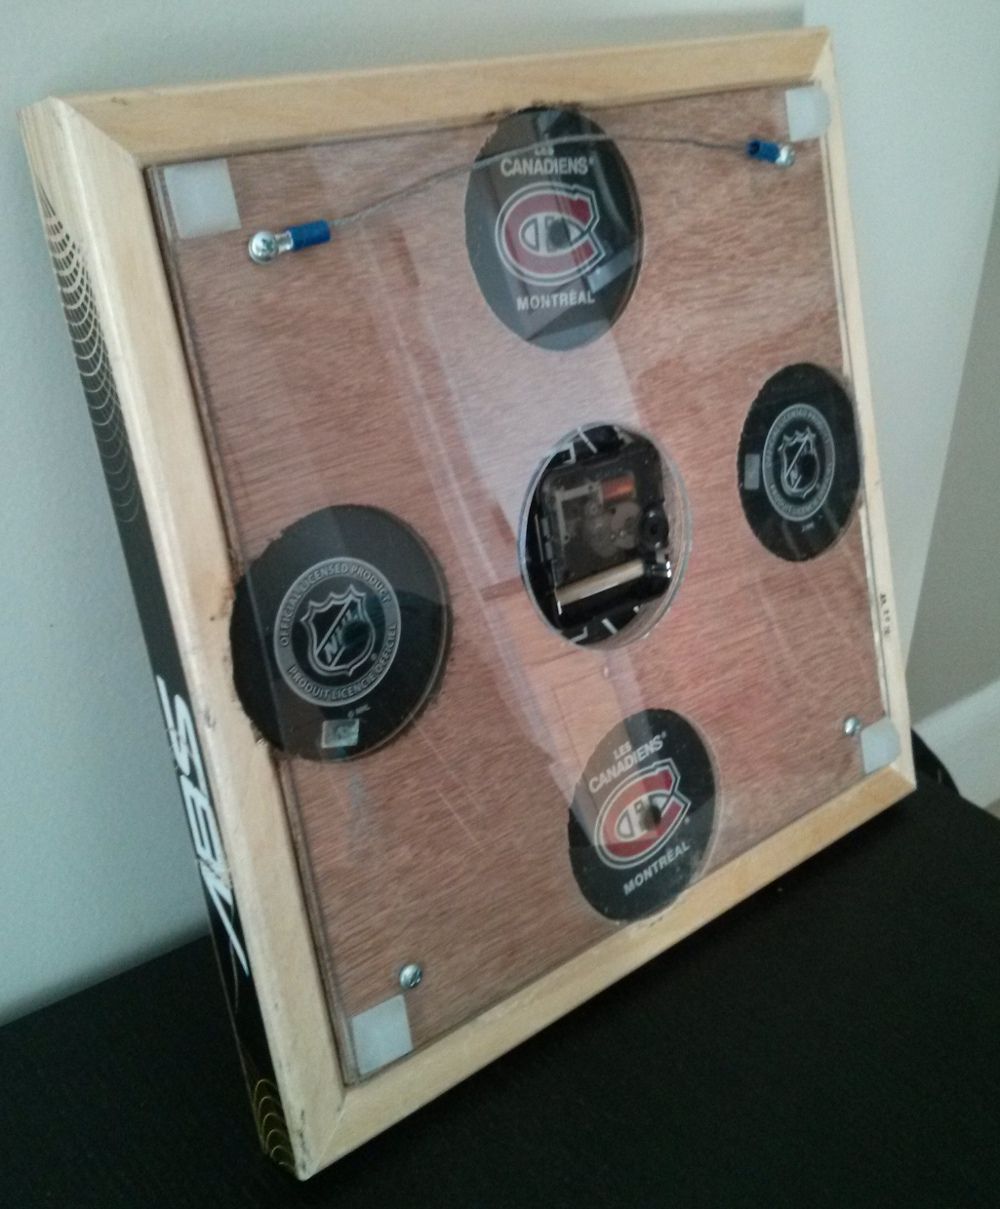
Finishing Details
- Attach the polycarbonate using machine screws about 1″ from all sides
- Crimp the picture frame wire to the ring terminals and attach using the polycarbonate screws, along with the rubber bumpers
- Optionally place small black bumpers on the polycarbonate behind the pucks to keep them flush with the front
Now you’ve got some great completed clocks!
For a full 3D model, visit the Models page.
Gallery (21 photos)
Related Projects
Hockey Puck Wall Clock
A wall-mounted clock made from hockey pucks with stick frame. Features a three-puck design with routed center for the clock movement.
Hockey Stick Desk Clock
A compact desk clock using a single hockey stick and a hockey puck with clock movement. Great beginner project for clock-making.
Stick Wall Clock
A classic wall clock built from hockey sticks with a framed face. Probably the easiest item to build — great for a first small project.