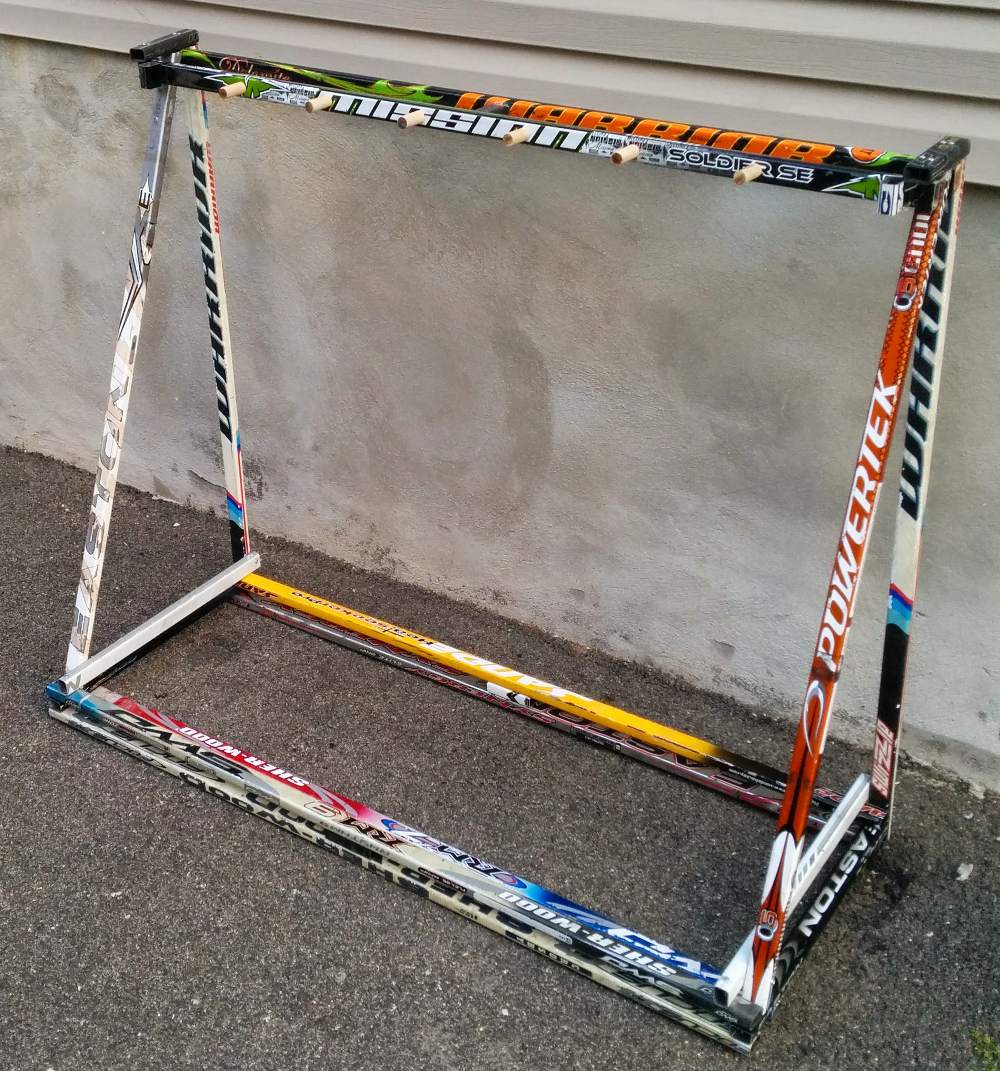
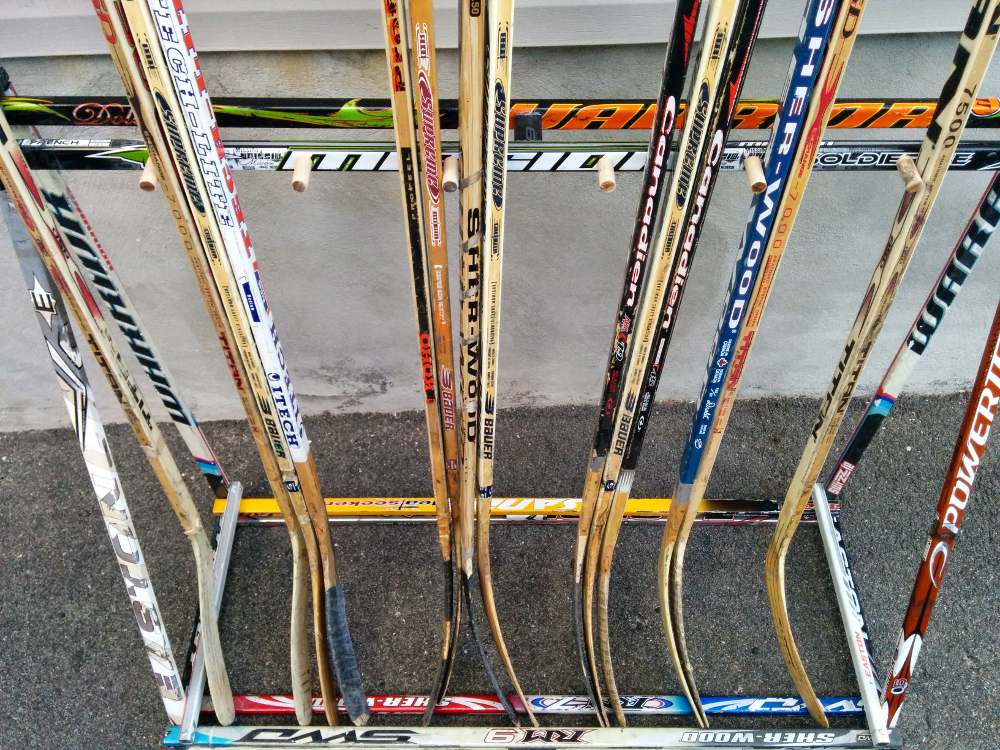
Hockey Stick Rack
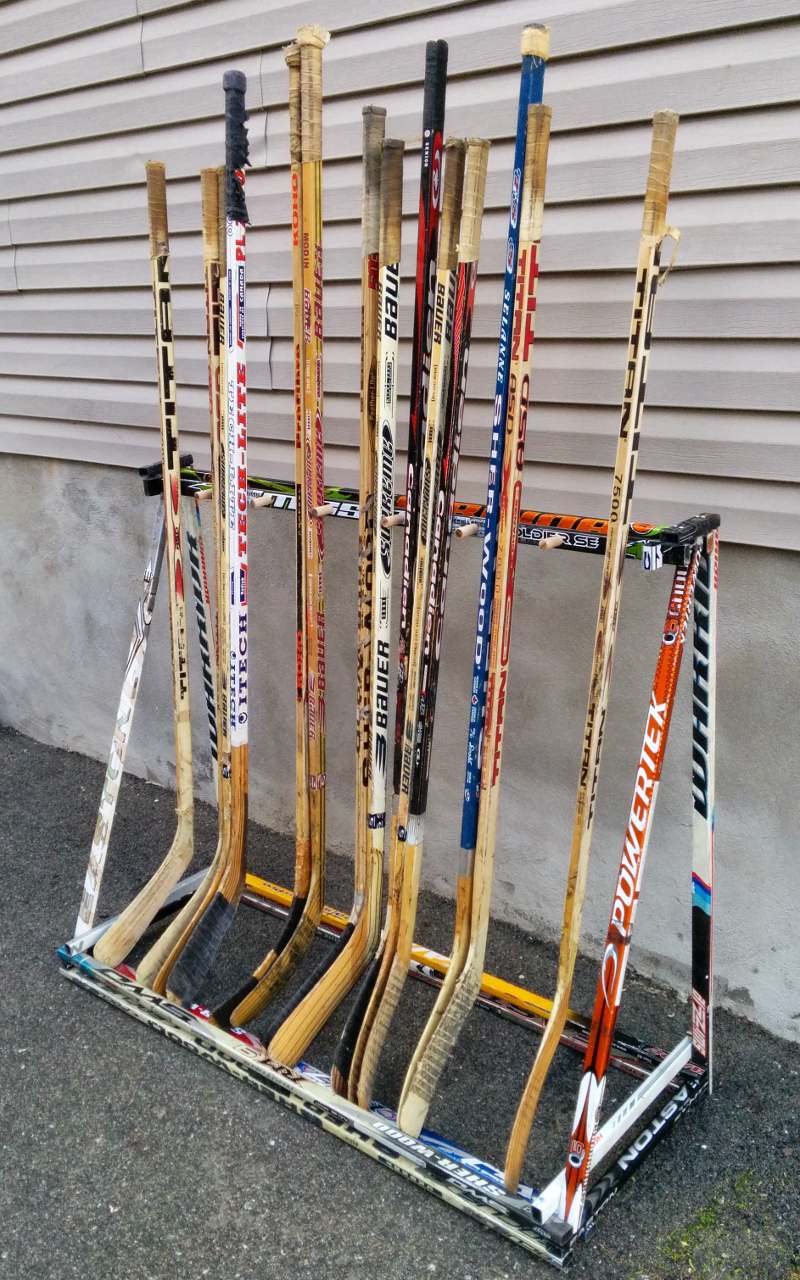
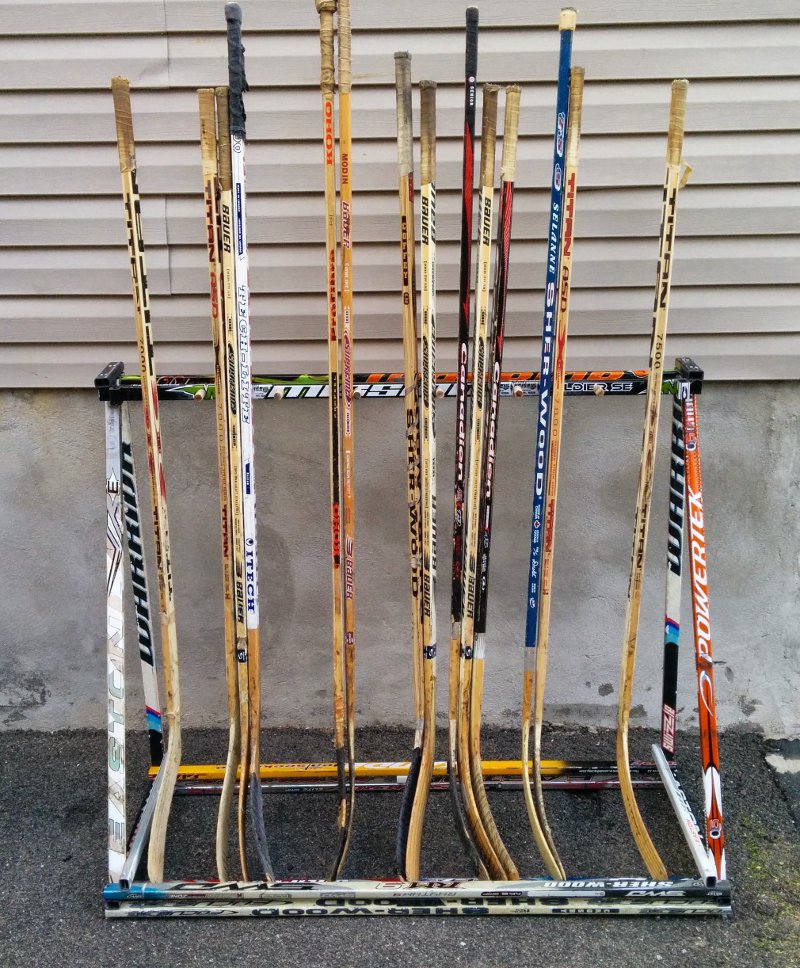
A display rack for storing and showcasing hockey sticks. Built from 15 sticks with angled supports, dowel dividers, and a sturdy base.
Before you start: Read the Building Guide for essential safety and technique information.
The hockey stick rack is not difficult to build. It only involves making some careful measurements and trusting the design.
Design Breakdown
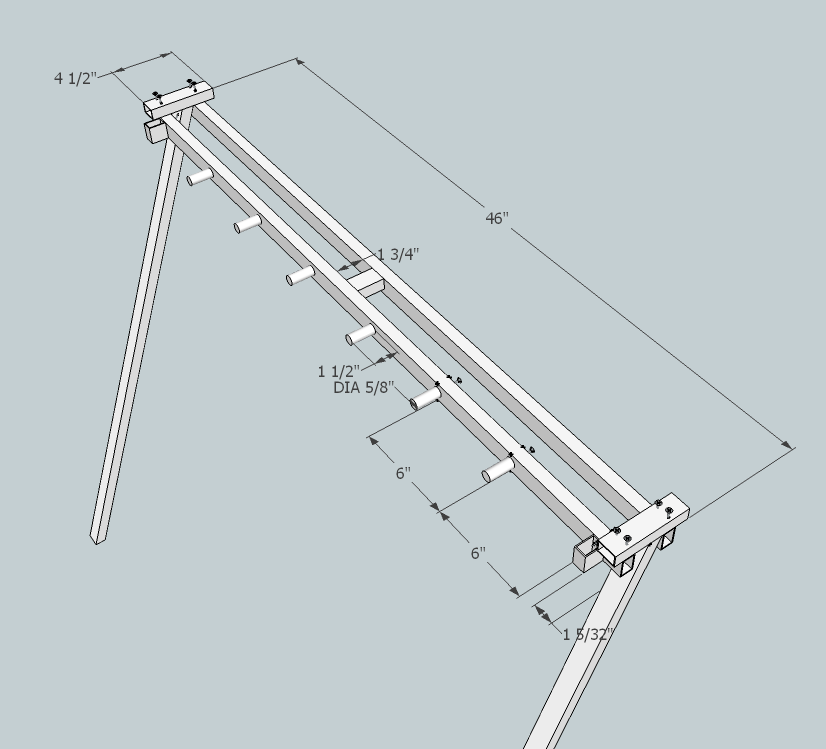
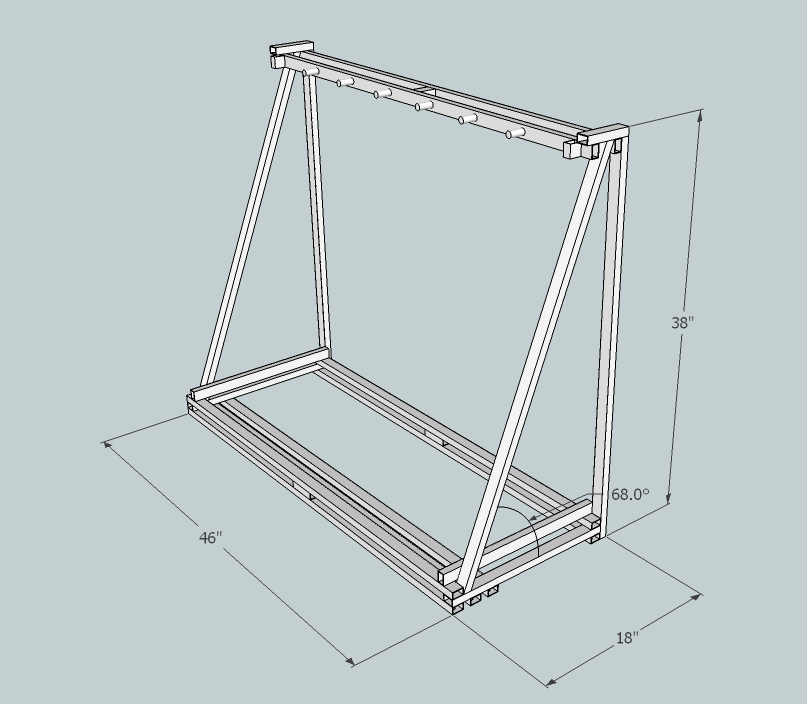
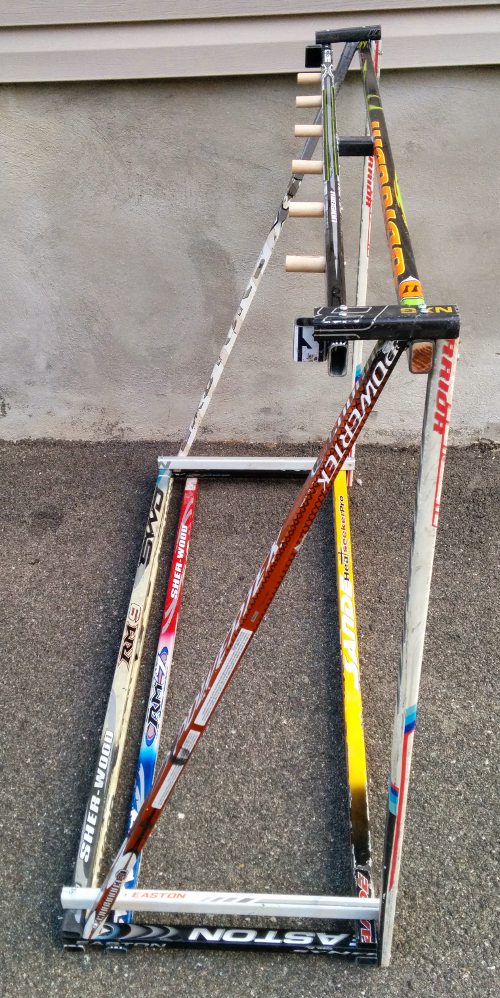
- Base — 46″ platform with clearance holes
- Vertical Supports — two uprights connecting base to top
- Rack Top — angled cross beams with dowel dividers
- Finishing Pieces — support cross-pieces in the base
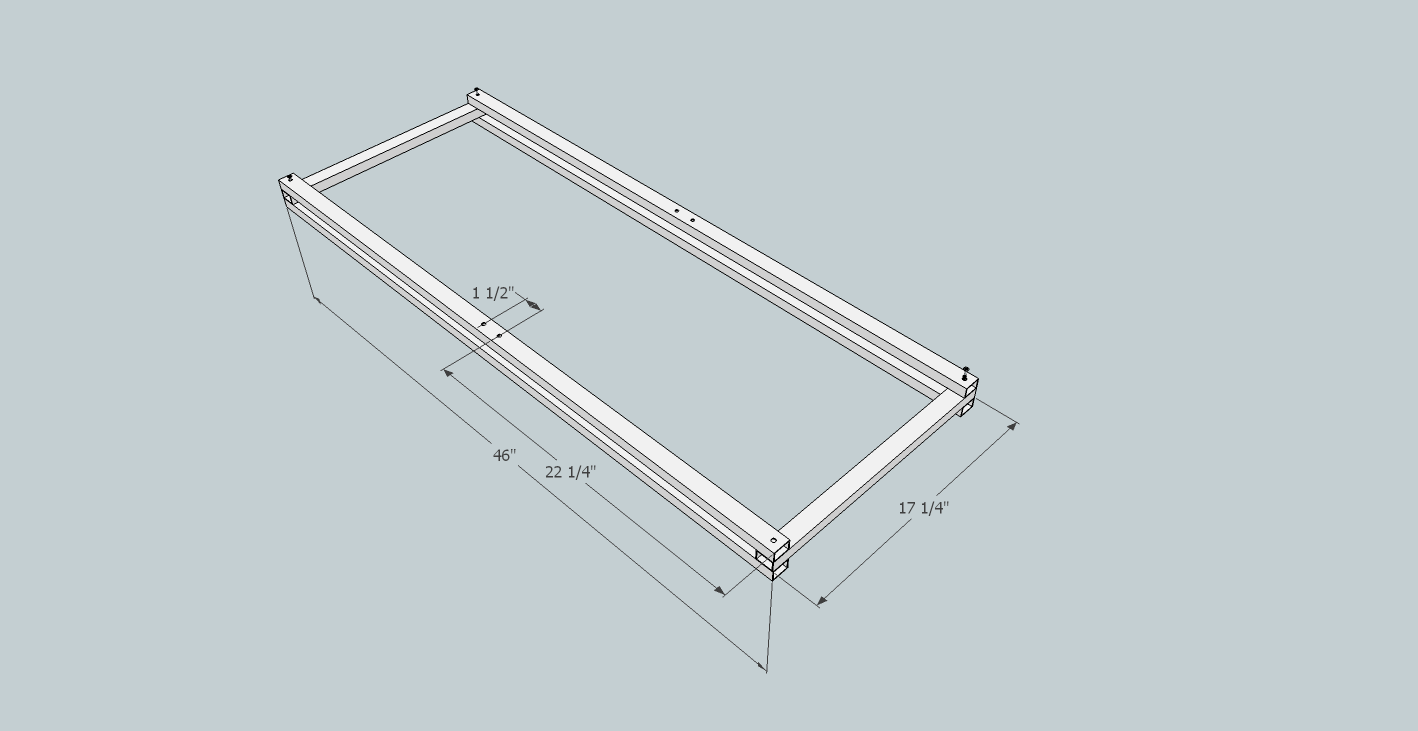
Base
The base shown here is 46″ in length — right around the sweet spot for guaranteed good-length sticks.
- Cut 4 sticks to 46″ and 2 to 17.25″
- For the two bottom 46″ sticks, drill a 17/64″ hole through one side only — positioned 9/16″ from the outer corner at each end and at specified middle locations. These clearance holes prevent screw heads from lifting the rack off the surface
- Drill #6, 1.25″ sheet metal screws into the four corners through the three base sticks
- Don’t touch the 4 holes in the middle — we’ll use them for support pieces later
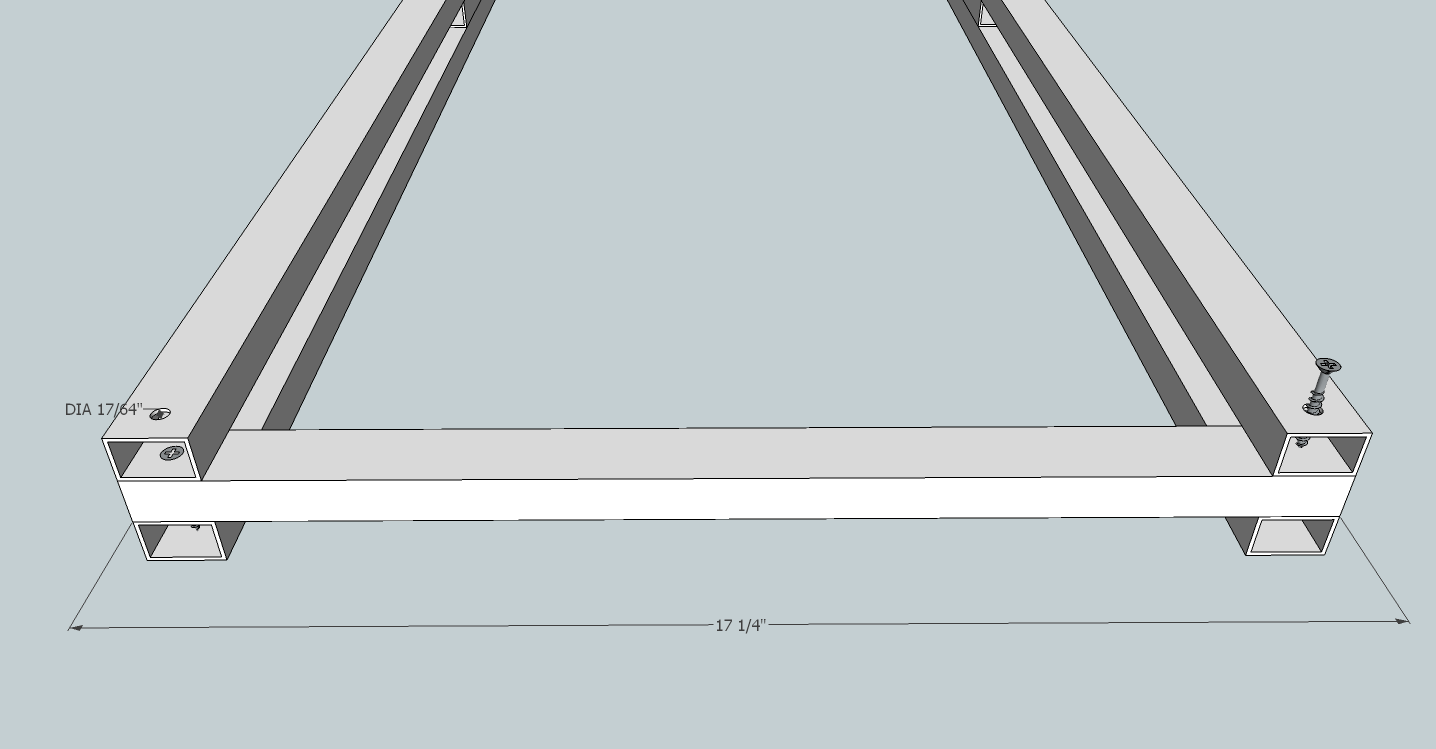
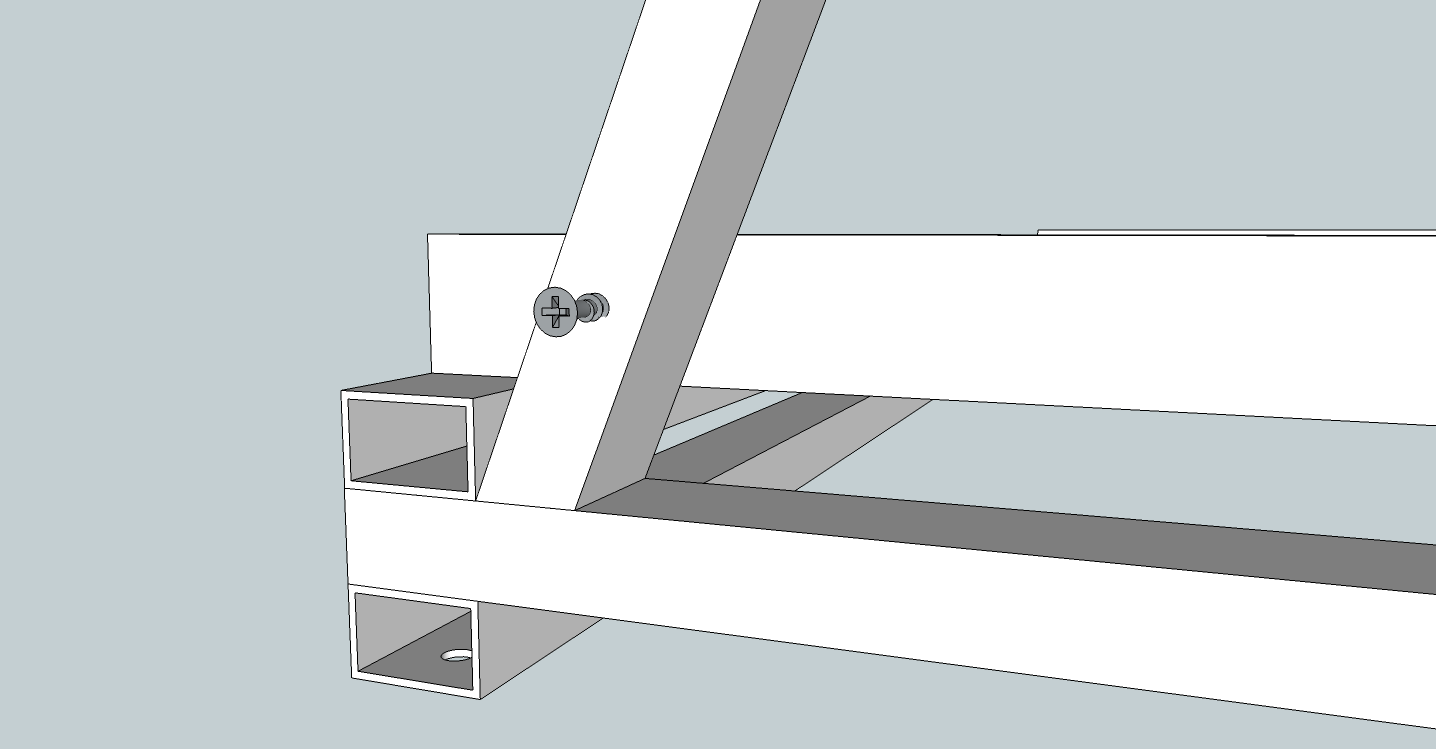
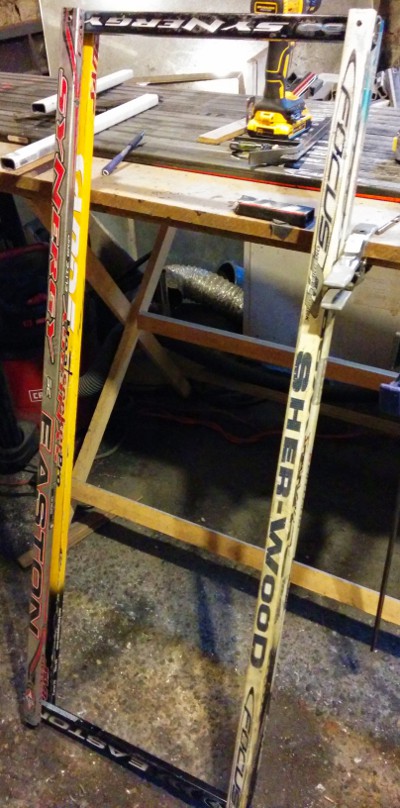
Vertical Supports
Cut two additional lengths: 37.25″ and 18″.
- Attach each 37.25″ stick vertically using four #6, 1.25″ sheet metal screws into the two base pieces
- Ensure the sticks are orthogonal to the base or there will be a lot of twisting in the overall frame
- Attach the 18″ stick with one #6, 1.25″ screw to the vertical support and one #6, 1.5″ screw directly into the base
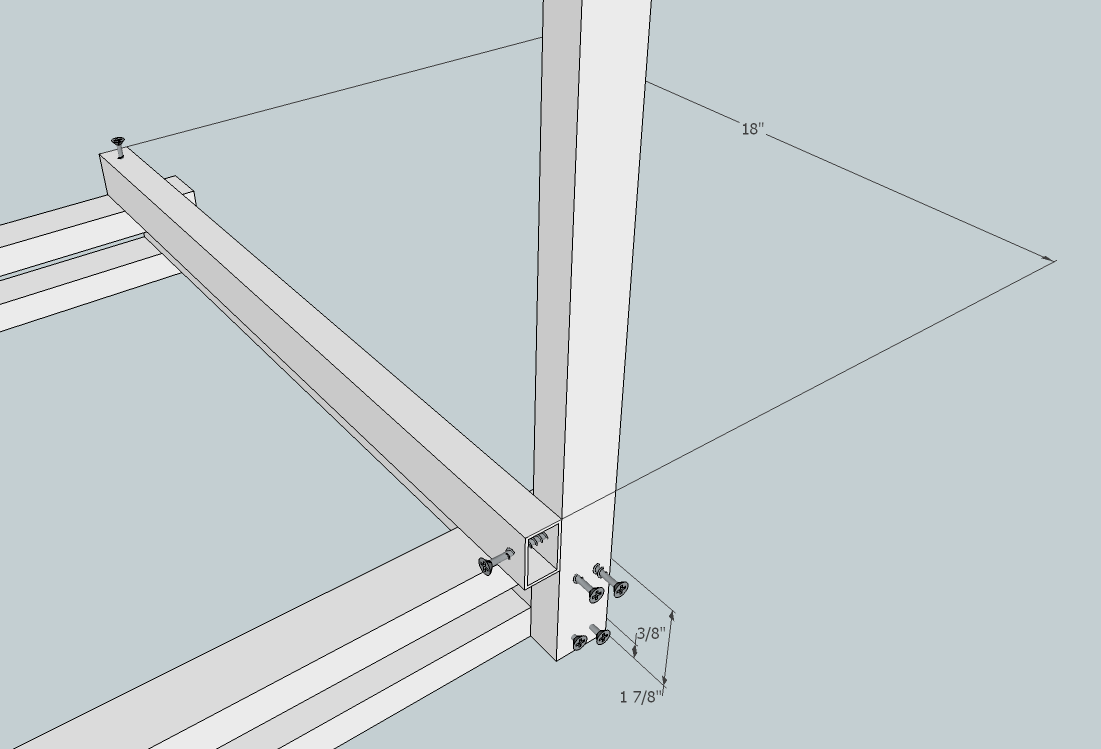
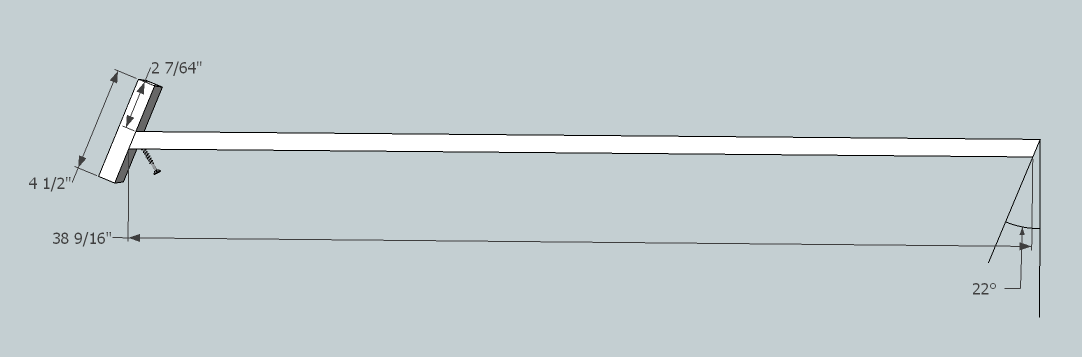
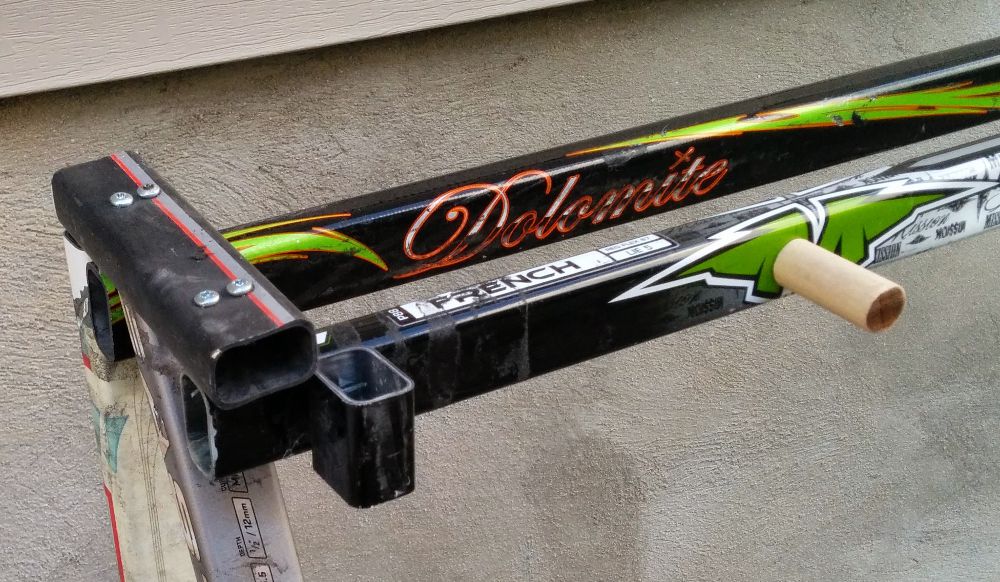
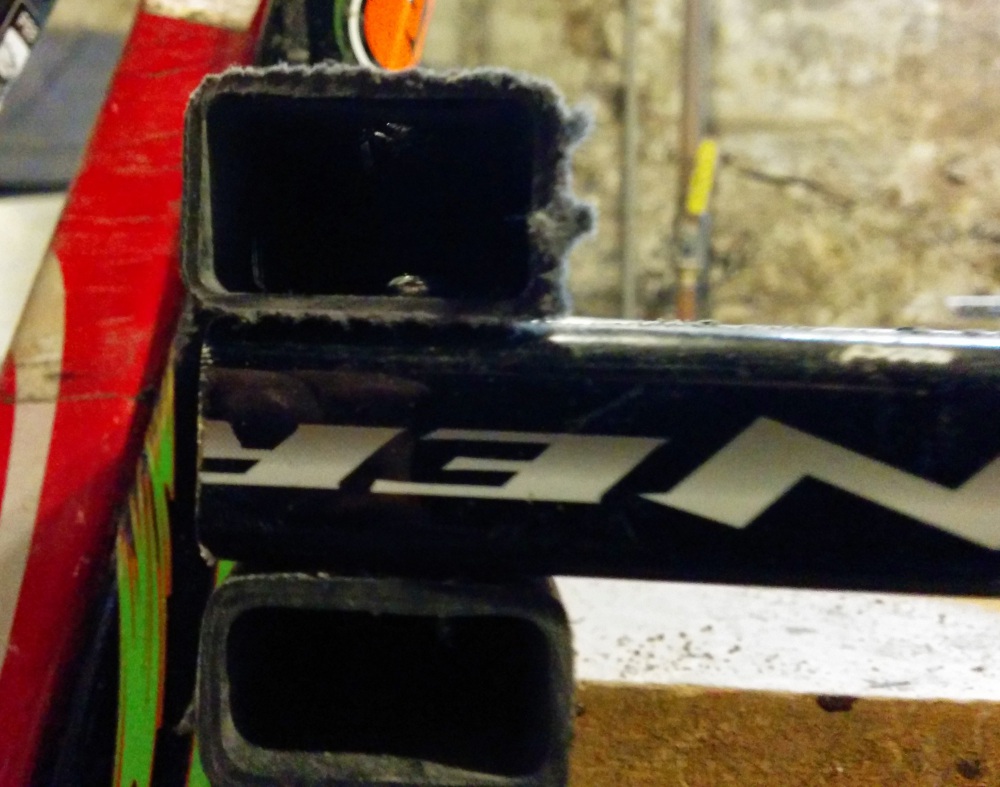
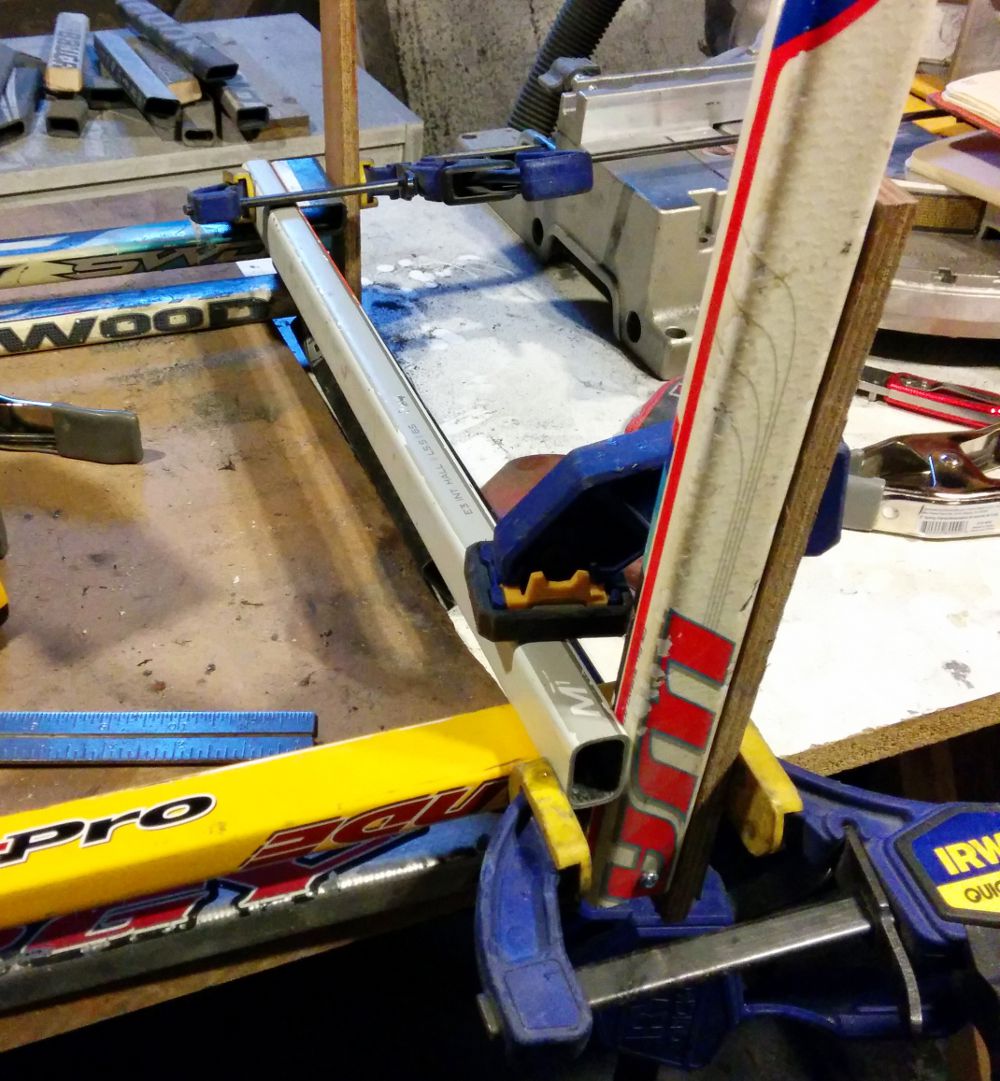
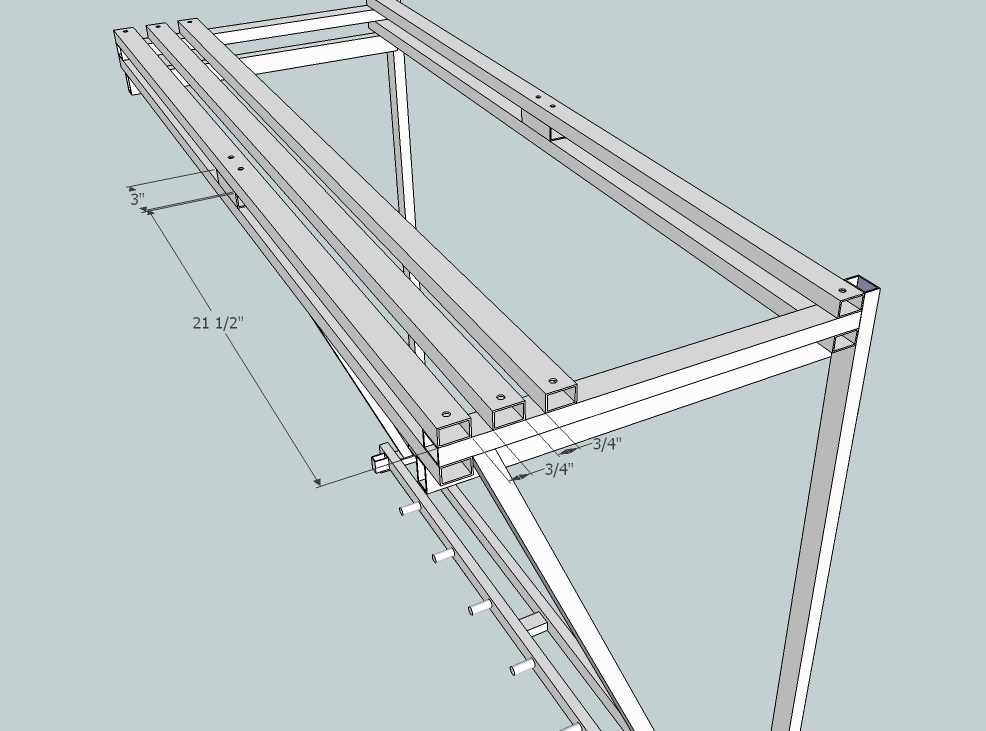
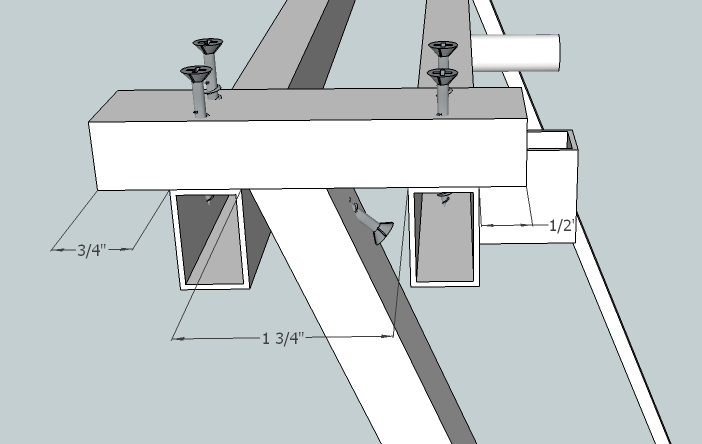
Rack Top
- Cut one piece to 4.5″ length
- Cut another stick with 22° bevels on both sides — 38 9/16″ on each side (note: the overall length is not 38 9/16″; rather, each side is that specific length)
- Attach by offsetting the beveled stick 2 7/64″ from the front with a #6, 1.25″ screw at an angle
- Cut six 1.5″ lengths of dowel rod to serve as stick dividers
- Cut two 1 3/16″ stick pieces as end stops — attach with two screws each to prevent rotation
- Attach dowel rod pieces by drilling a small hole in the back, fixing to the cross beam from behind with a #6, 1.25″ screw
- Space dowel rods 6″ from the small stick pieces and 6″ apart; center each vertically
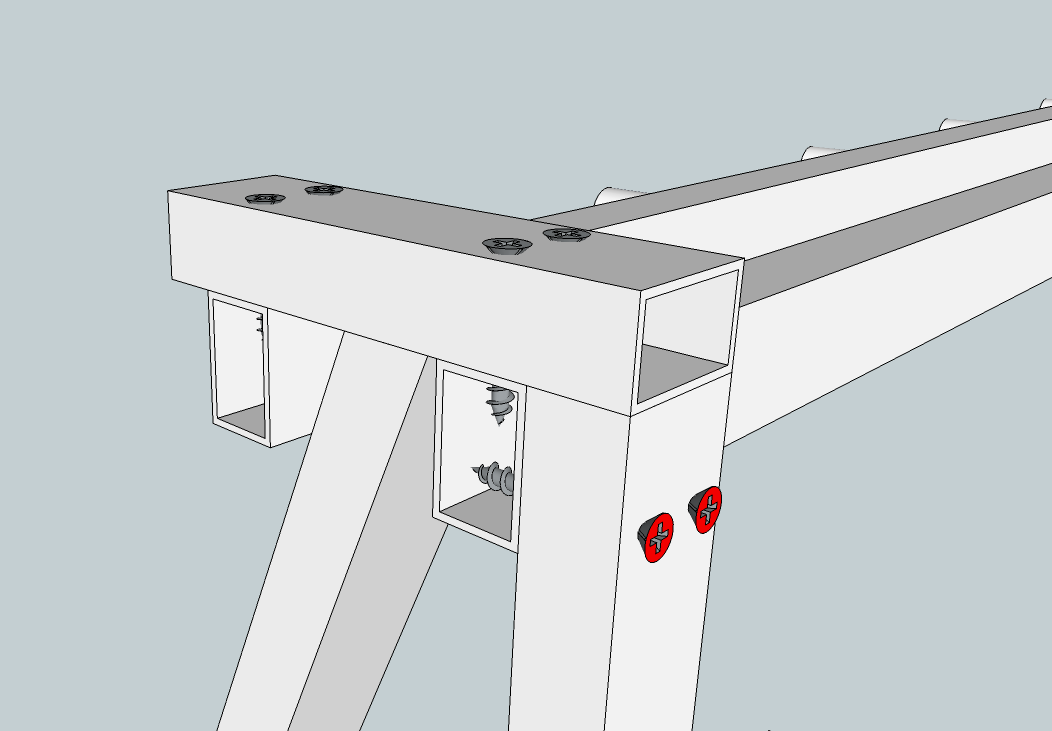
Attach the top assembly to vertical sticks and base. The vertical sticks fit behind side pieces with two #6, 1.25″ screws on each side. Attach angle pieces to base using a single #6, 1.5″ screw into the side — this adds a lot of rigidity to the entire rack.
Finishing Pieces
Take two 3″ lengths of stick and insert them between the two longer sticks in the rack front and back. You’ve already drilled the screw head clearance holes earlier, so just center them and screw them in with two #6, 1.25″ sheet metal screws each.
Also glue a 1.75″ support piece into the midsection (23″ from the edge) between the two cross pieces. Not necessary, but highly recommended for additional support.
Once the glue dries, you’re all done!
For a full 3D model, visit the Models page.
Gallery (20 photos)
Related Projects
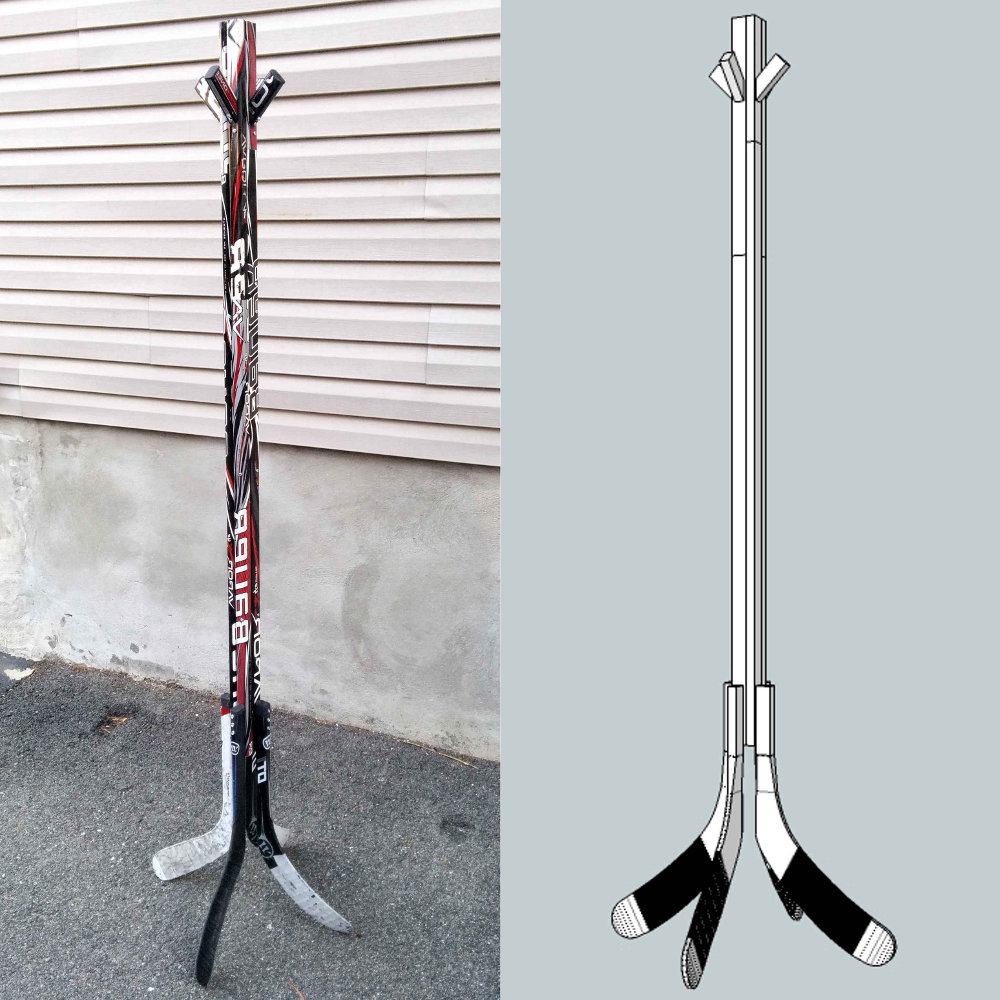
Hockey Stick Coat Rack
A standing coat rack built from 6-7 hockey sticks with blade feet and hanging posts. Great for entryways and mudrooms.
 Preview
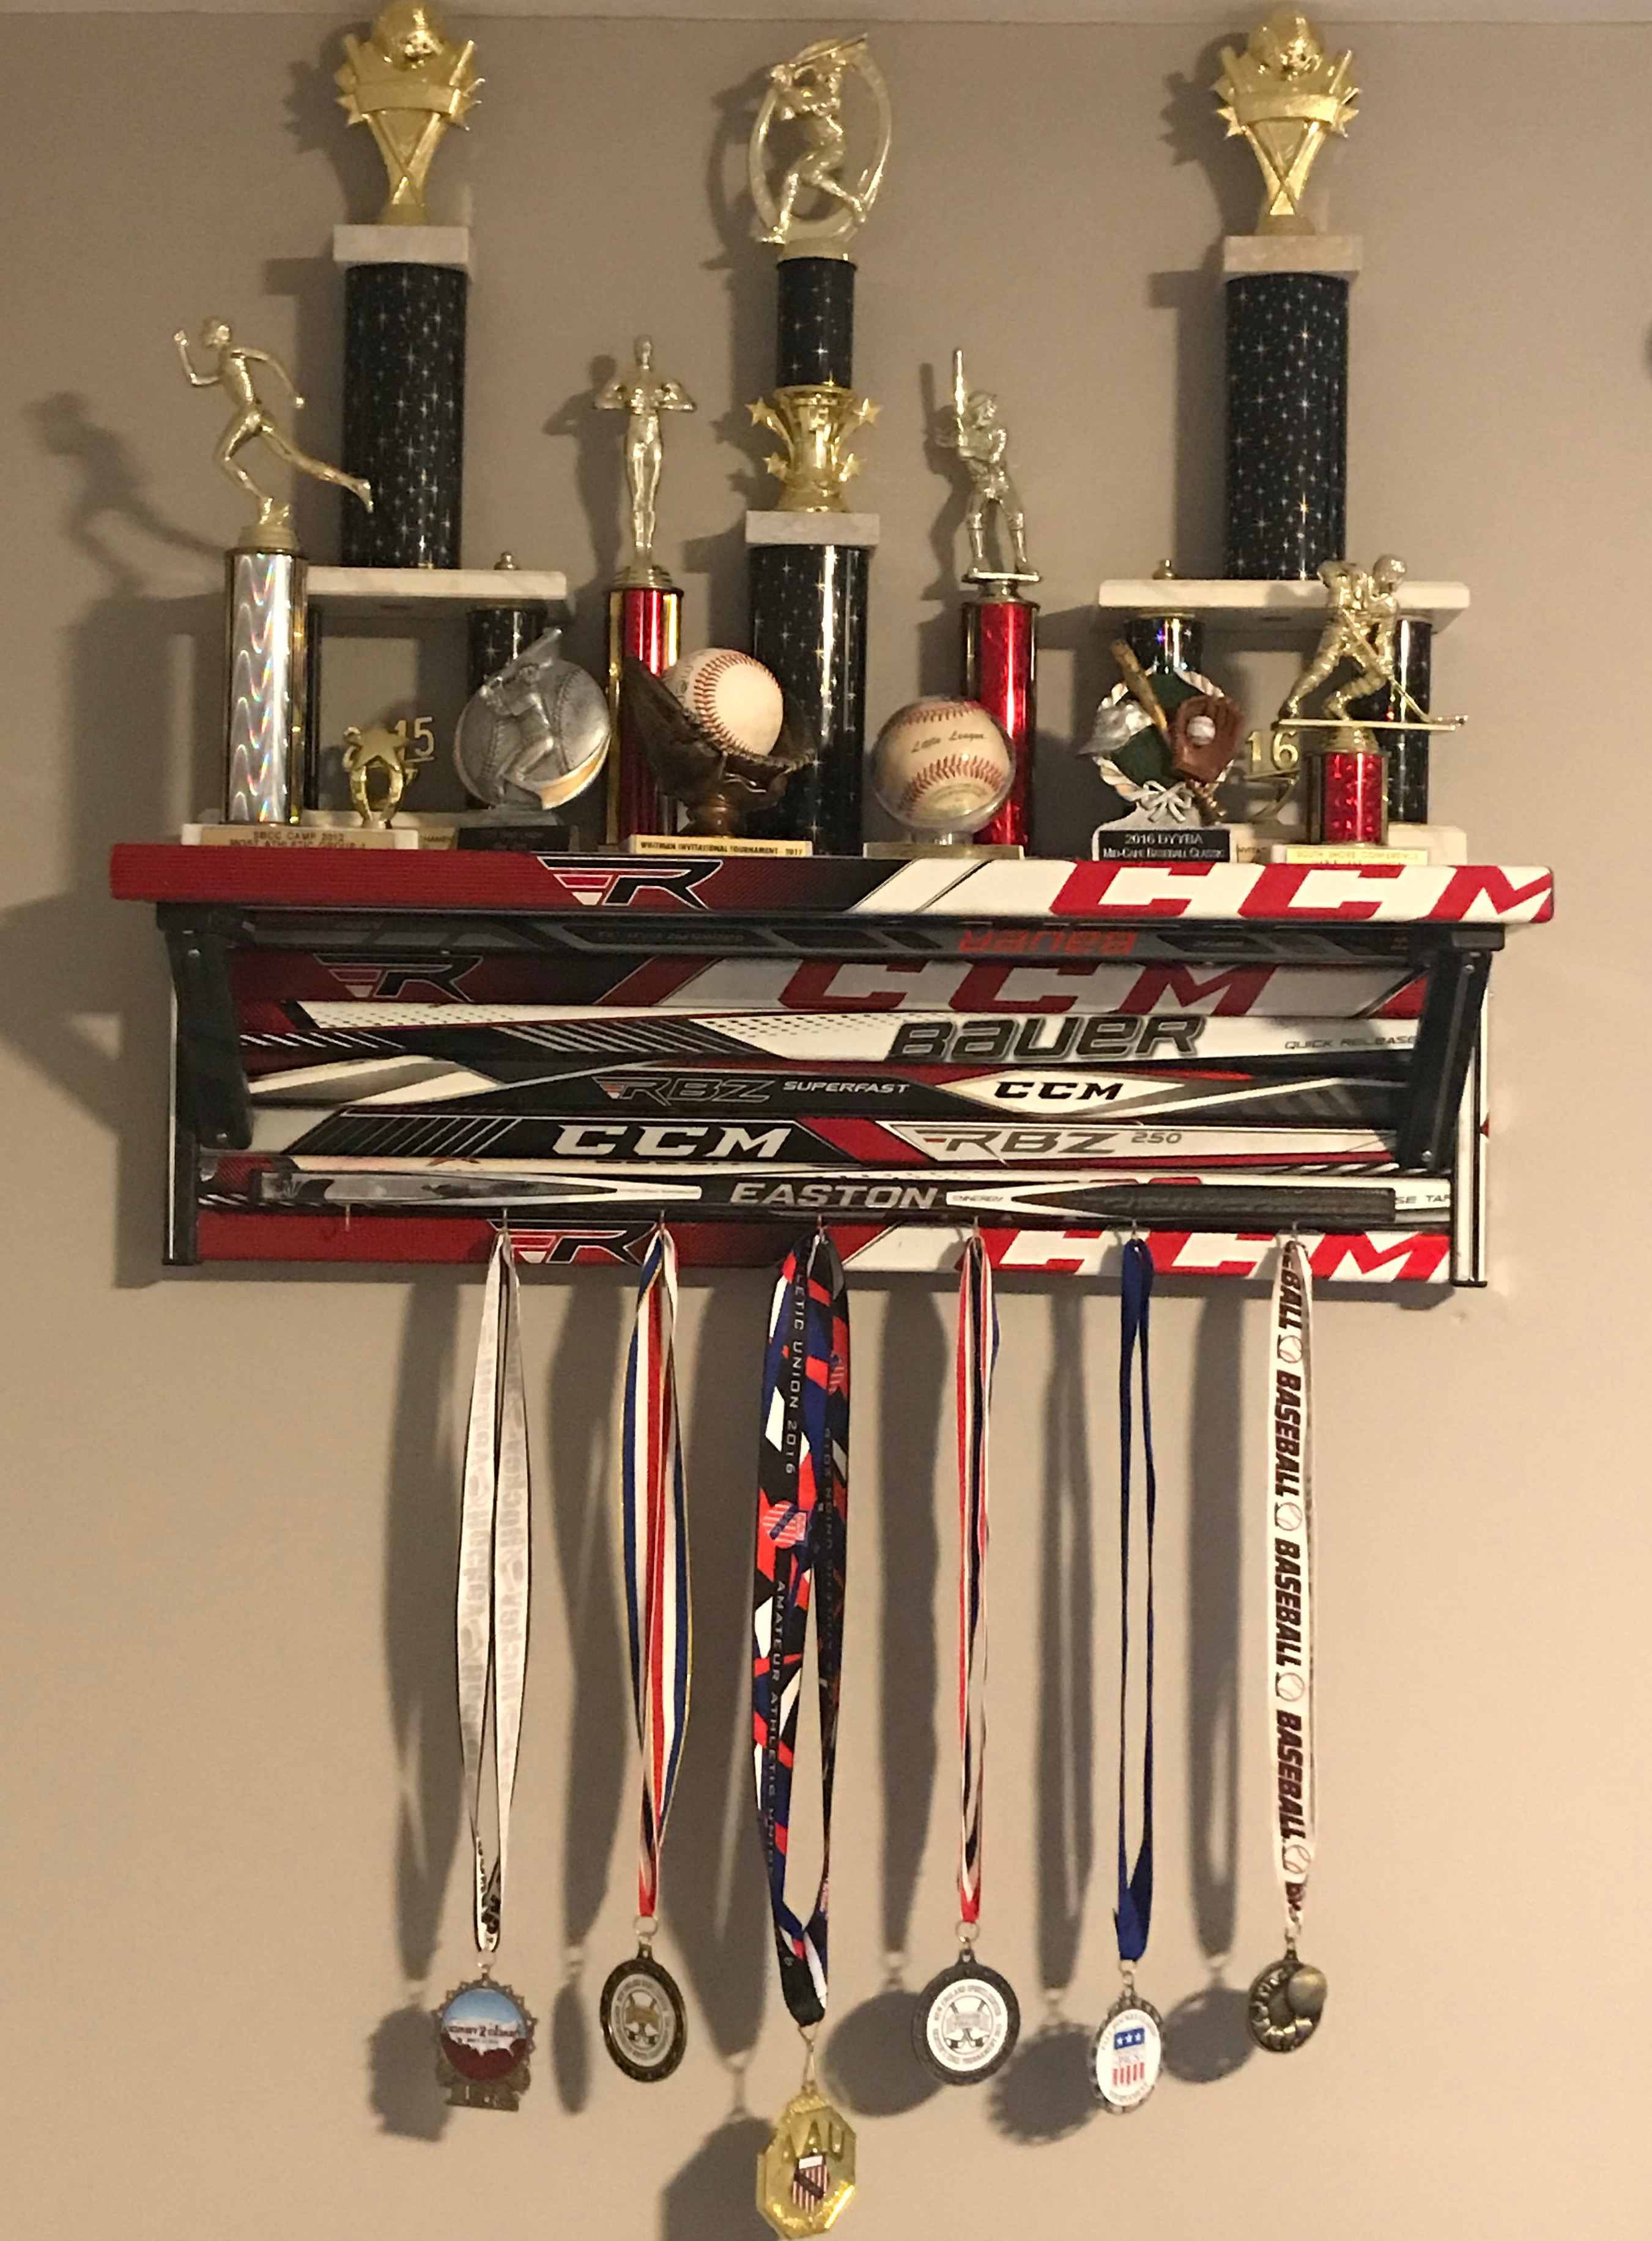
 Hockey Stick Shelf
A wall-mounted shelf built from hockey sticks. Great for displaying trophies, photos, and hockey memorabilia.
 Preview
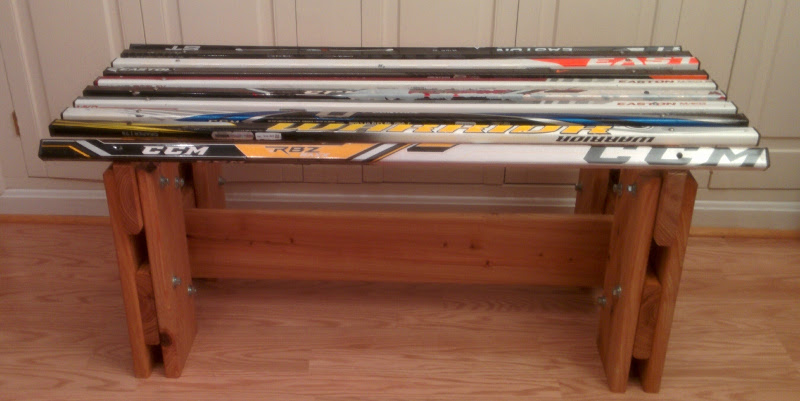
 Outdoor Bench
A hockey stick bench designed for outdoor use. Weather-resistant construction for patios and rinks.