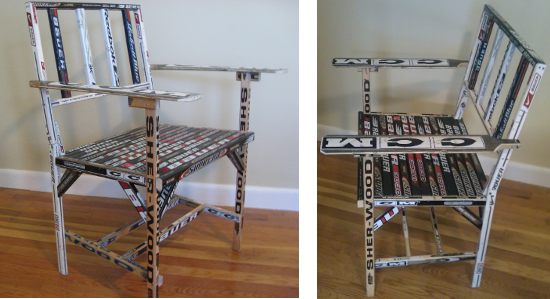
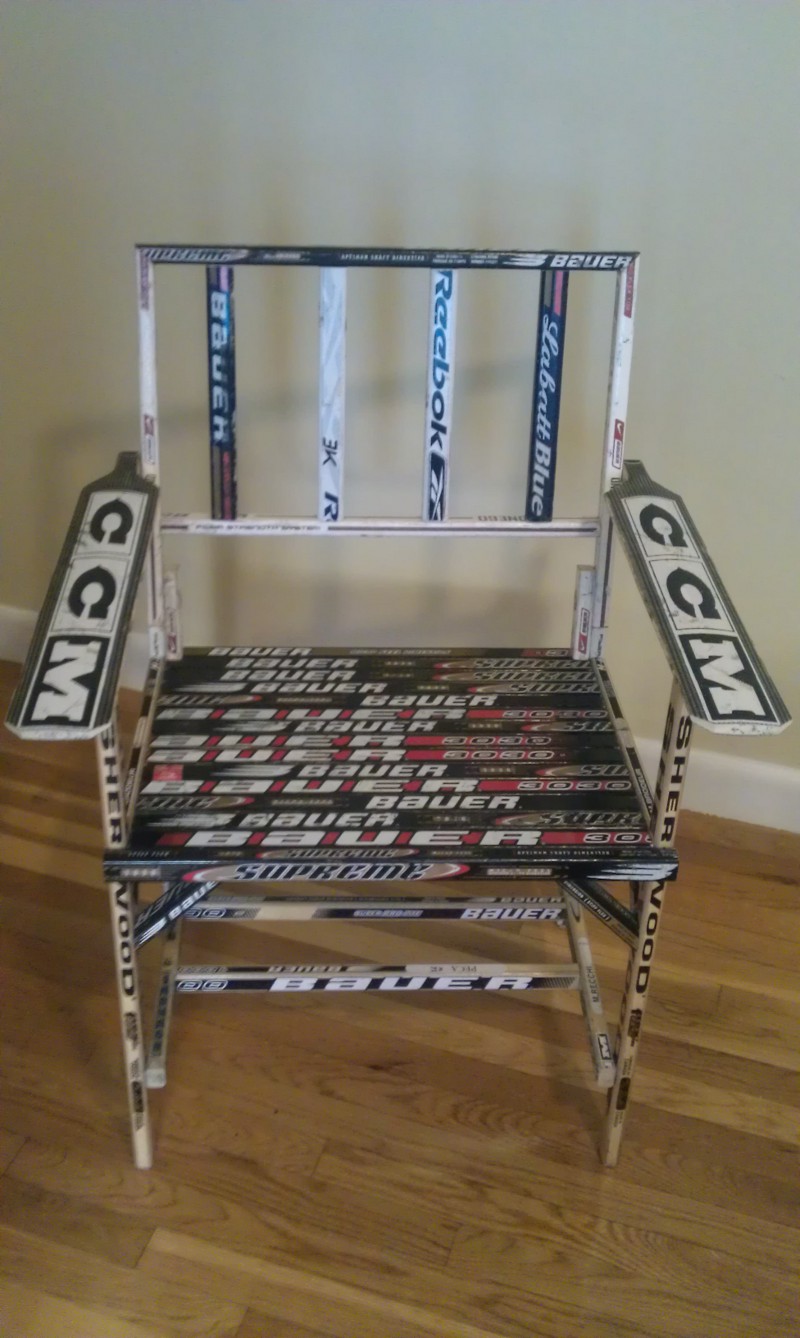
Hockey Stick Chair
The most complex hockey stick build — a full chair with angled back, armrests, and supports. Requires ~20 sticks and precise angle cuts.
Before you start: Read the Building Guide for essential safety and technique information.
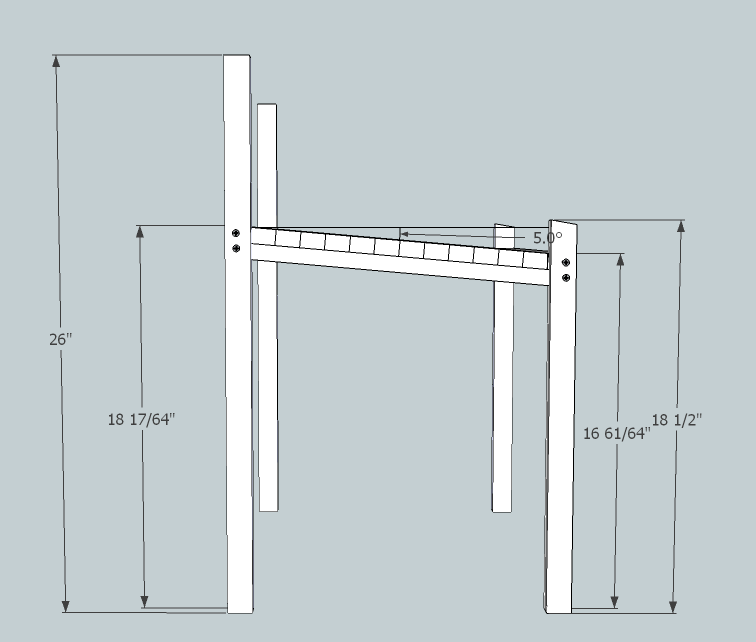
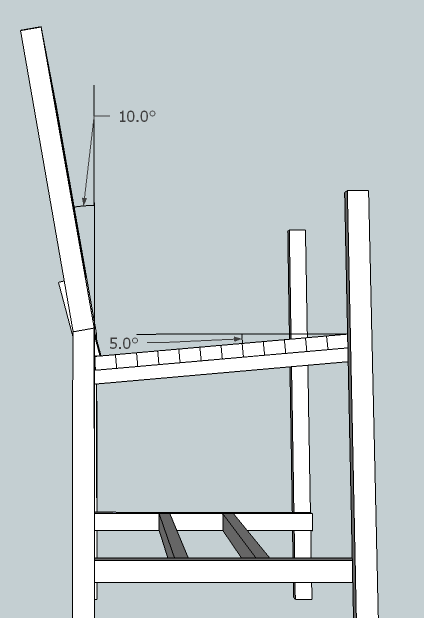
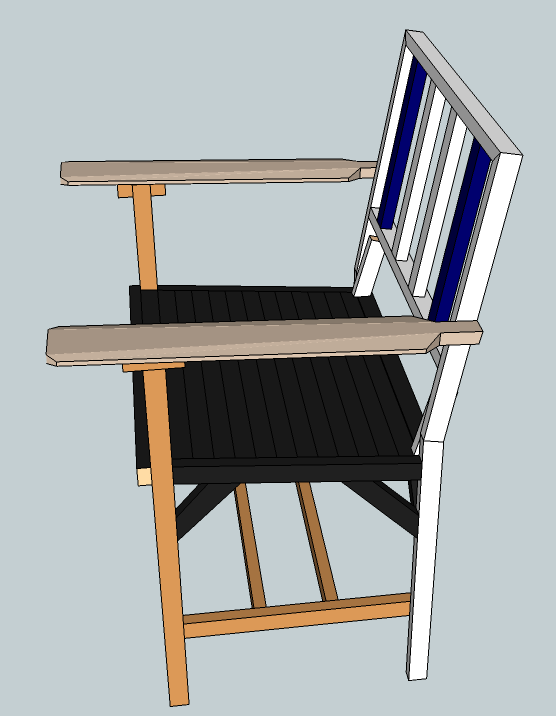
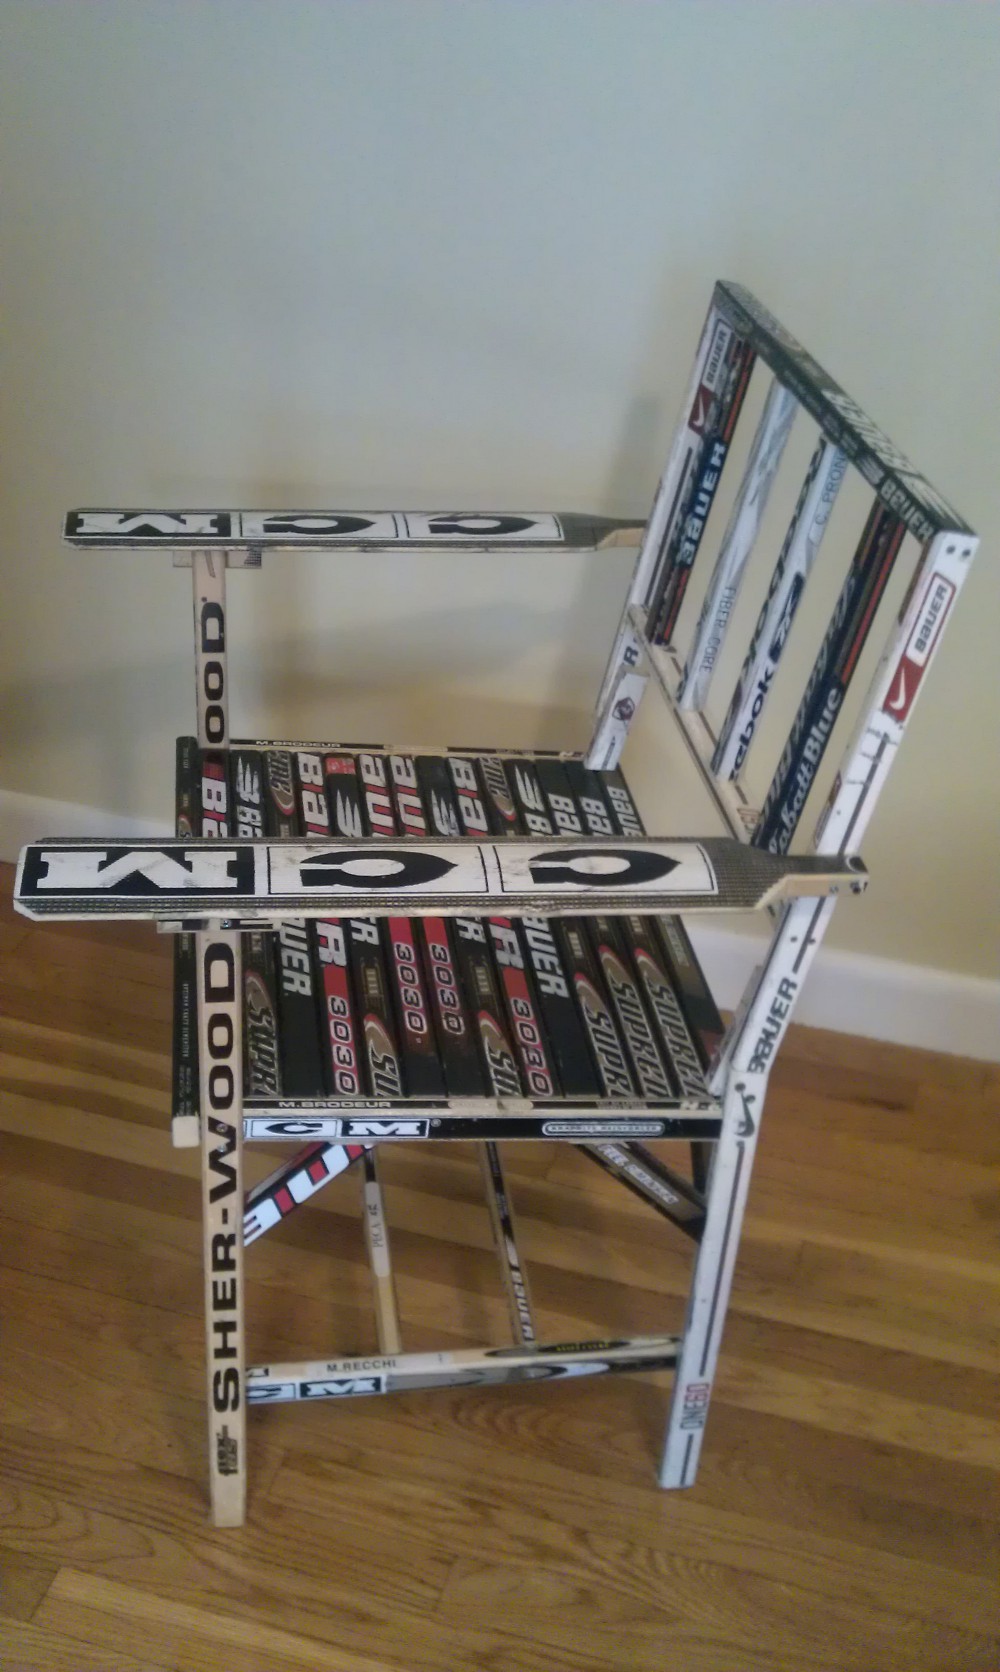
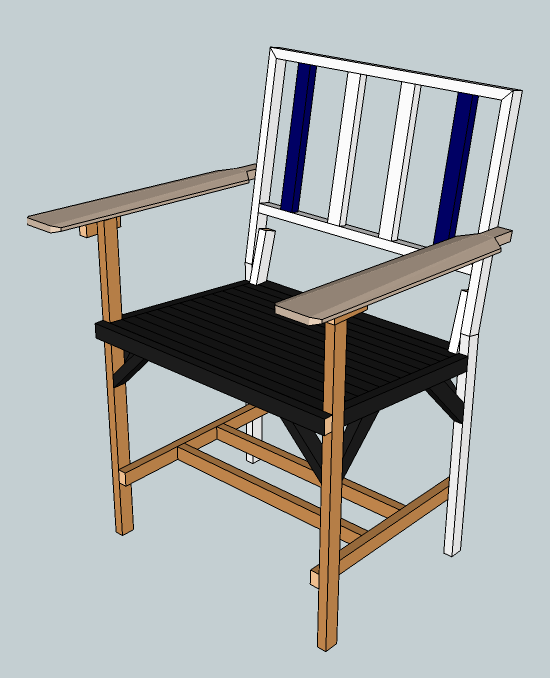
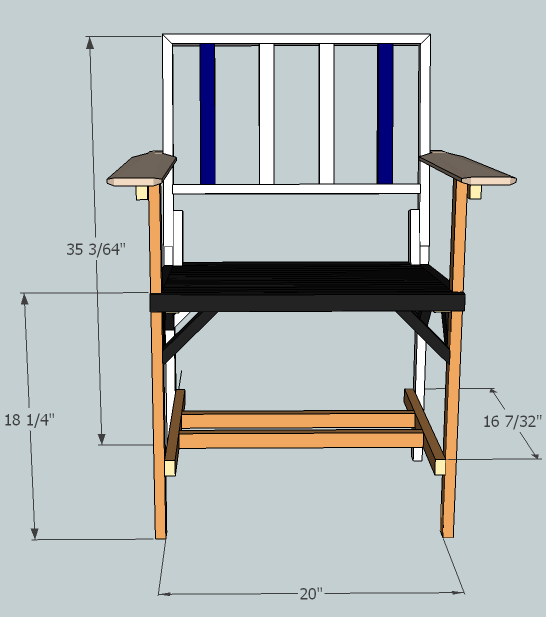
The first thing to note is that the seat and back are not at 90° to each other, the ground, or the vertical. The seat declines 5° from horizontal and the back 10° from vertical, creating a comfortable 95° seat-to-back angle.
Design Breakdown
- Seat — flat surface declining 5° from horizontal
- Legs — calculated height accounting for seat angle
- Bottom Support — rigidity between legs
- Back — separate build, angled 10° from vertical
- Arm Rests — goalie sticks providing comfort and counter-torque
- Seat Supports — two rounds of support pieces
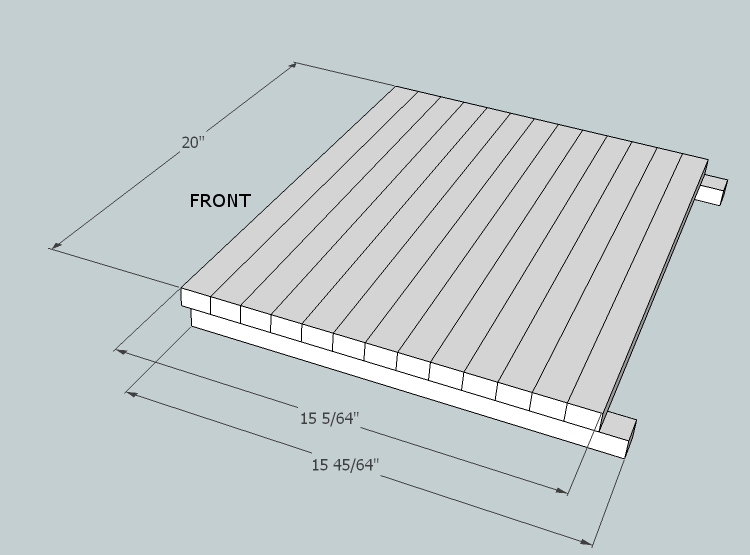
1. Seat
The seat follows the formulas for making nice flat surfaces as covered in Building Guide. Specifications: 20″ width, approximately 14.5 sticks deep (roughly 17″ depth). Attach the first 13 sticks using the mitre saw and template method.
2. Legs
Since the seat needs to decline 5°, the back seat must come down about 1.315″ (calculated as 15.078″ × sin 5°). Arm rests position at 26″ high.
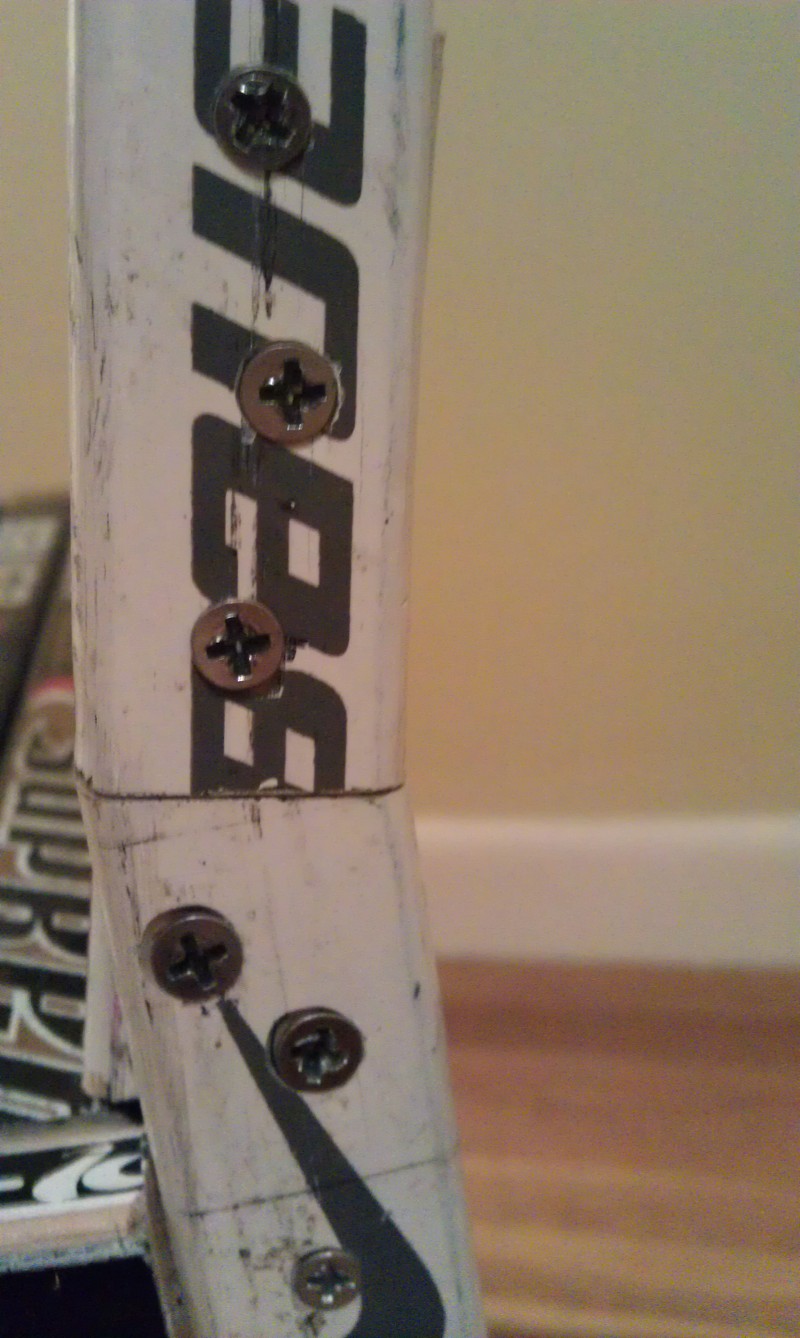
The 14th stick is critical — make sure it is level with the horizontal when attached. Screw in two #6, 1.25″ from the side, then screw the 14th stick to the attachment piece from the bottom with a #4, 1.25″, avoiding the #6.
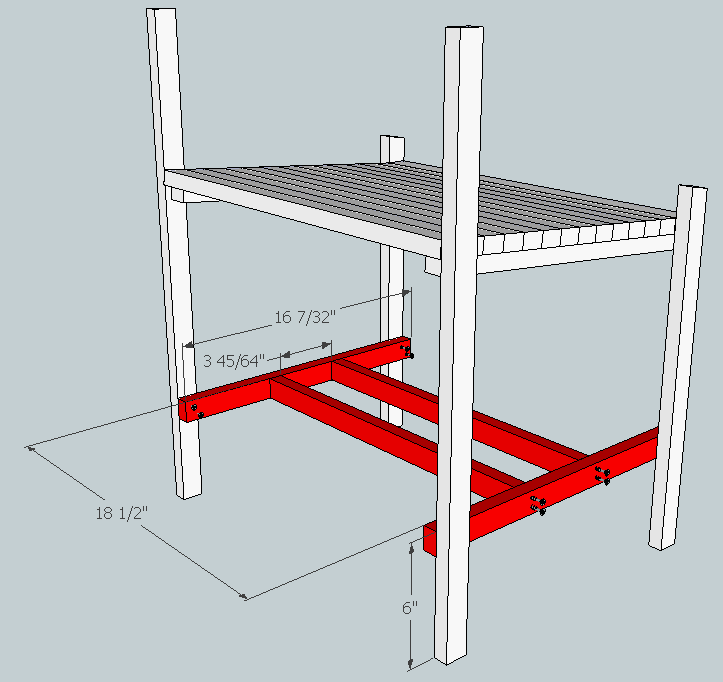
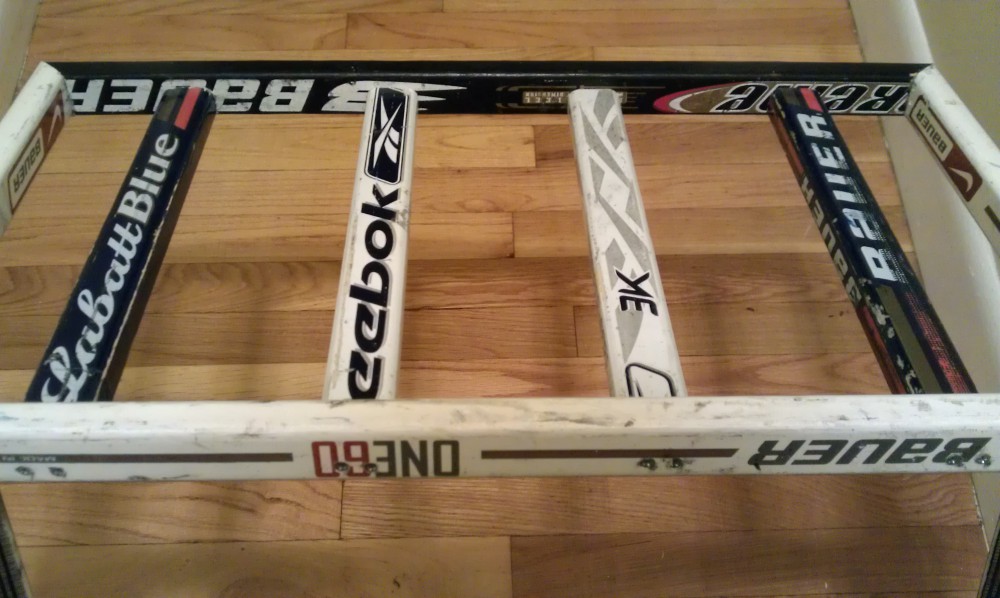
3. Bottom Support
Connect a bottom support to add rigidity to the legs. You need a double screw in each leg to keep the sticks from turning in place or the whole thing from racking. Use #4 if you’re uncomfortable squeezing stuff in, or #6 if you’re comfortable.
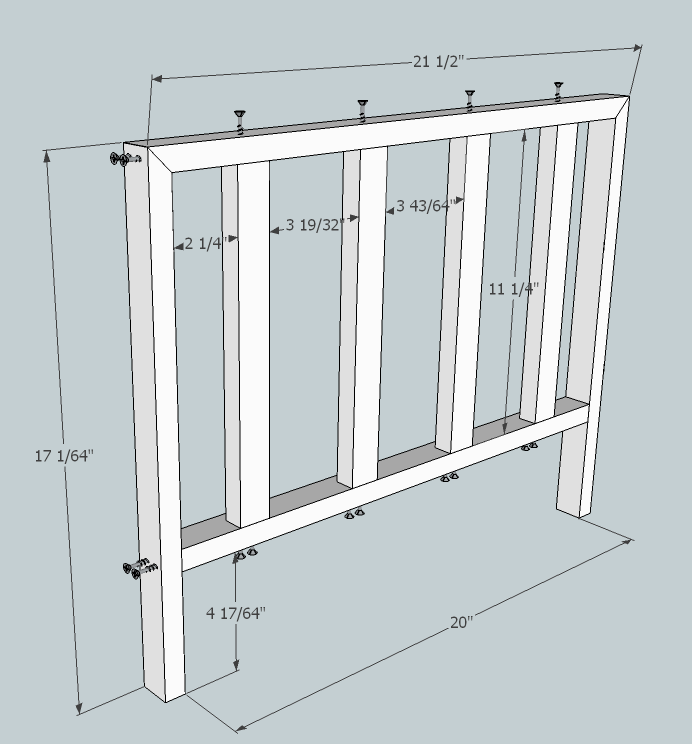
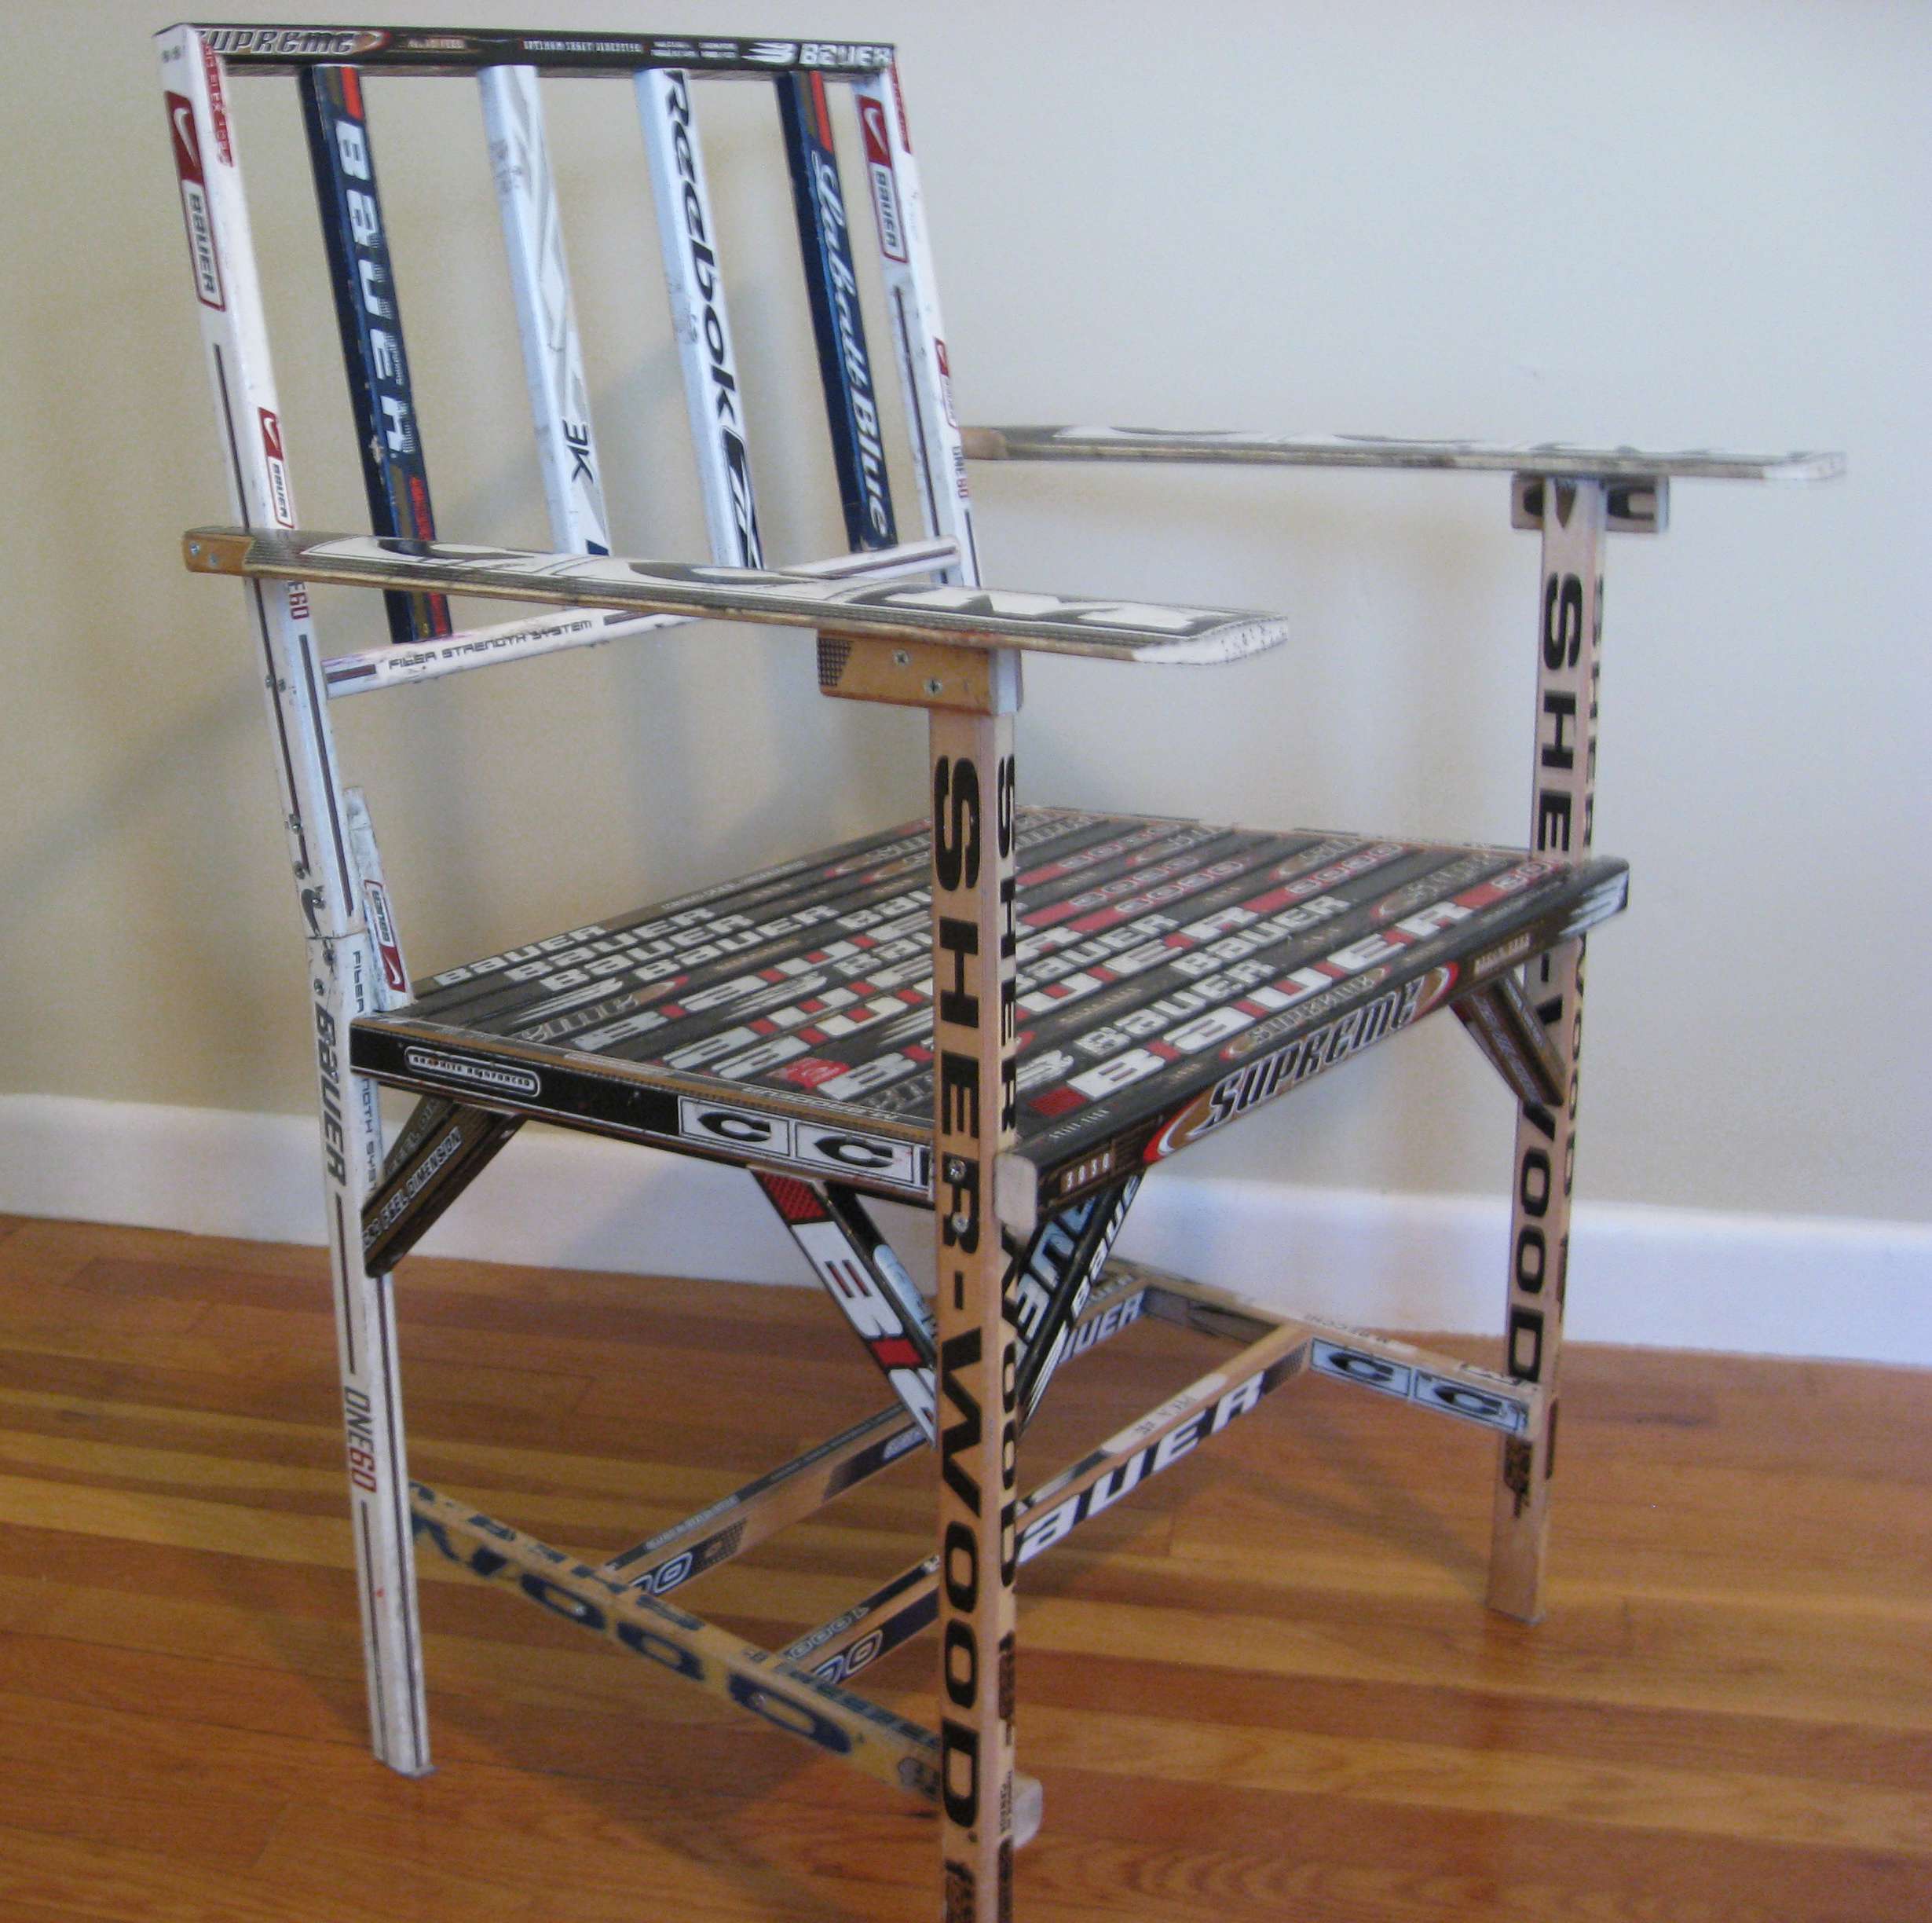
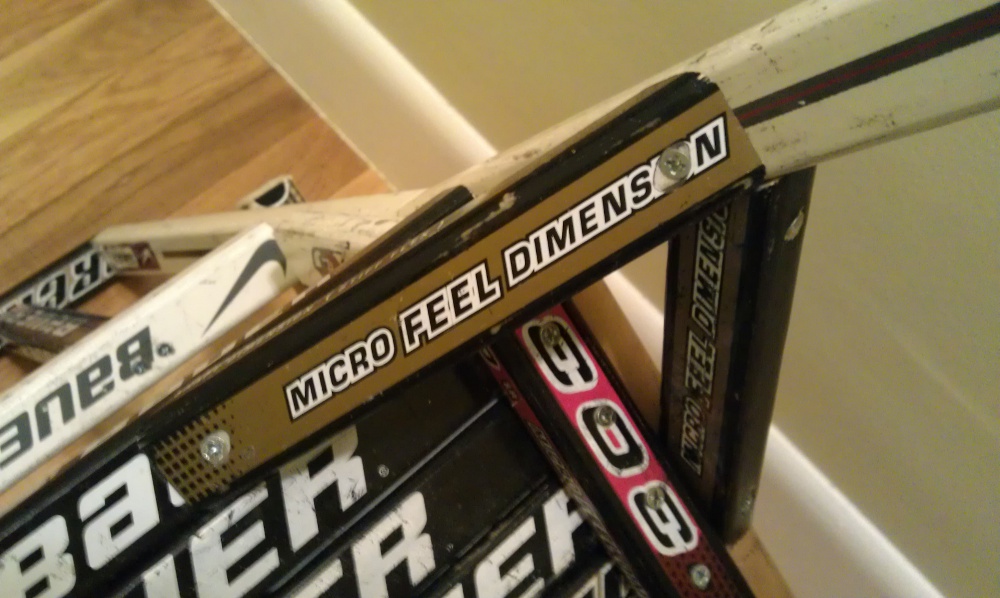
4. Back
Build the back separately from the rest of the chair, then integrate.
- Maintain 20″ width plus 2 sticks
- Sits directly on the 10° angled legs
- Top corners cut at 45°
- Use the exact same stick or style for the top and 2 sides — different manufacturers have slightly different aspect ratios which will look off
- You need at least 3″ from the bottom of the back to the first cross member — this is for clearance. You need it.
- The 4 vertical beams need a double screw in at least one side to keep them from spinning — use #4, 1.25″ on the bottom where fewer screw heads show
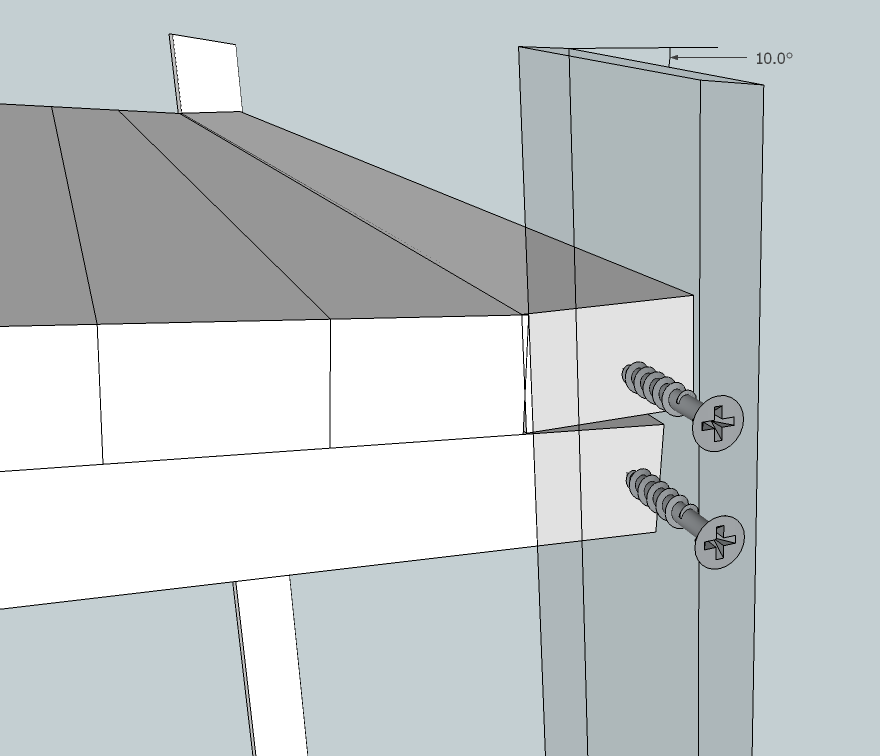
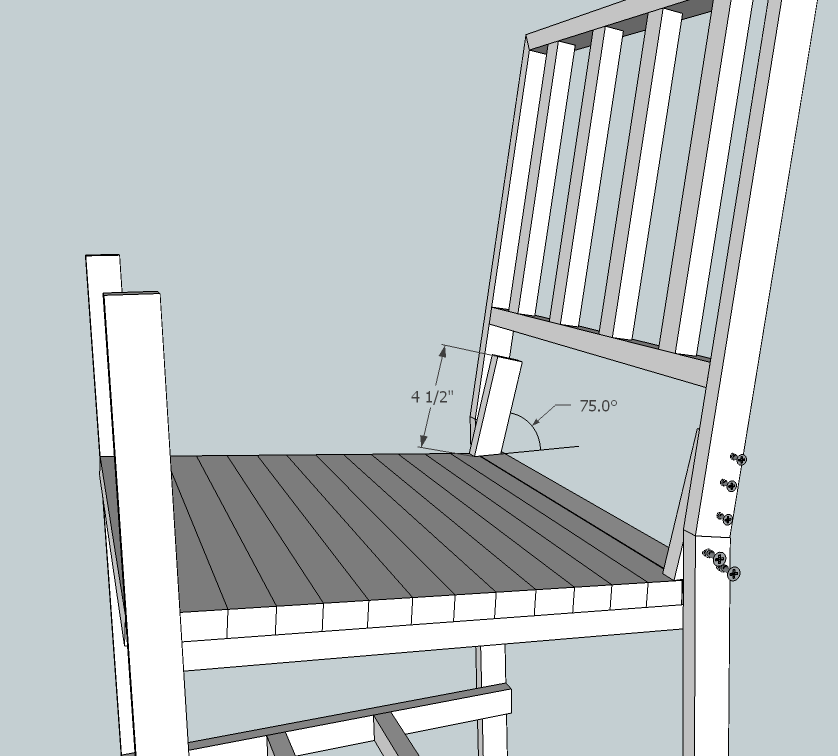
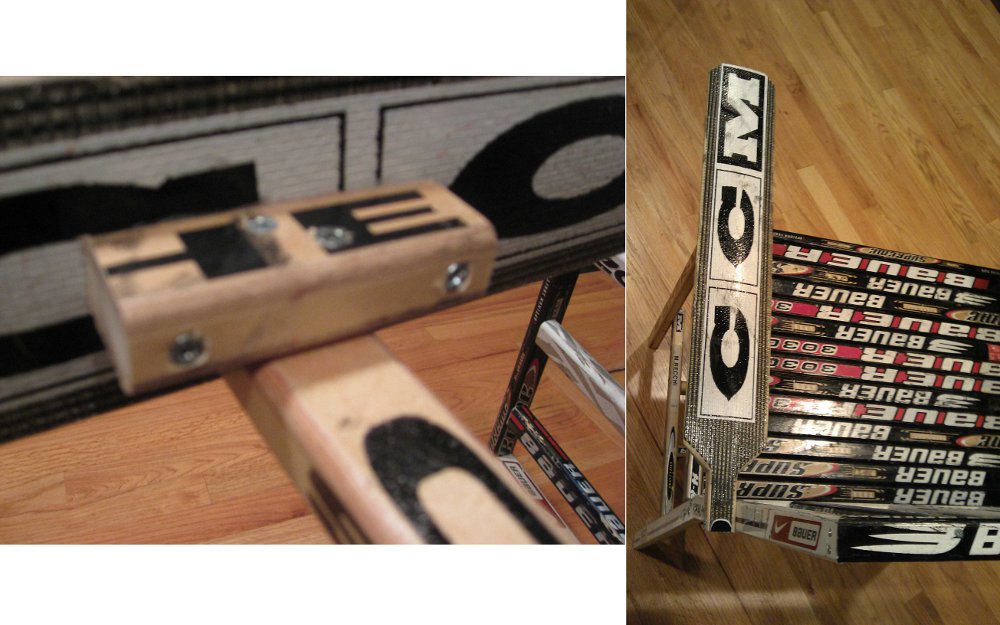
Attachment piece: A small 4.5″ piece connects the back to the legs at 75° from horizontal. Attach these pieces to legs first using 2 × #8, 1.25″ wood screws. The goal is that when someone leans against the back, the attachment piece pushes against stick #14 in the seat instead of straining the back-leg joint.
Attach the chair back to the attachment piece using 3 × #6 screws, making sure the back is flush to the top of the legs.
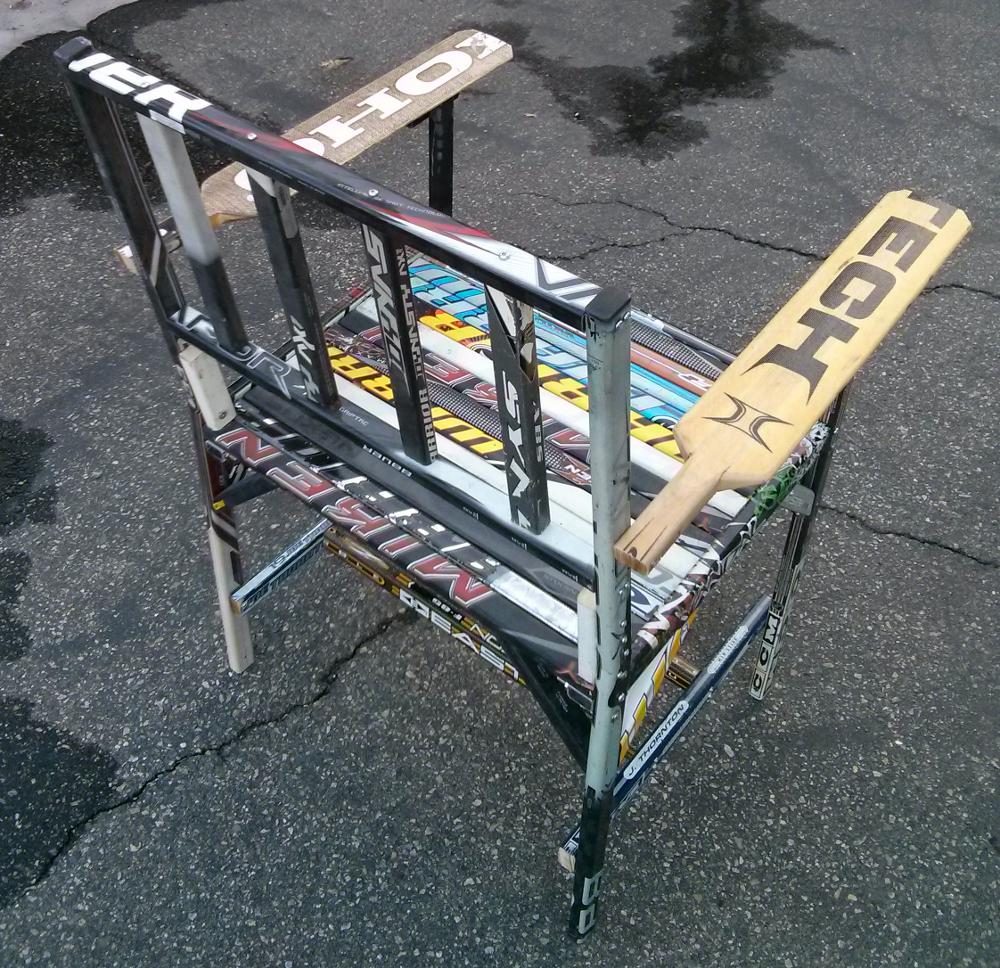
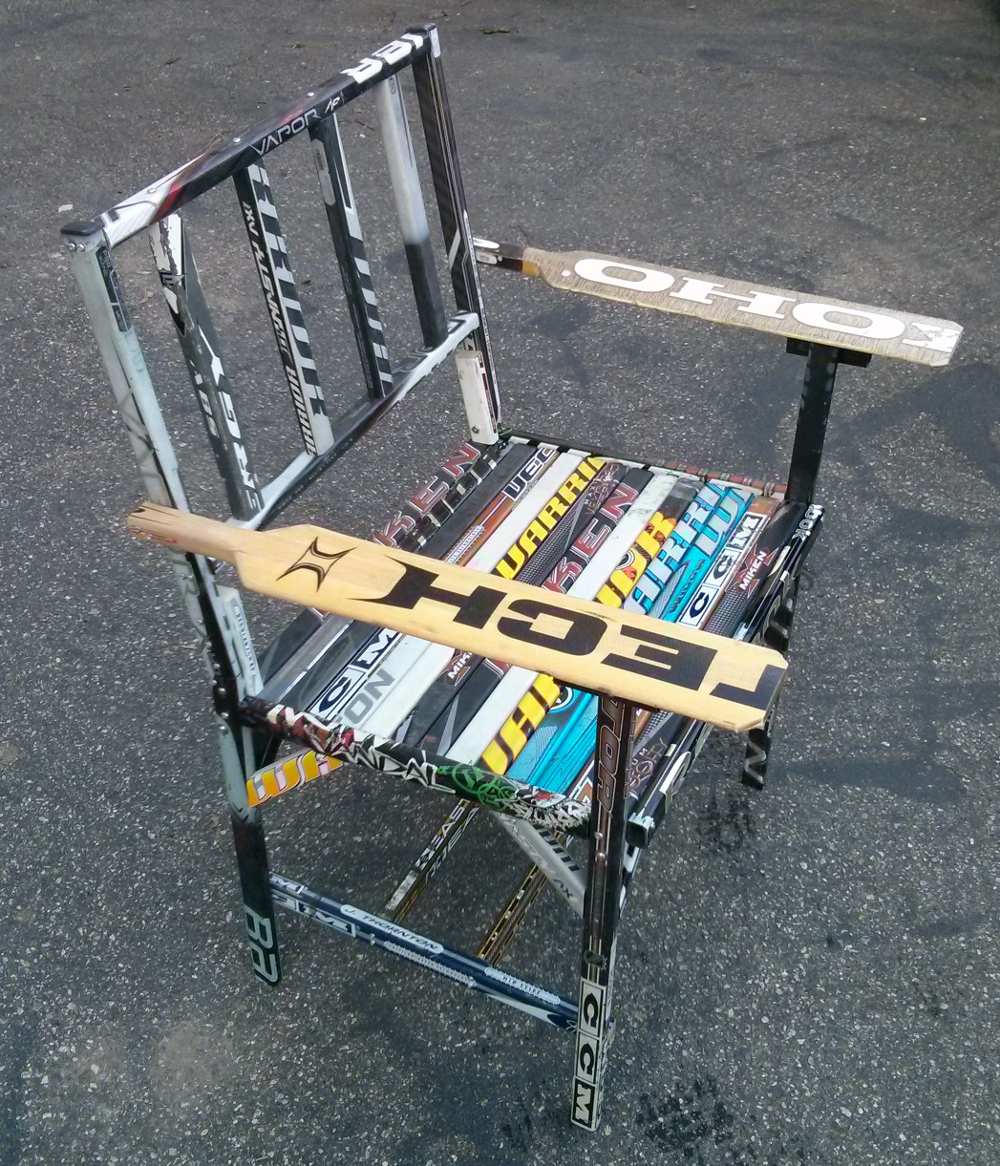
5. Arm Rests
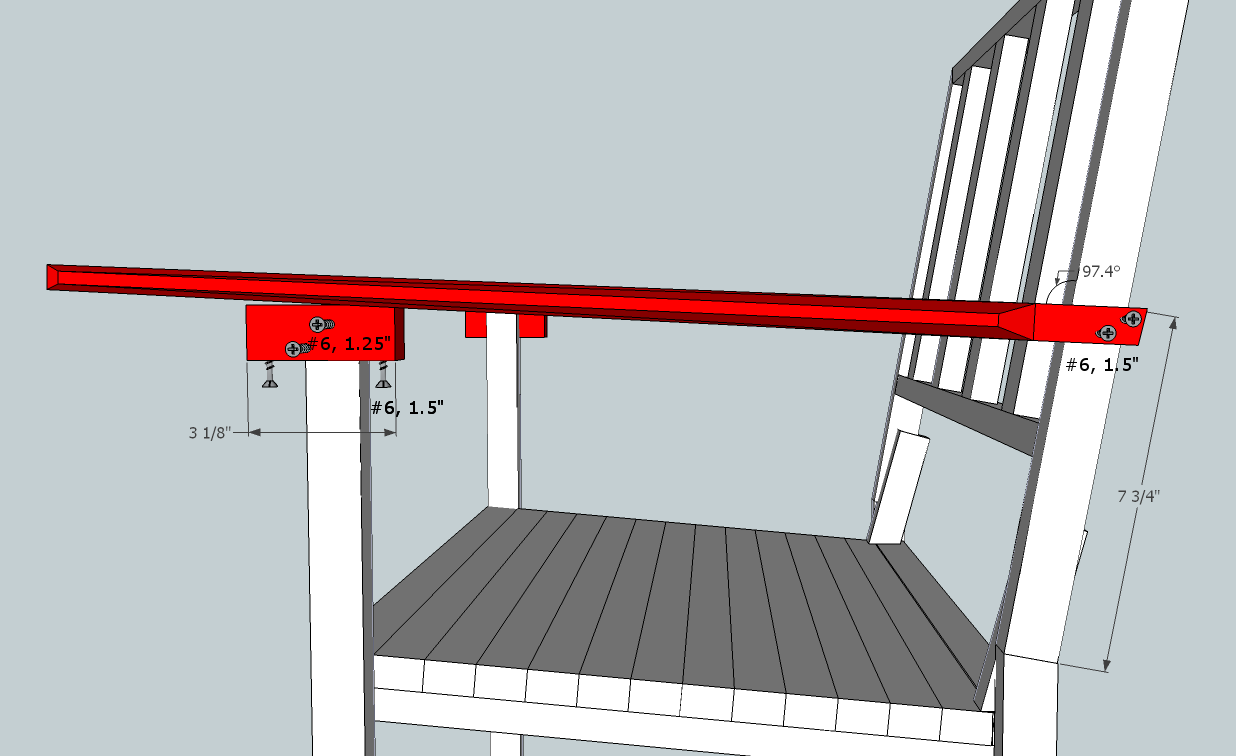
Arm rests add comfort and significant rigidity by creating counter-torque about the back-leg joint that opposes the weight of the person sitting.
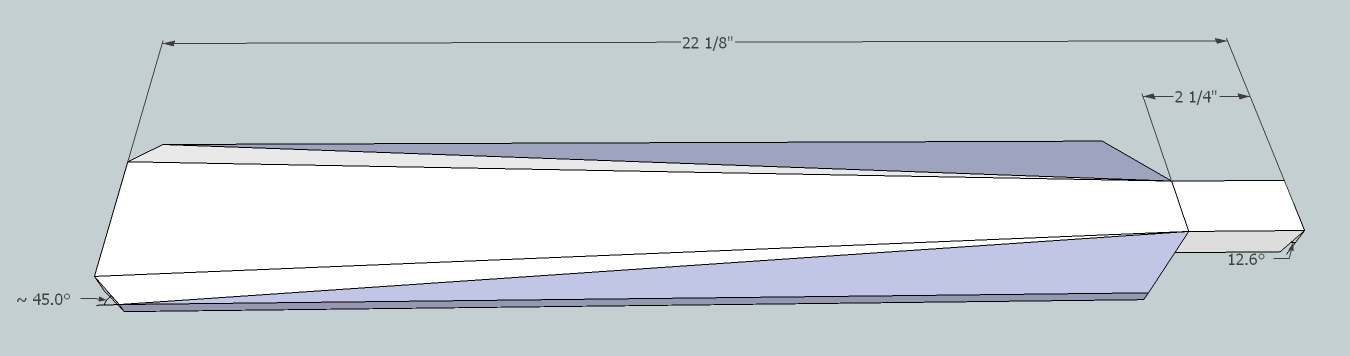
Cut goalie stick corners at 45° and the rear at slightly greater than the 10° back angle (allows for error when mounting).
Mount to front legs via two #6, 1.25″ screws. Also connect to the arm rest via #6, 1.5″ from the bottom — be very careful these screws don’t poke through the top of the goalie stick! 1.5″ should be just right if centered.
Use two 1.5″ screws to attach the arm to the back for a secure hold.
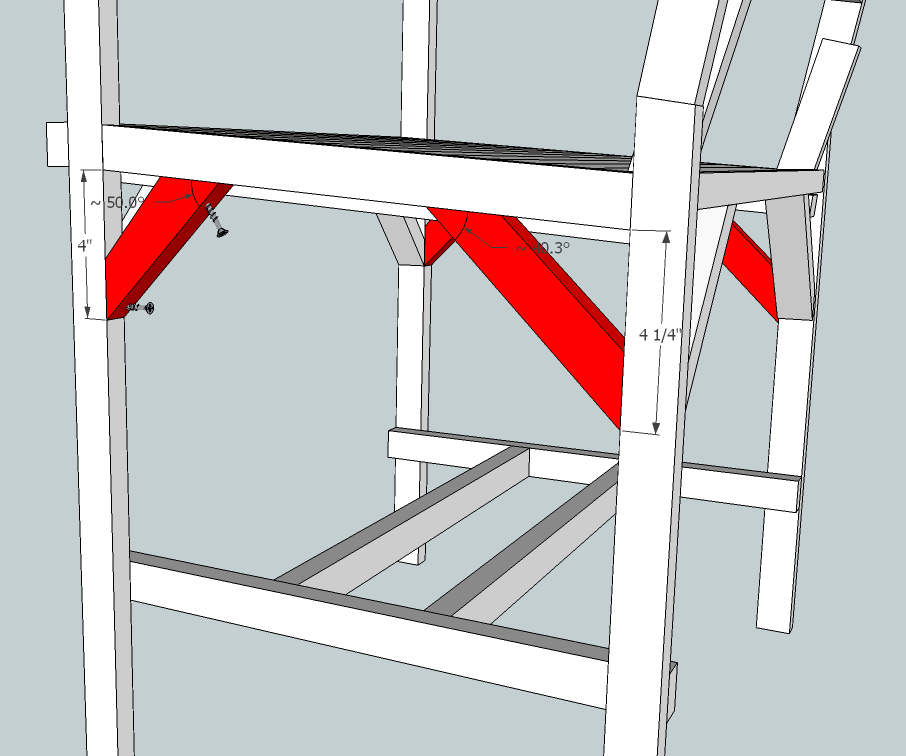
6. Seat Supports
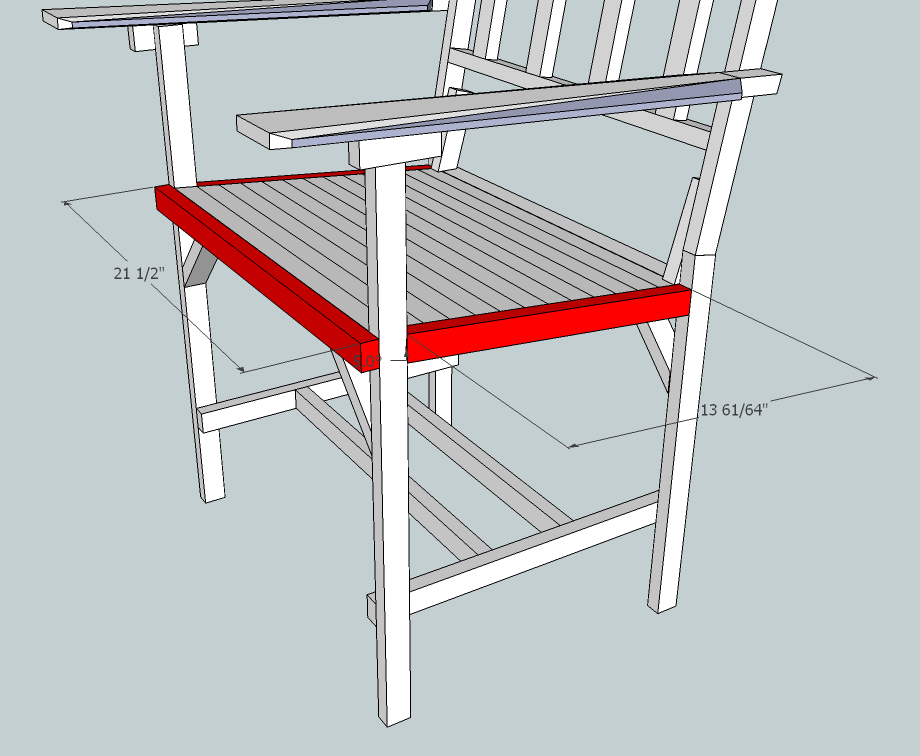
Round 1
Easy to make — cut the angles at the ends to 45°. You may have to slightly “twist” stick #1 on the front of the seat to lie flush with the support. Note the direction of the #6, 1.25″ screws — they should go in at a slight angle to maximize the amount of wood caught.
Side Covers
Add finishing pieces to cover the stick sides. No screws — use Liquid Nails and bar clamps for a clean look. Finish with a couple finishing nails. The side pieces need 5° angle cuts on each end to account for the seat angle.
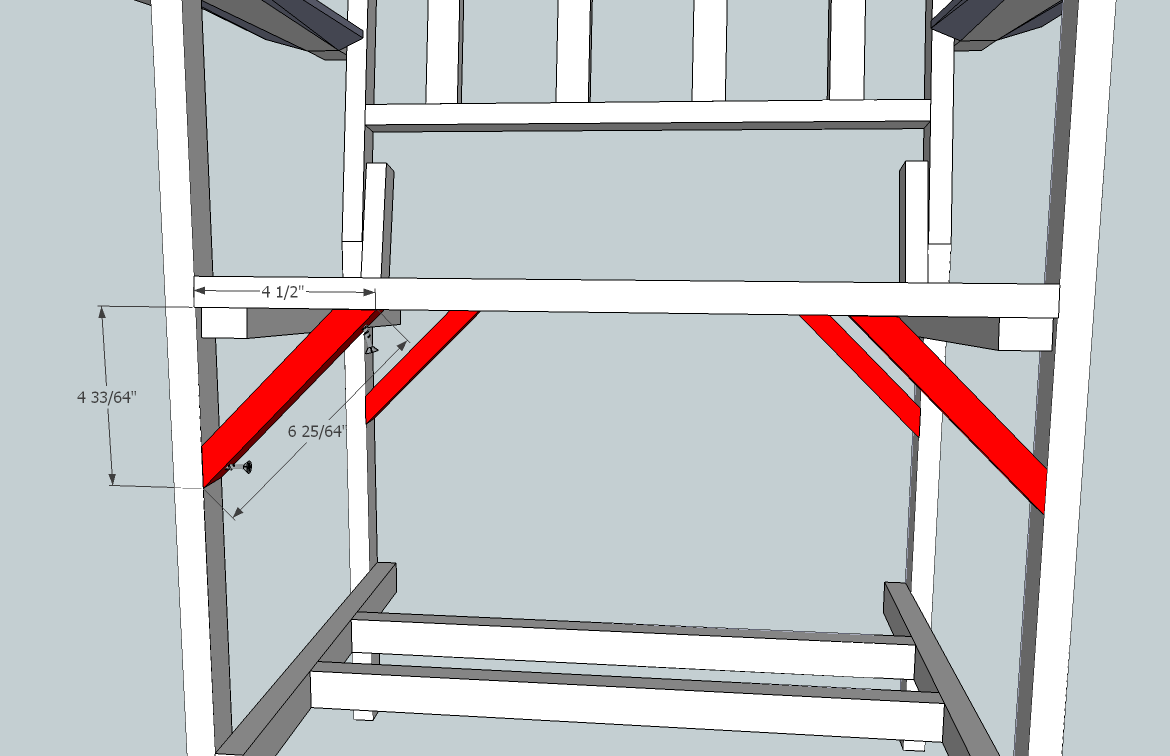
Round 2
Note the angle of the screws — these are slightly more difficult as you must accommodate the seat angle on the supports. The angles are close to 40° on the seat side, keeping the other at 45°. Cut pieces slightly too long and test-fit, cutting to adjust as you go.
Now you’re all done!
For a full 3D model, visit the Models page.
Gallery (26 photos)

Related Projects
 Preview
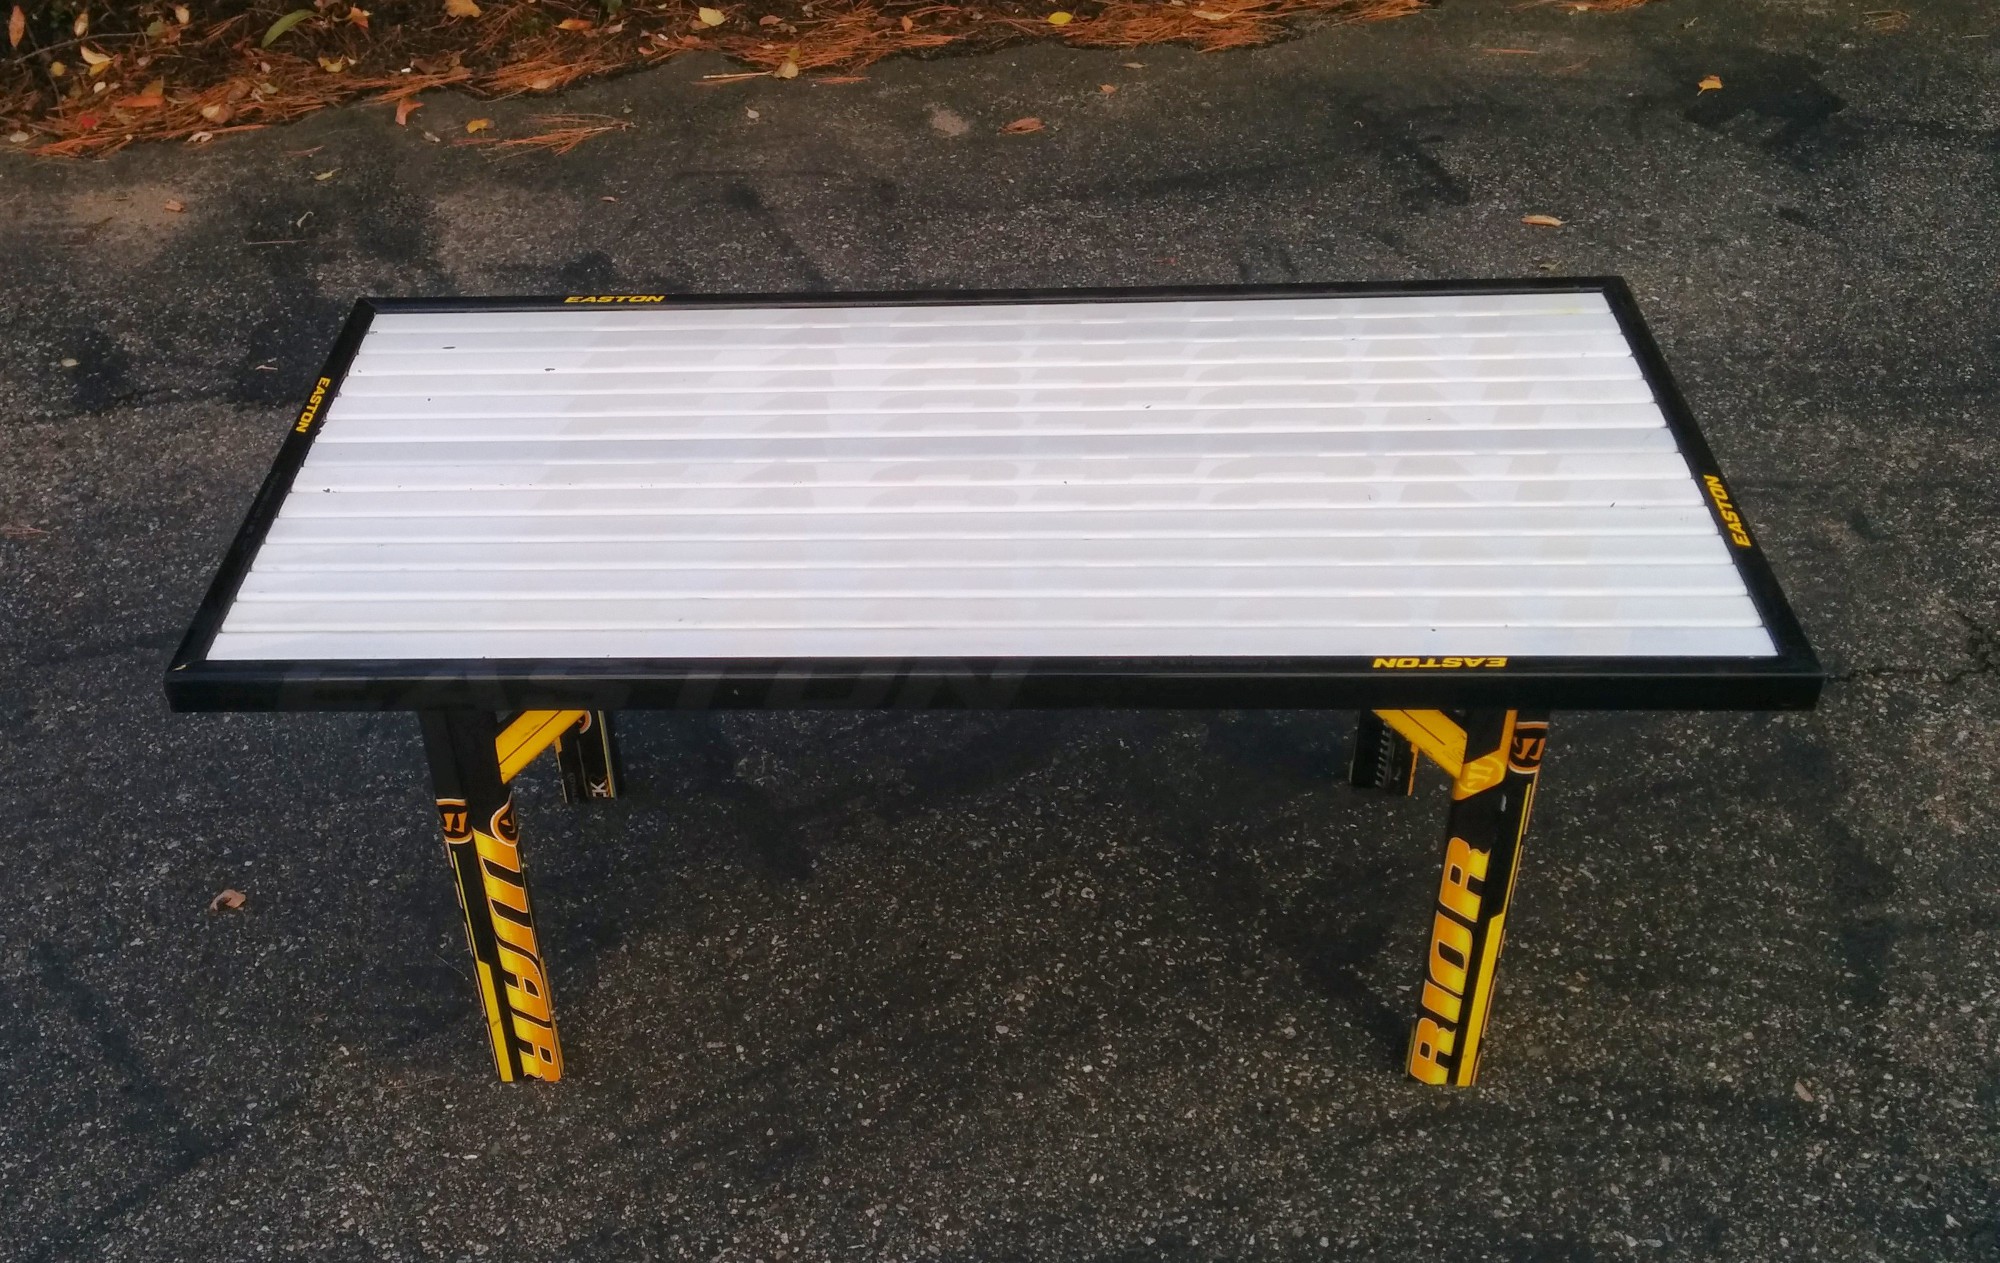
 Coffee Table - Composite
A coffee table built from composite hockey sticks with angled legs. A modern, sleek variation on the classic hockey table.
 Preview
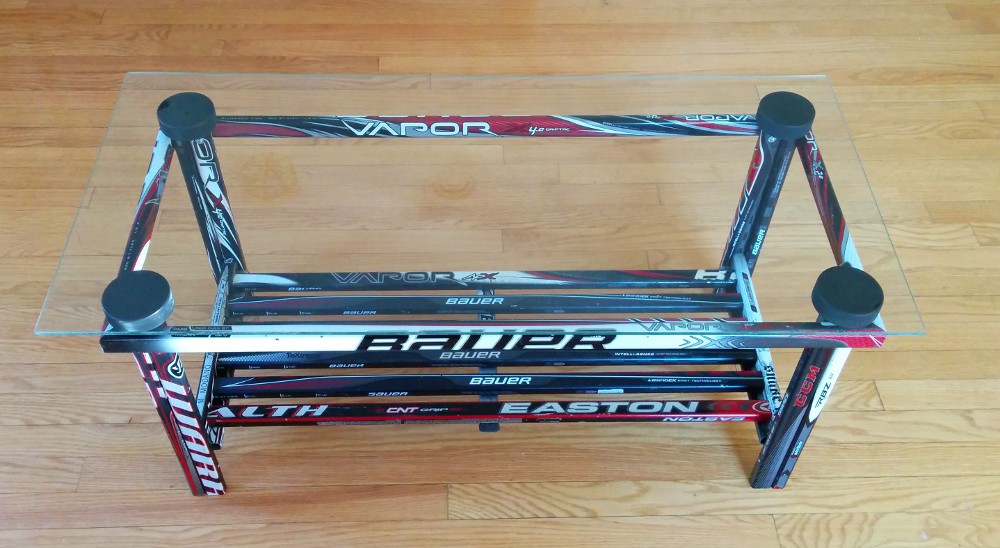
 Coffee Table - Glass Top
A hockey stick coffee table with a glass top, showcasing the stick pattern underneath. Available in multiple color themes.
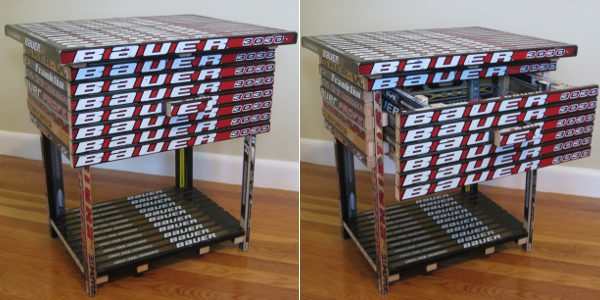
Hockey Stick Nightstand
A full nightstand with working drawer built from ~60 hockey sticks. The most stick-intensive project with 6 build phases.