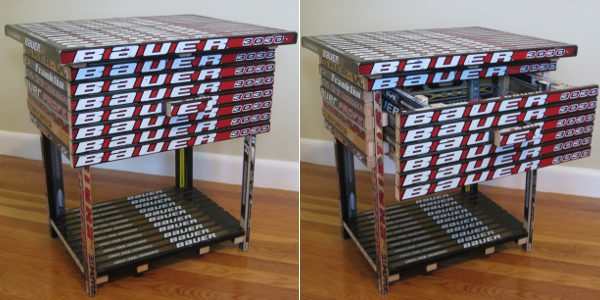
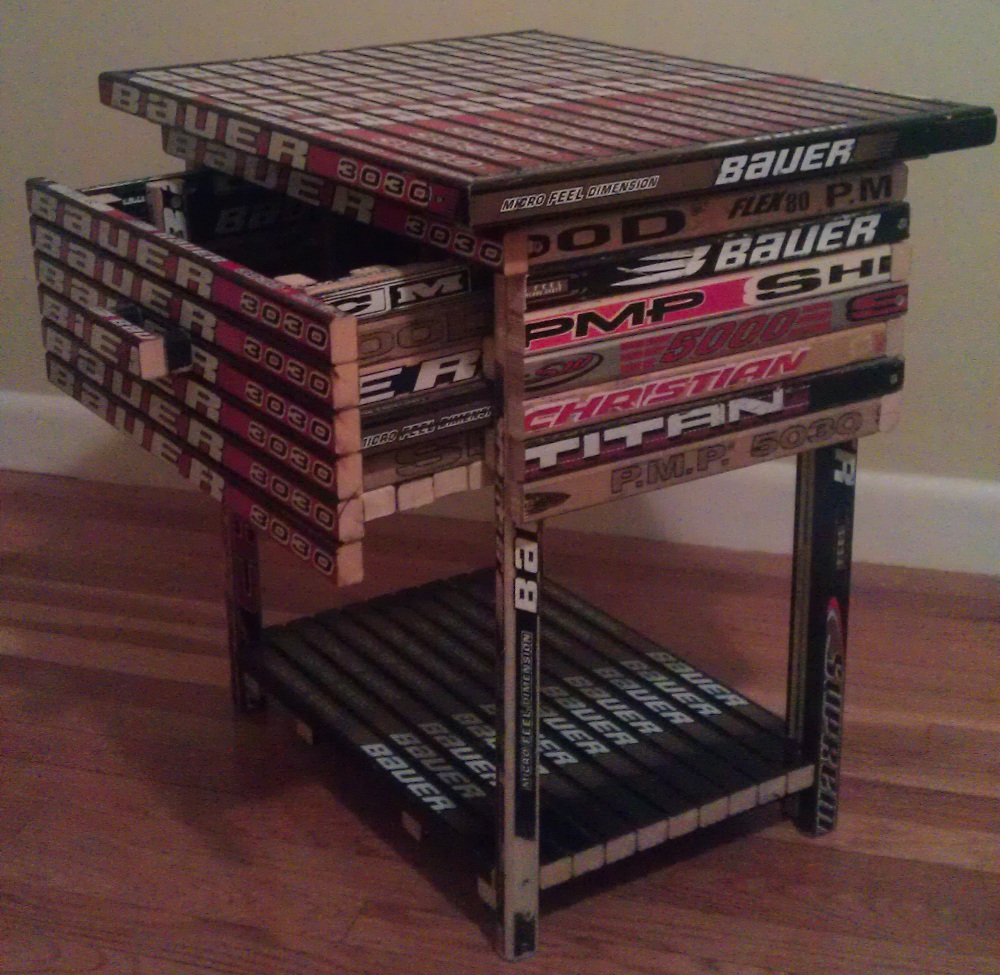
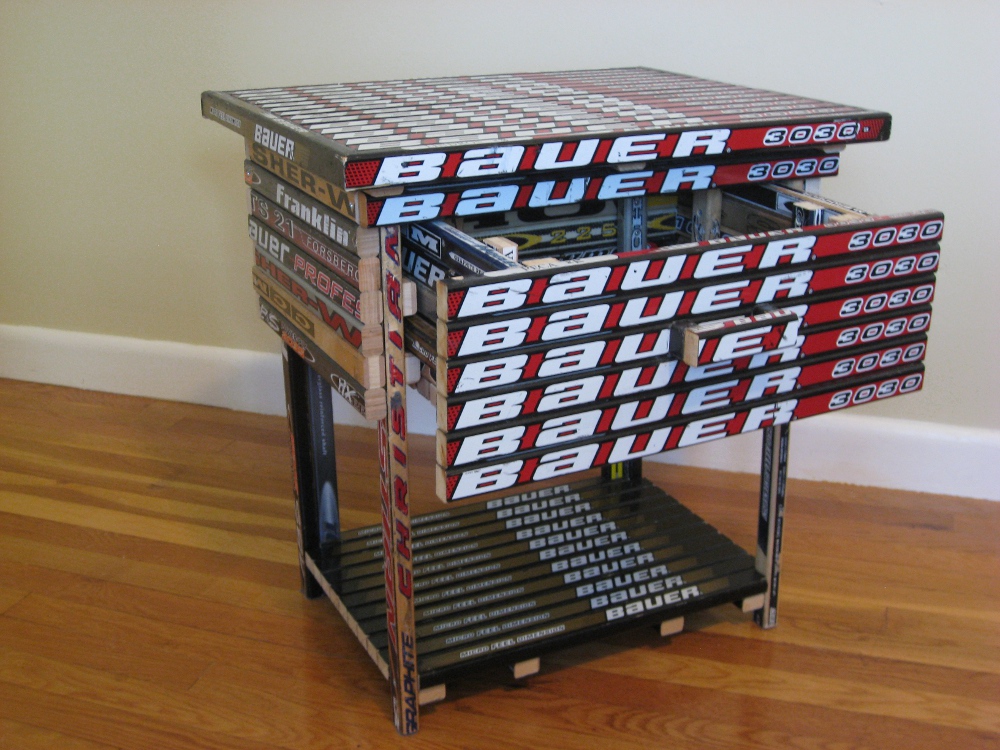
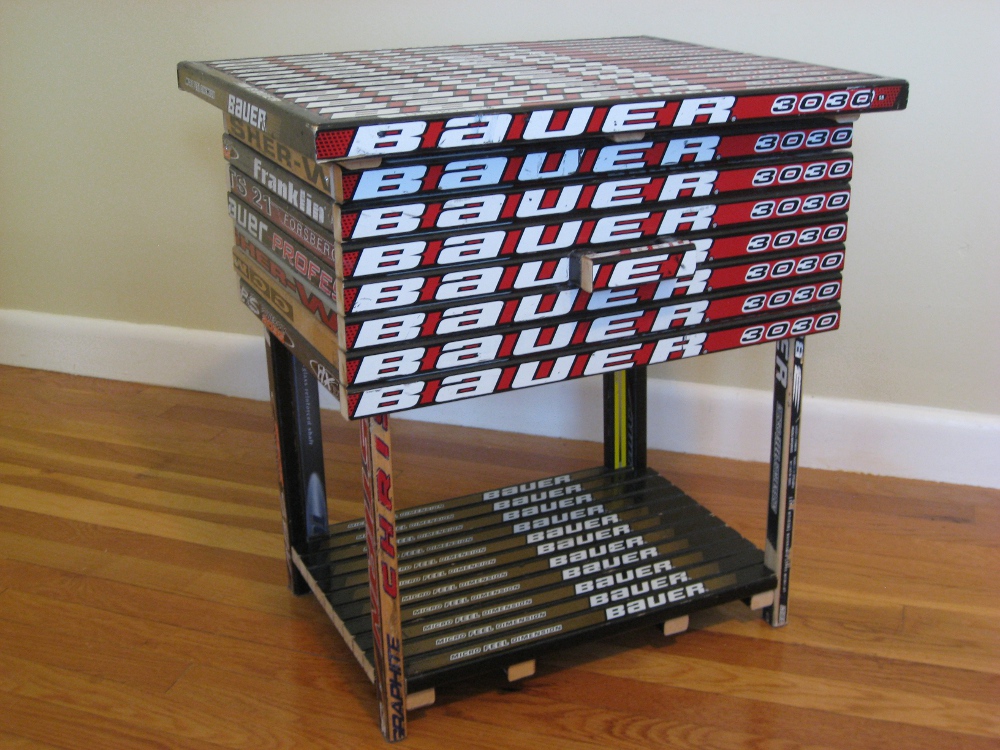
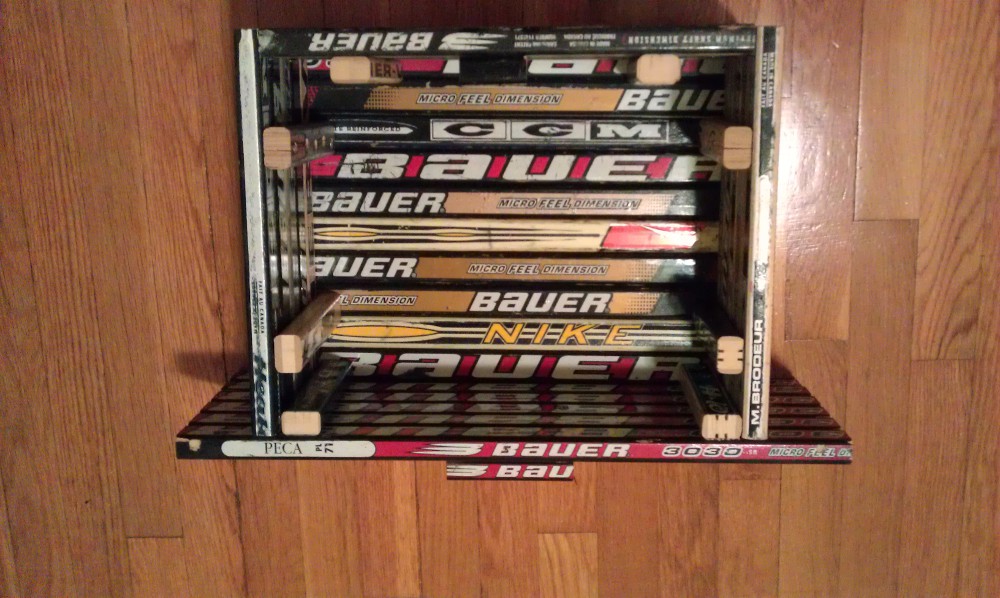
Hockey Stick Nightstand
A full nightstand with working drawer built from ~60 hockey sticks. The most stick-intensive project with 6 build phases.
Before you start: Read the Building Guide for essential safety and technique information.
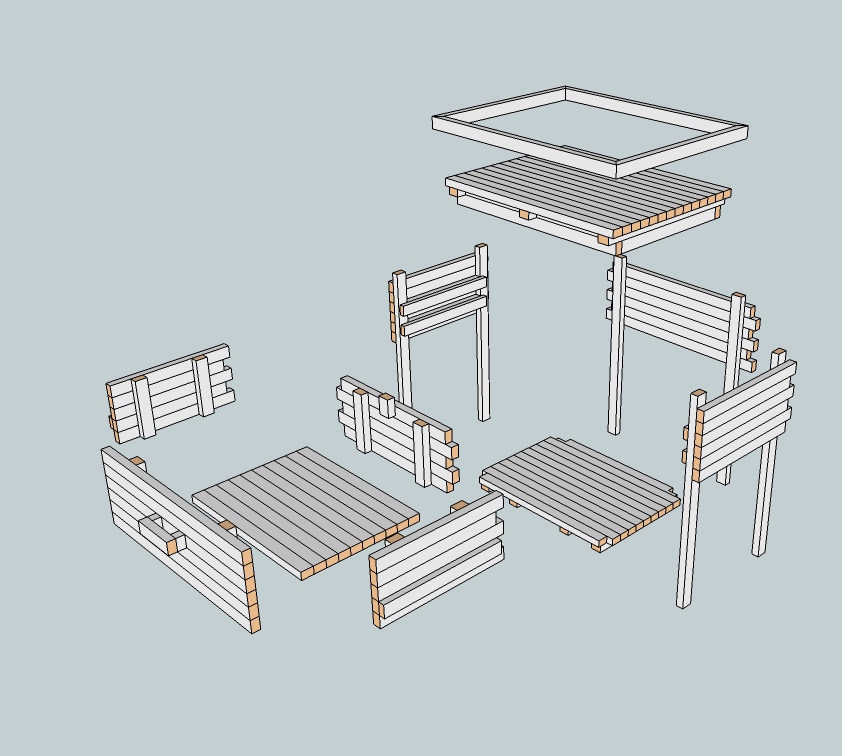
This one is tricky. Of high importance: understanding where the points on one surface are used as attachments for another. Really think about how you’re going to do this design by modeling or at least drawing it out.
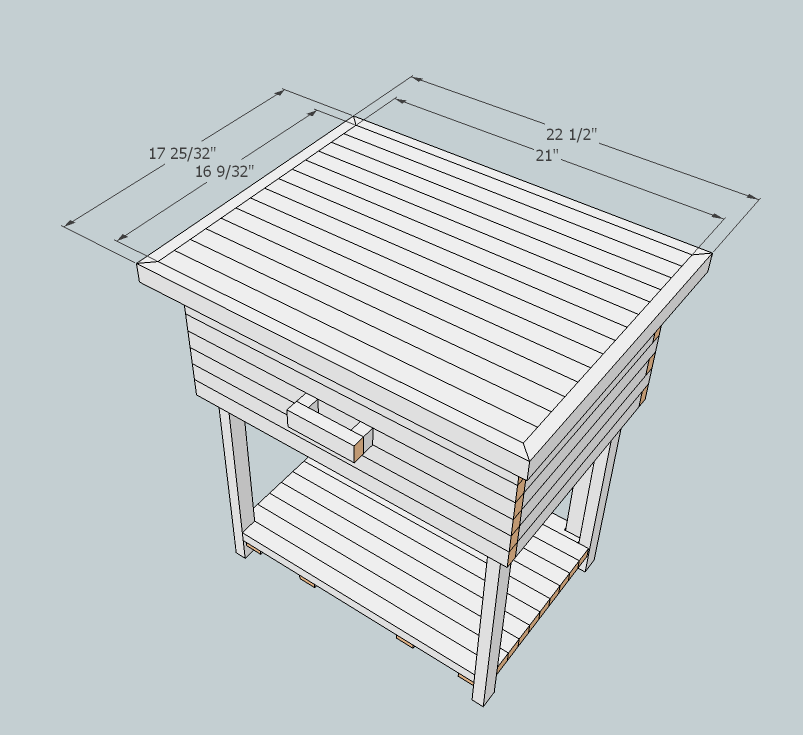
Design Breakdown — 6 Phases
- Top Surface — flat stick surface with spacer pieces
- Top Undercarriage — framework for drawer housing attachment
- Drawer Frame — legs, sides, back, and drawer runners
- Bottom Shelf — lower storage area with special back cuts
- Drawer — measured to fit, with stopper and handle
- Top Frame — finishing edges at 45°
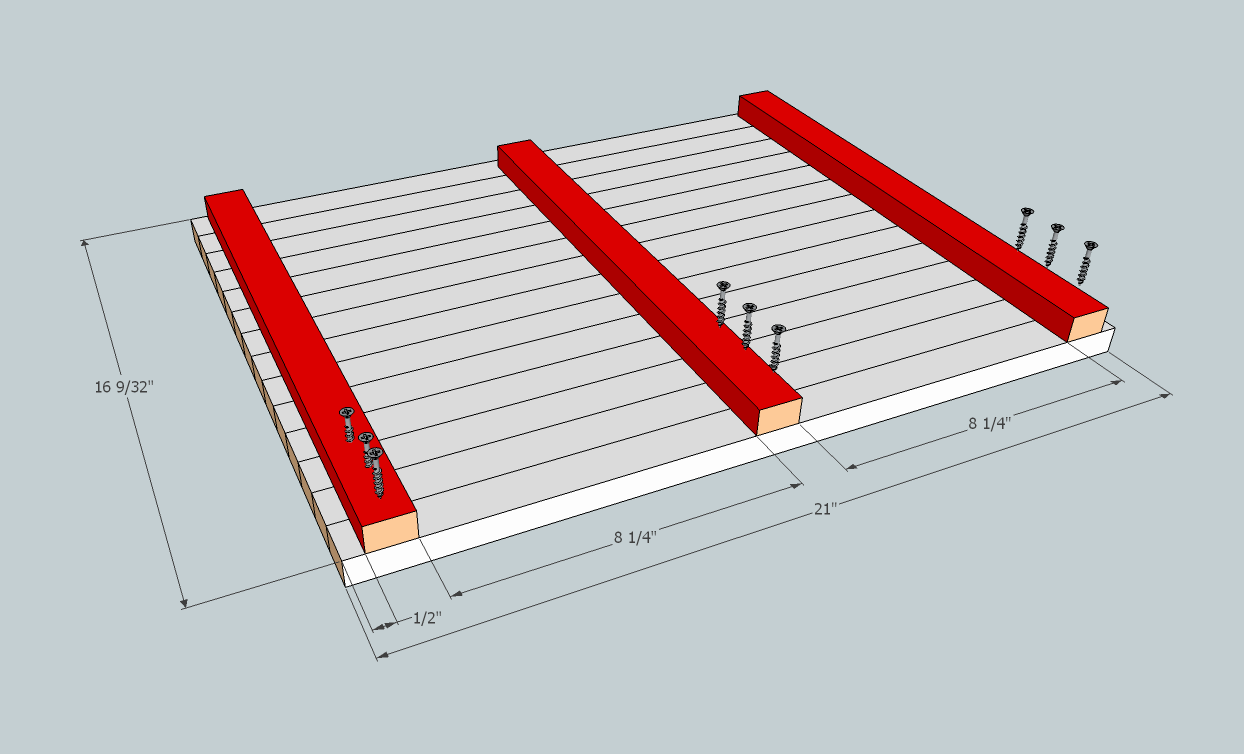
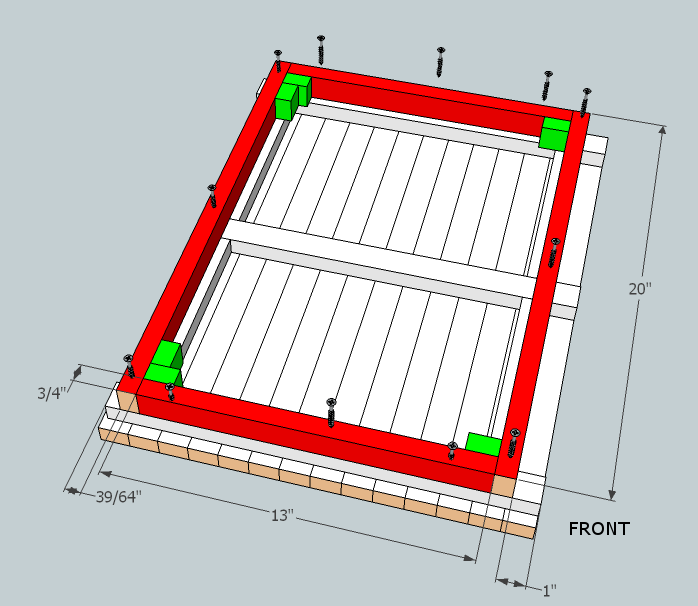
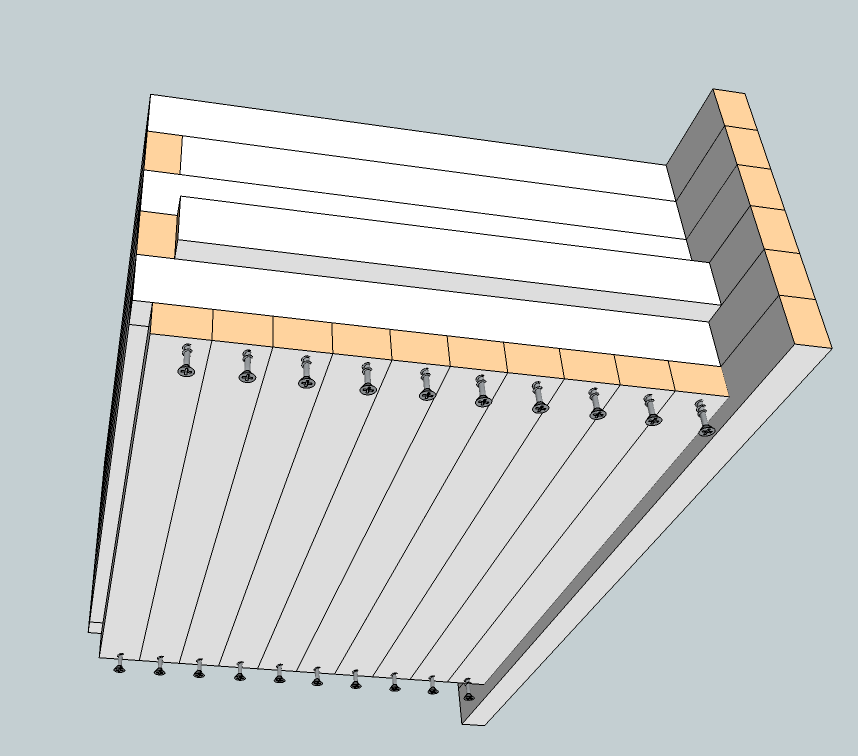
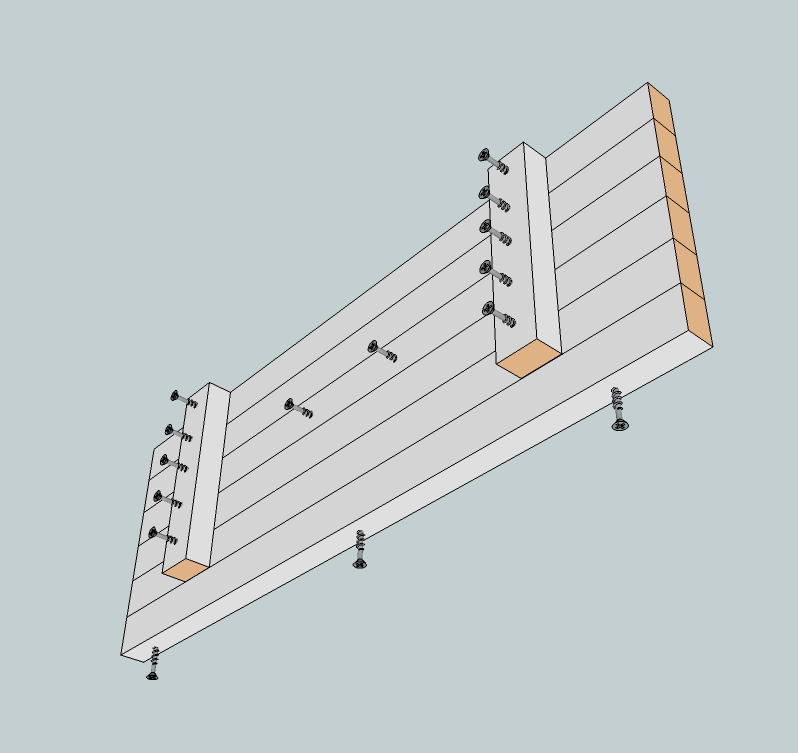
Phase 1: Top Surface
Start with the top surface. Cut the top as described in Building Guide for circular or mitre saws. Using the circular saw gives a clean cut that guarantees a good look when you attach the top frame.
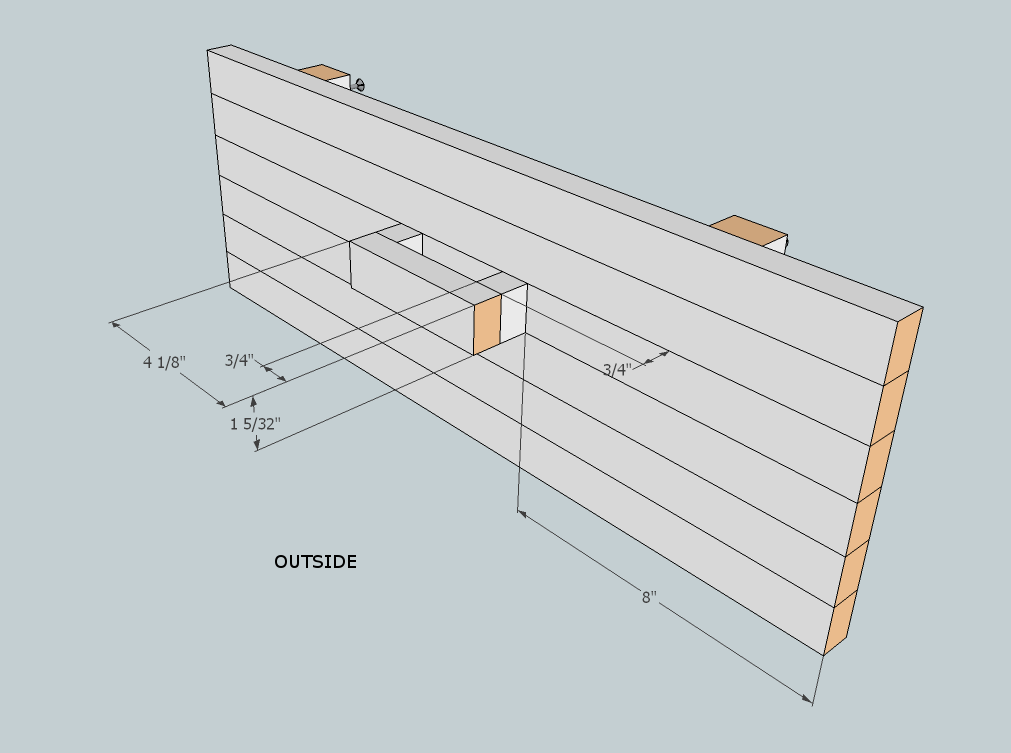
The outer 2 pieces set the width of the housing for the drawer! Next add spacer pieces about 1″ from the front surface and about 0.5″ from the back. These set the depth of your drawer housing and ultimately the drawer.
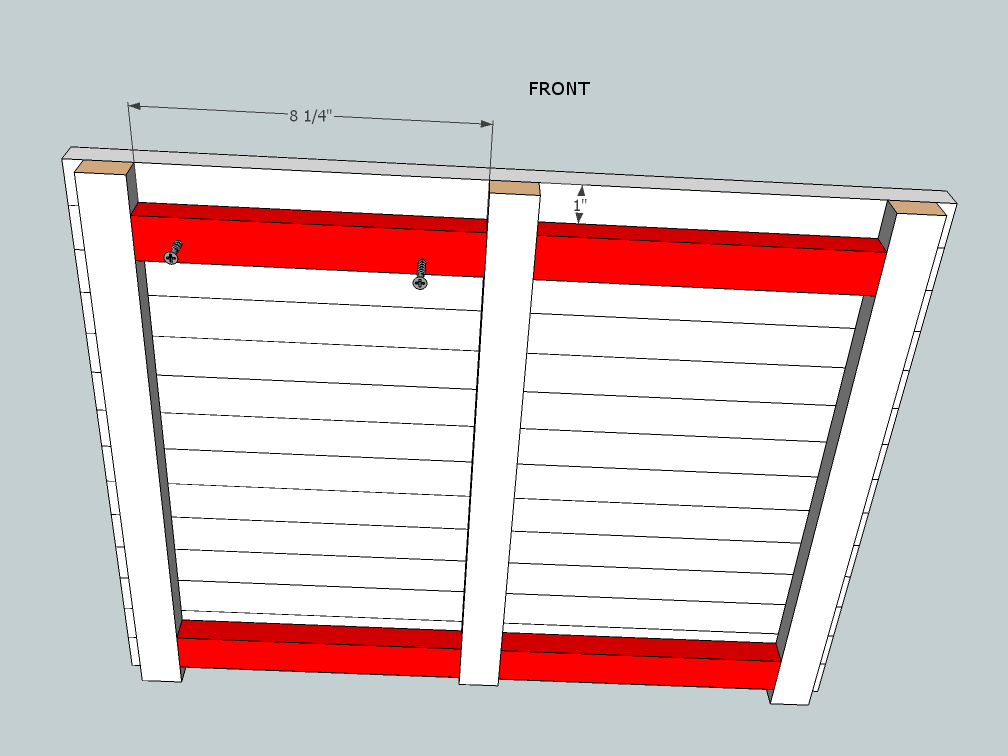
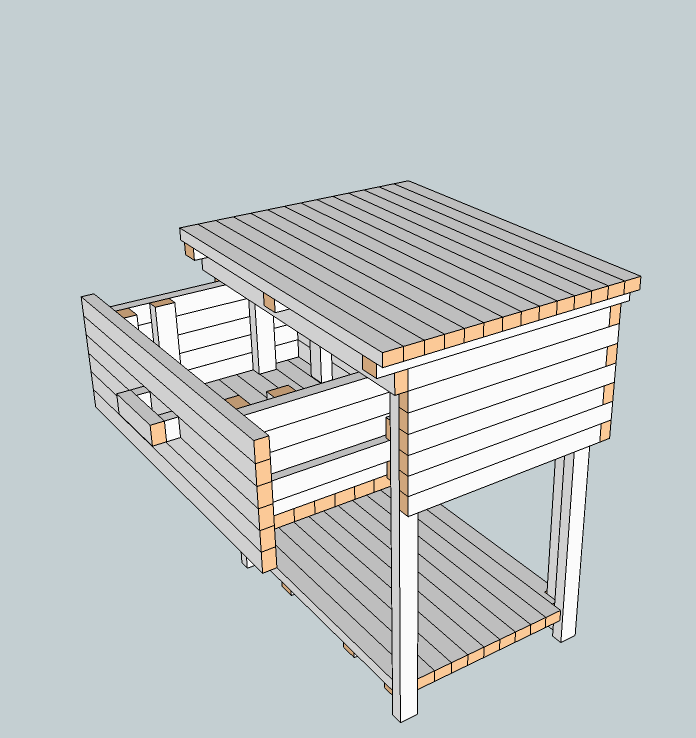
Phase 2: Top Undercarriage
Add the undercarriage to enable the drawer housing to attach to the top surface.
Critical: Don’t put any screws through the undercarriage pieces near the drawer frame attachment points. You’ll need those spots later!
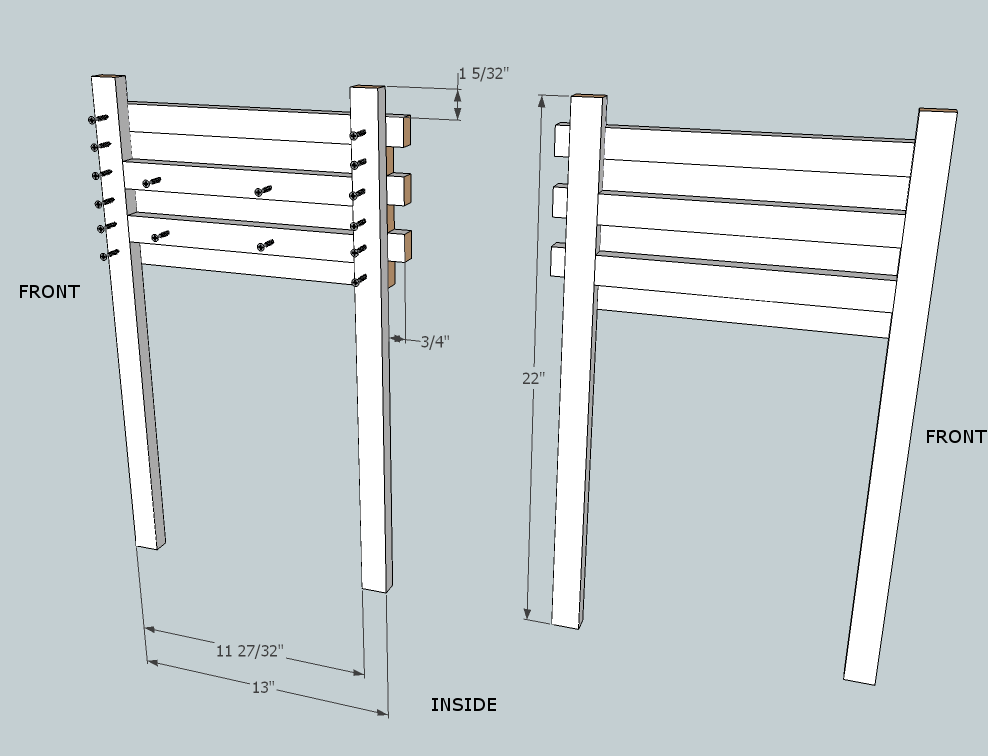
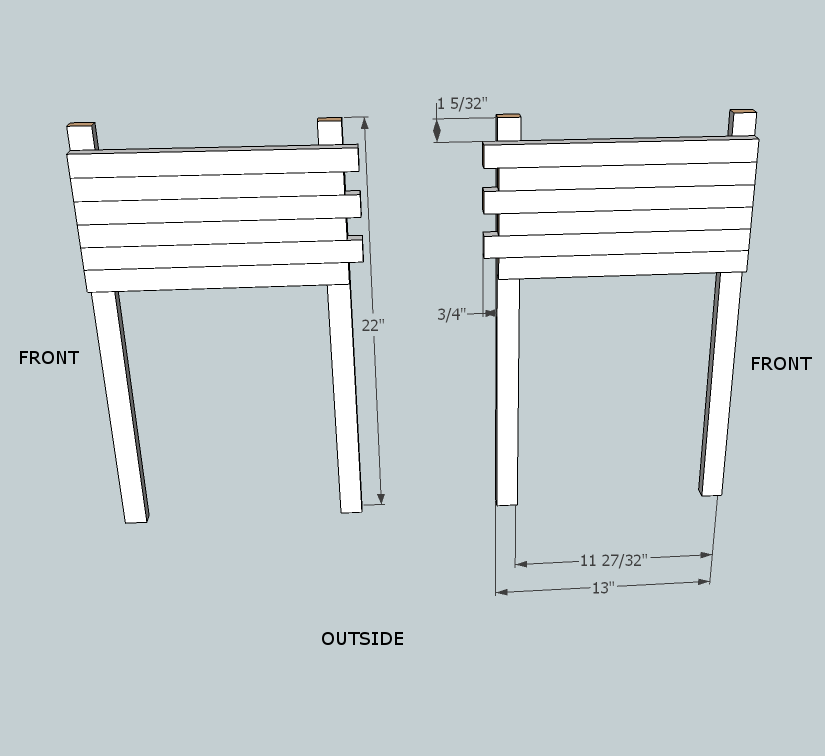
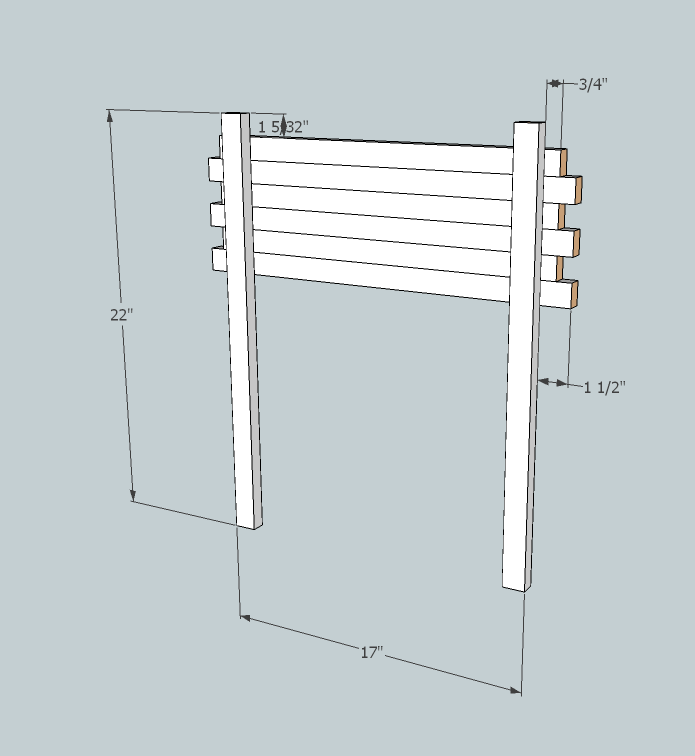
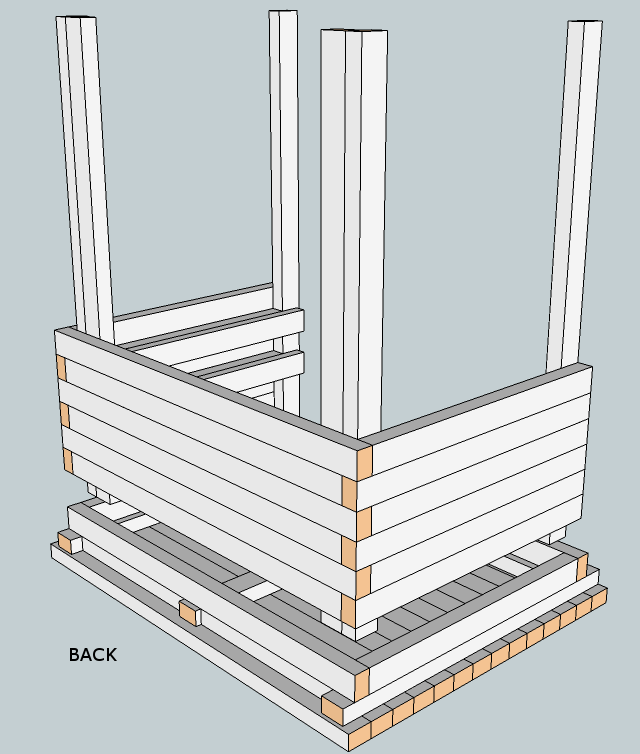
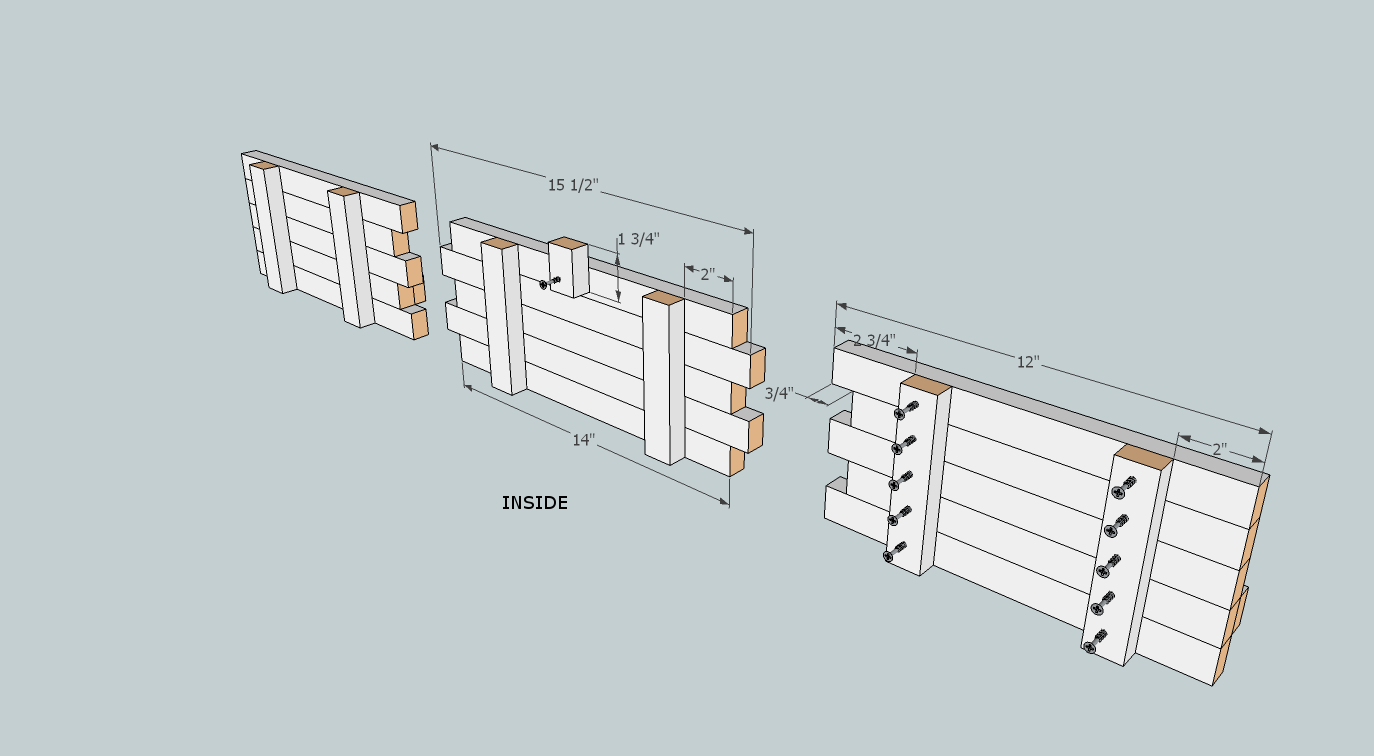
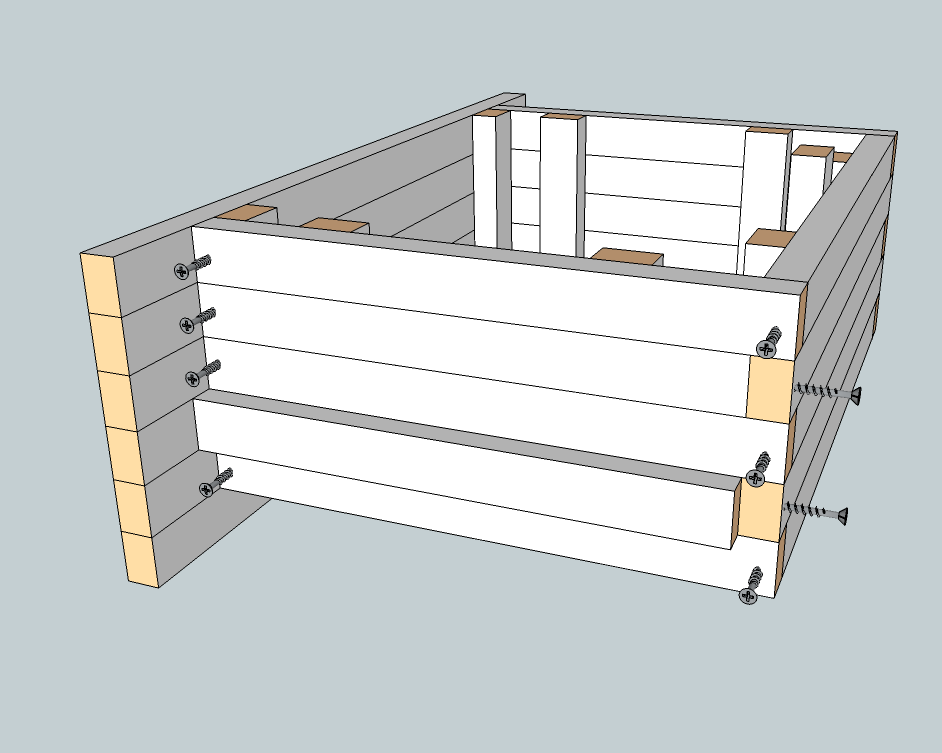
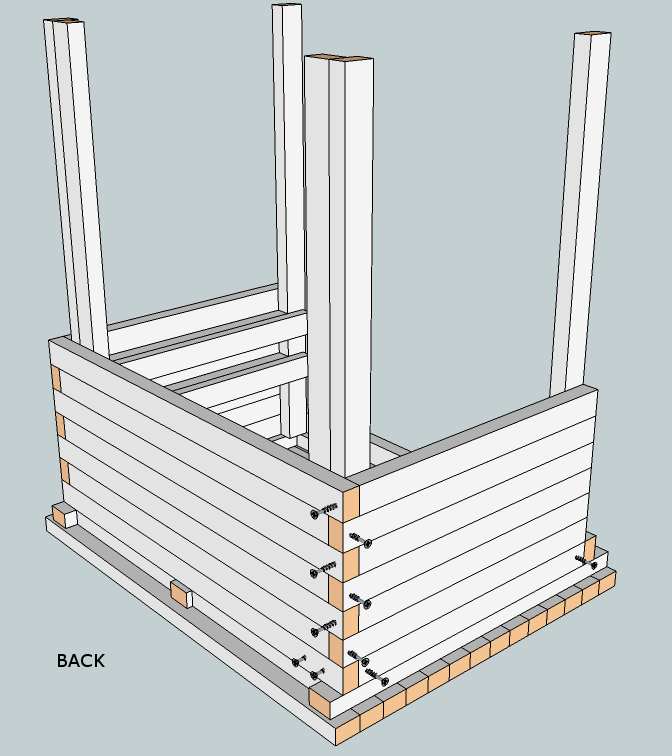
Phase 3: Drawer Frame — Legs, Sides & Back
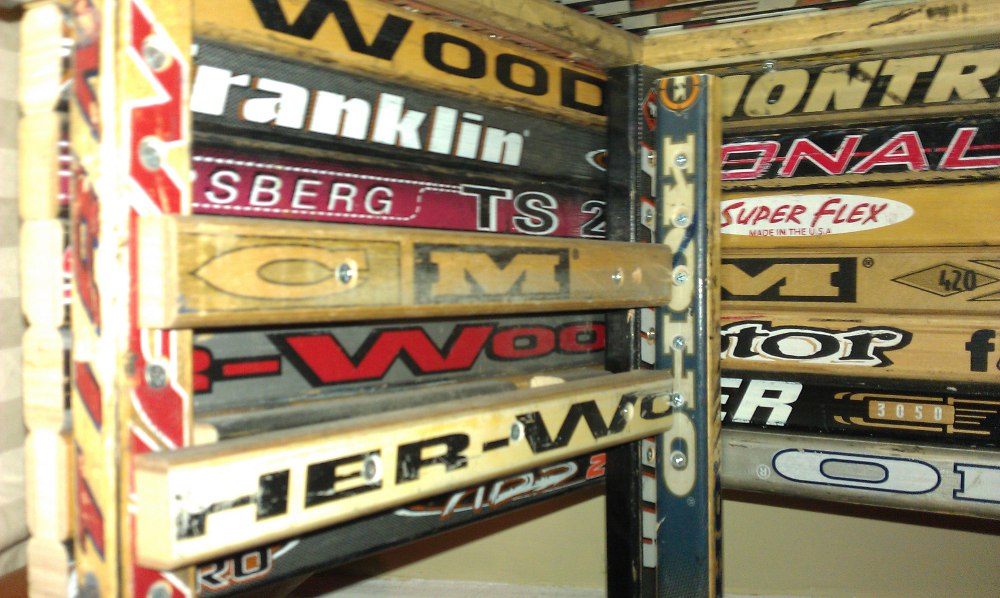
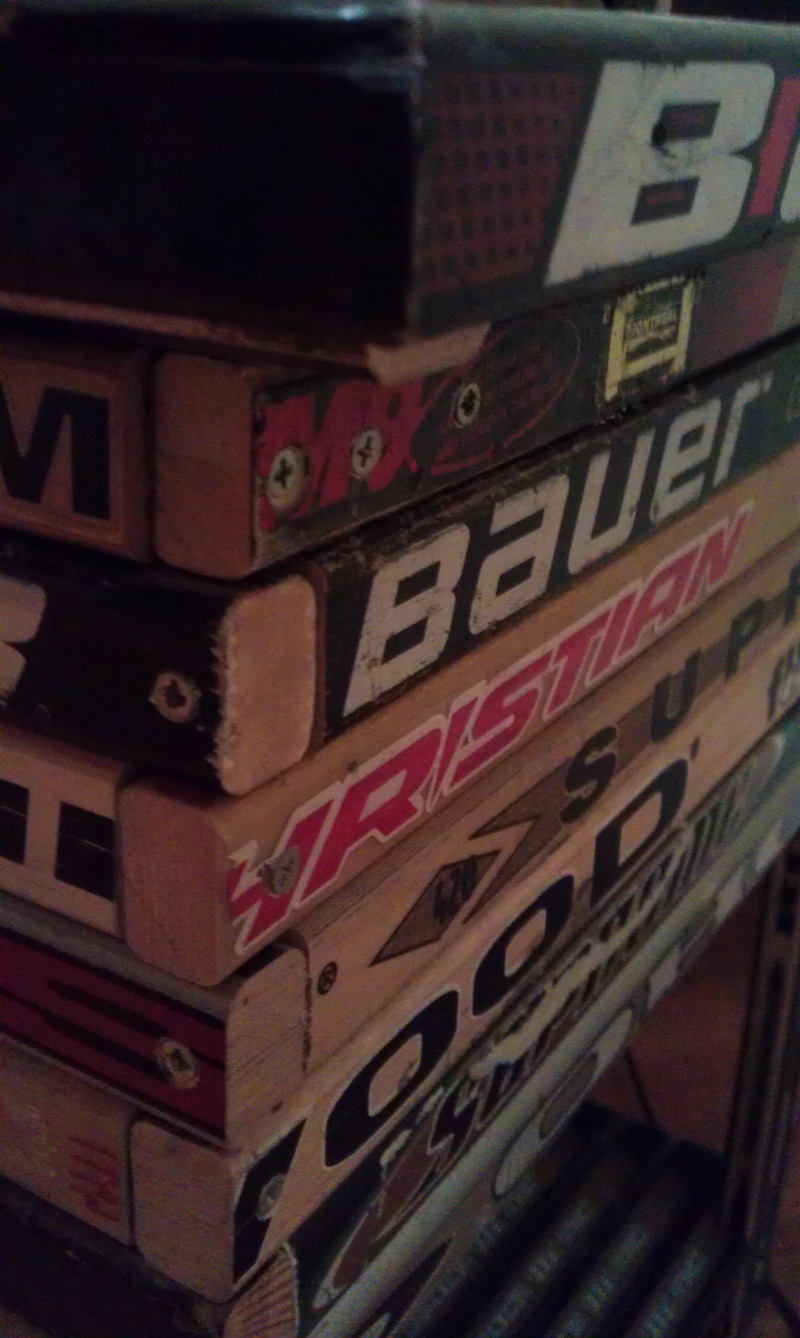
Using the pieces that hold the sticks together as legs is an easy way to get things together. Plan the placement before screwing — front legs should be nearly at the front, back legs exactly one stick width off the edge.
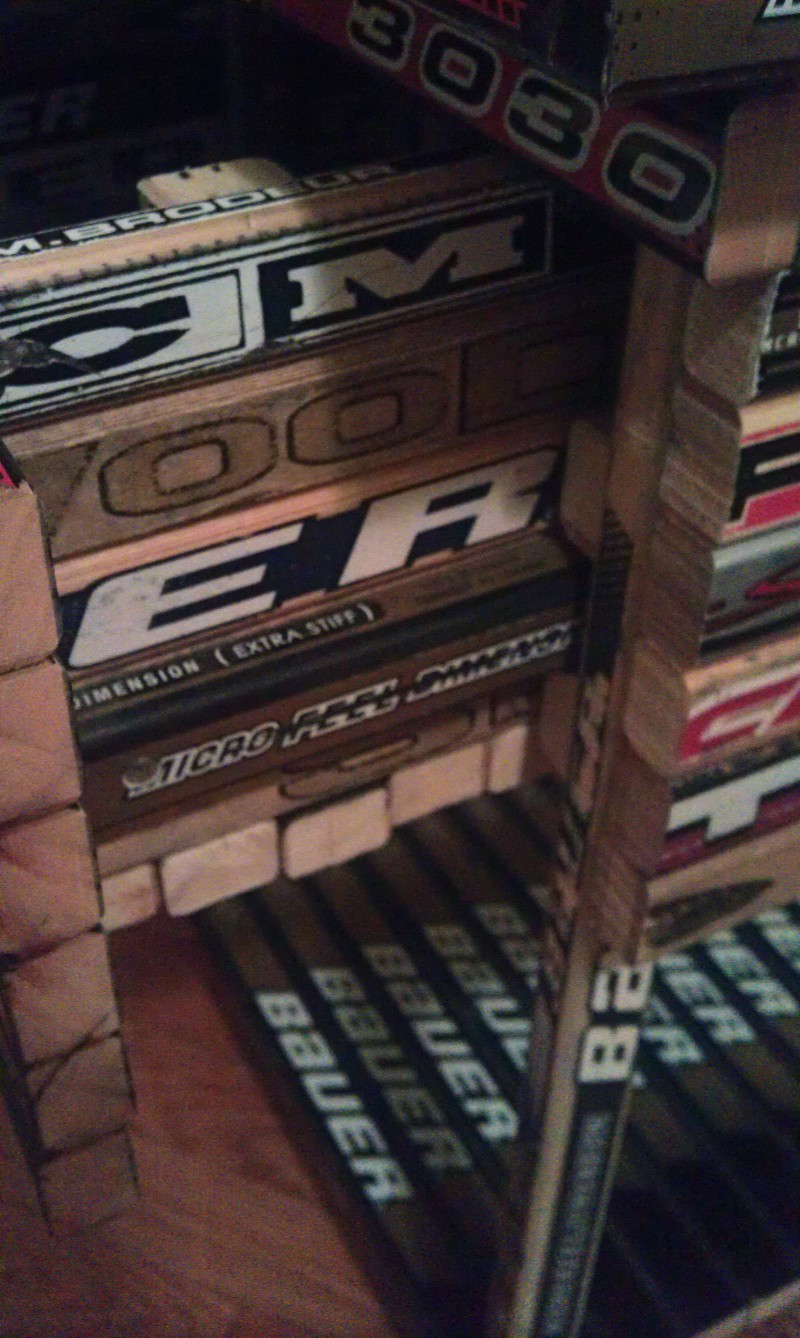
For the side legs and back, use a boxed type joint. This adds rigidity and makes bolting without visible screw heads possible.
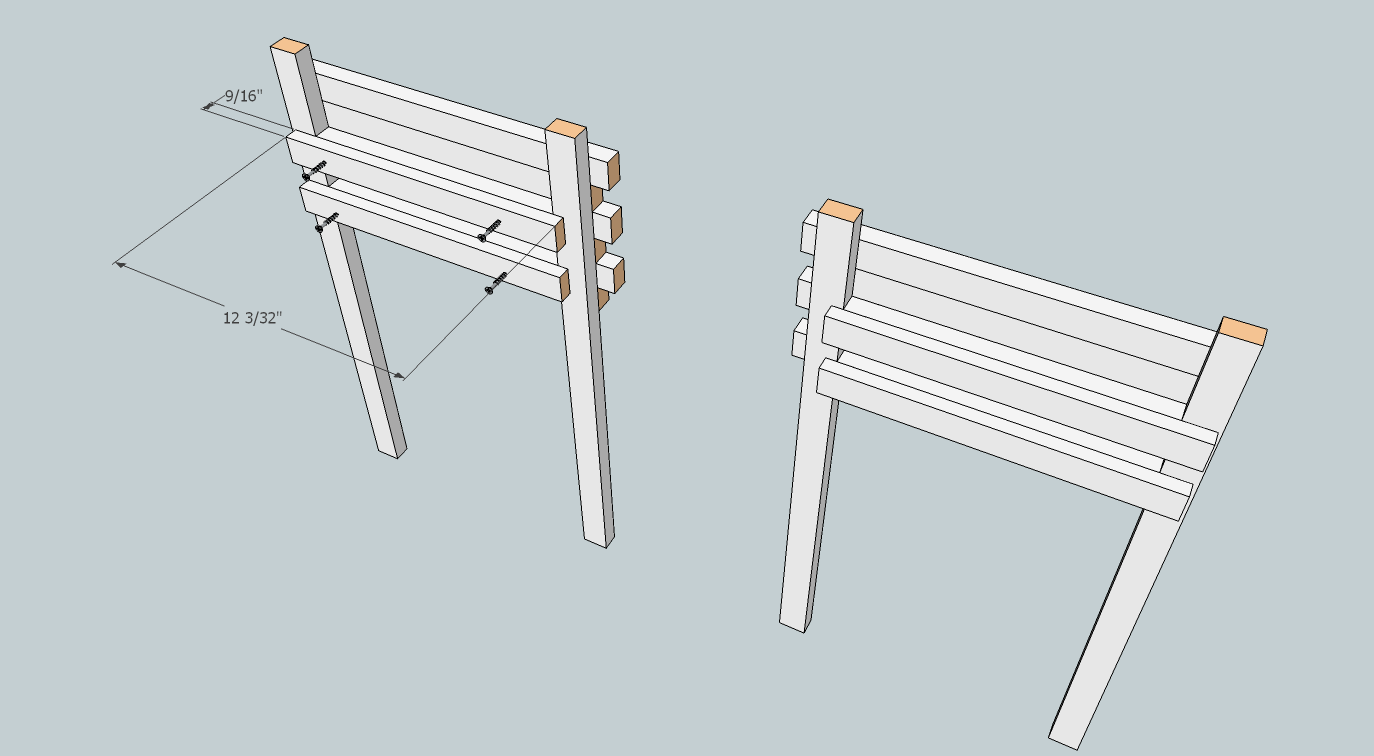
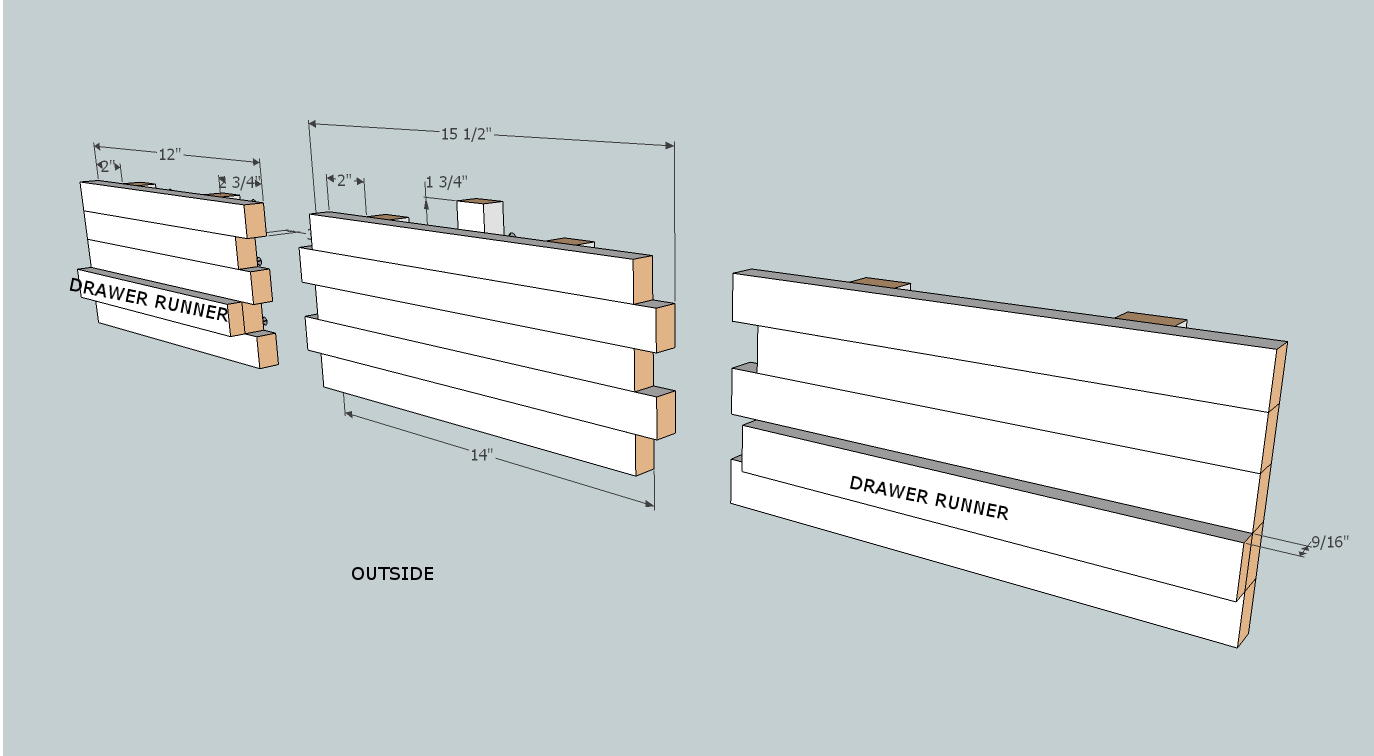
Drawer Runners
Add 2 runners per side. The drawer runner slides between these two sticks. Make the distance slightly wider than a stick width — add about 1/16″ to 1/8″ total for slop and to allow the drawer to point slightly downward when open for better access.
When attaching these four inside sticks, screw them loose enough initially to remove easily in case anything goes wrong during alignment.
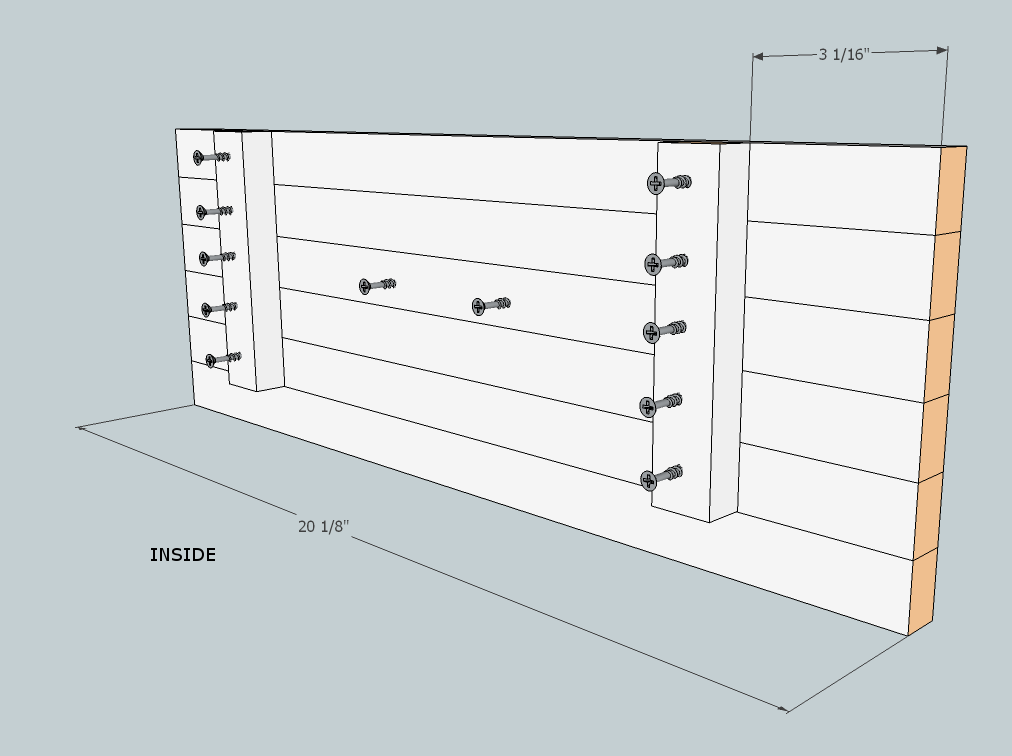
Back
The back is easy to make and should match the undercarriage framework.
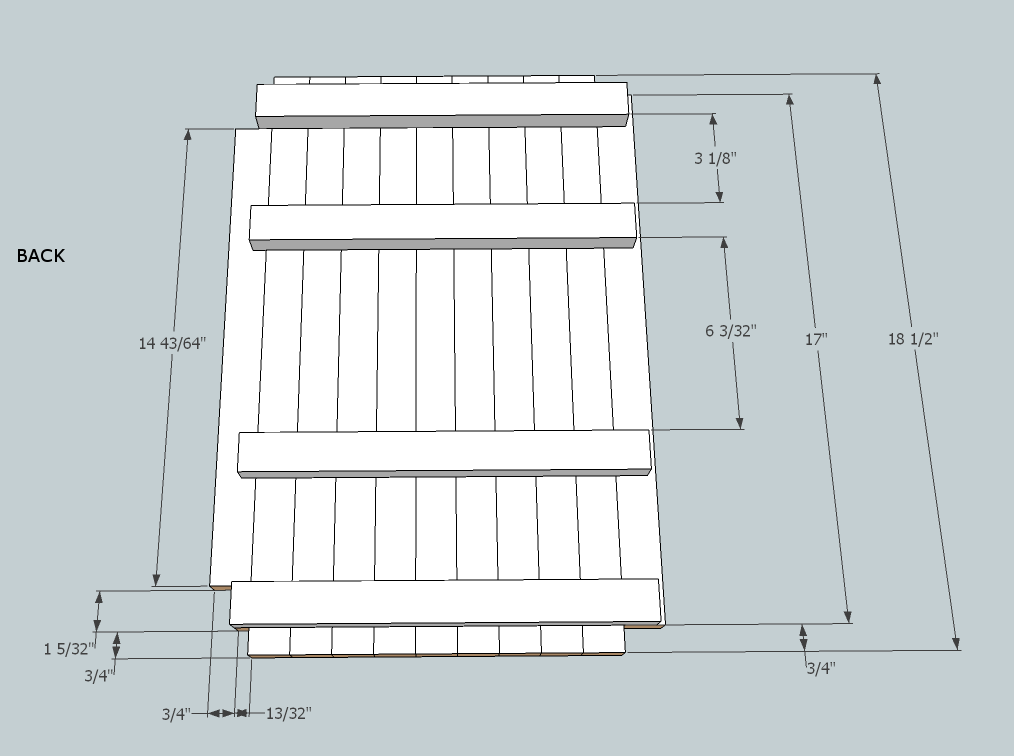
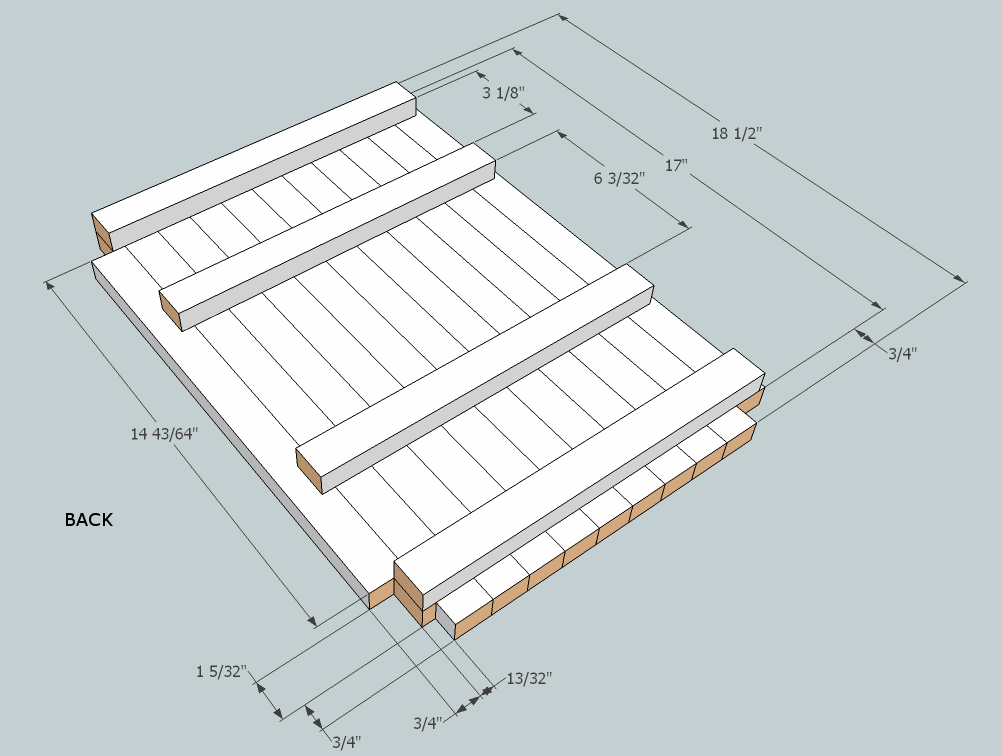
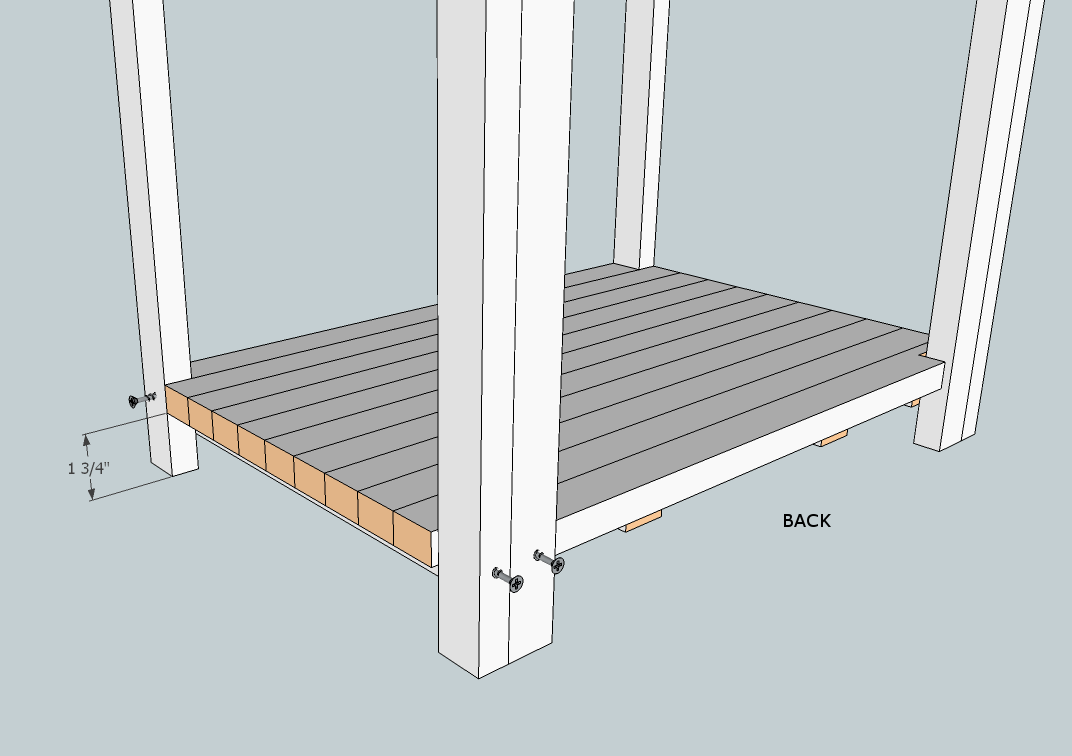
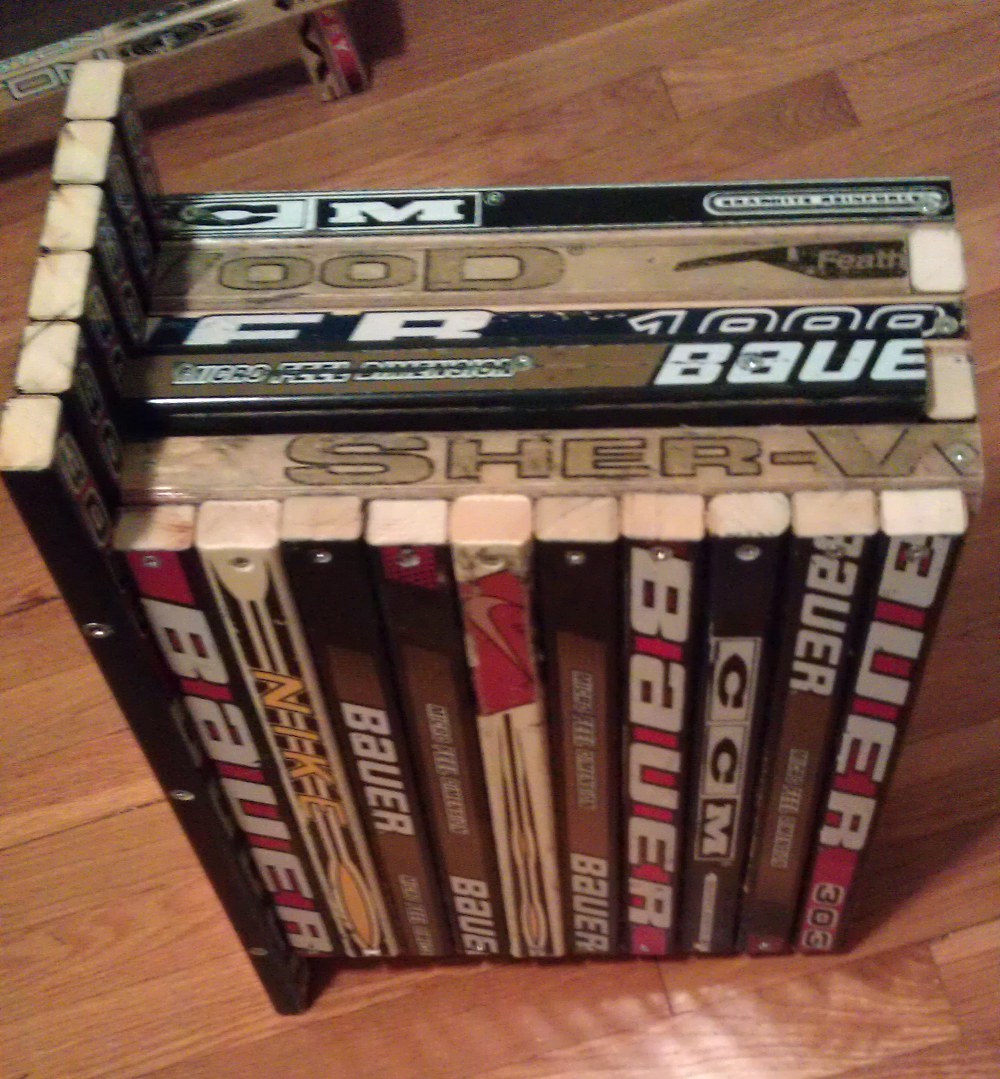
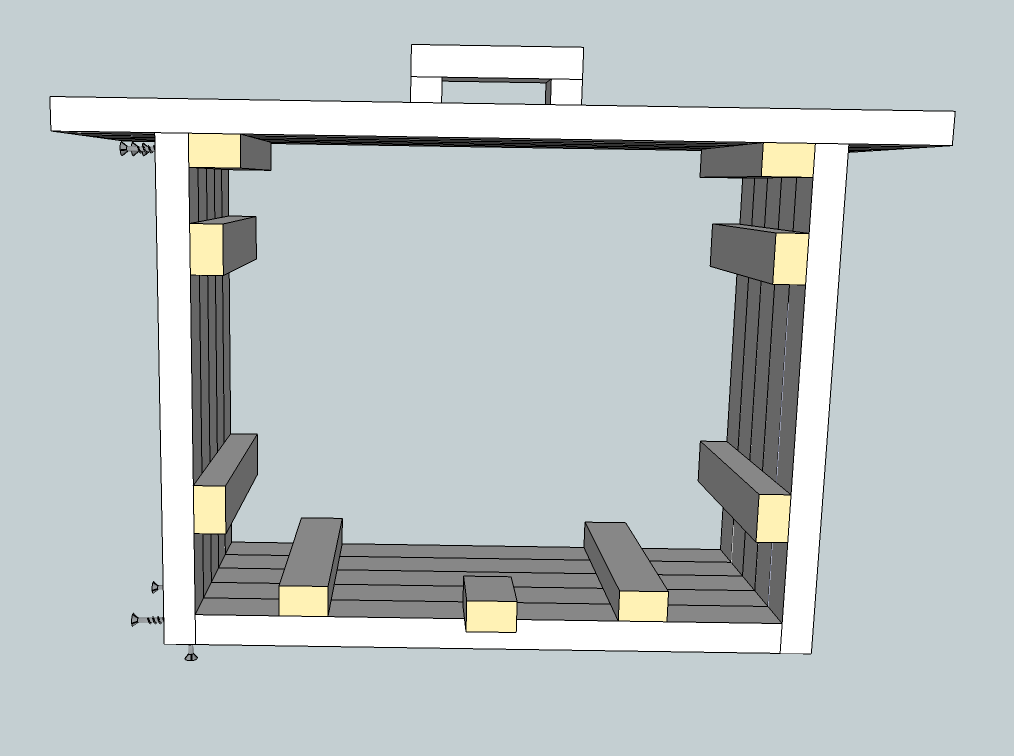
Phase 4: Bottom Shelf
Two critical details:
- Attachment pieces should only be one stick short width (0.75″) from the sides
- The back piece requires a special cut-out in the shape of another stick — you’ll need a band saw or hand saw for these cuts (nearly impossible with just a mitre saw)
Alternative: If you don’t have a band saw, make the stick length 14 43/64″ and leave the tabs off. Screw the leg into the attachment piece with a single screw.
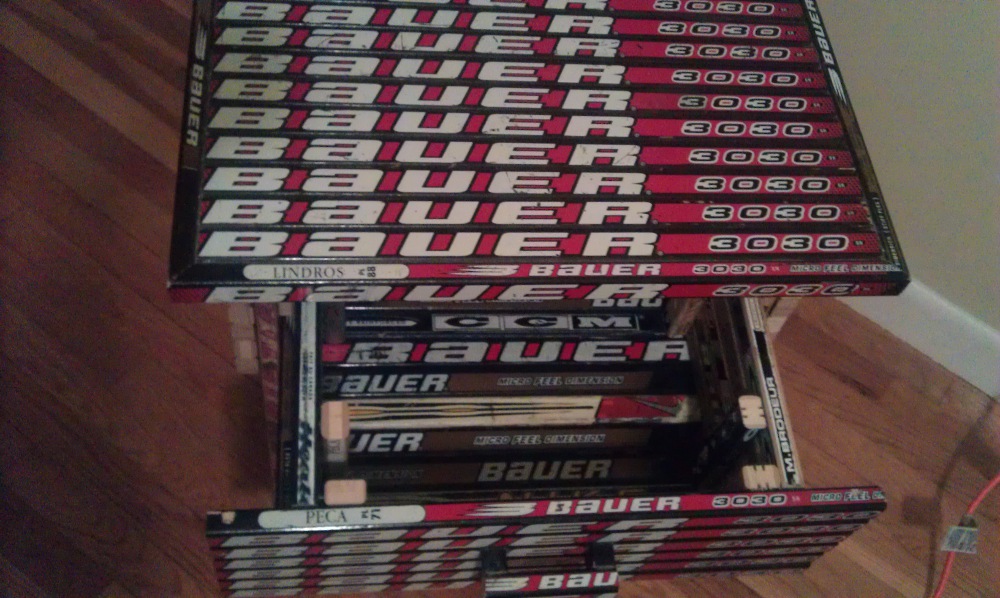
Phase 5: Drawer
Measuring
Measure on your completed assembly — the distance between the 2 runners on either side of the drawer housing. That should be the width of the back of the drawer. If you must err, err on making it too small.
Warning: If the drawer is too big, it’s a major pain to fix (involves shaving down those runners on either side)!
The front should be slightly larger than the housing opening (shown as 20″). It’s easier to fix if too long and ensures you cover the stick ends facing forward.

Assembly
- Don’t make the attachment beams go all the way to the last stick — only attach up to but not including the bottom stick
- Add the handle now — it’s significantly harder to do later. Use #6, 1.75″ screws and Liquid Nails
- Add the bottom one stick at a time (this is why the front piece can’t extend all the way down)
- The last stick is screwed in from the bottom
Drawer Stopper
The stick stub poking out the top with a single screw is the drawer stopper — it keeps the drawer from falling out. Only use one screw so you can rotate it down to insert the drawer, then rotate it up as a stop.
Phase 6: Top Frame
Add the top frame edges using Liquid Nails and finishing nails. Take your time with the 45° angles — oversize the cuts and shave down to get it just right. Be patient.
For a full 3D model, visit the Models page.
Gallery (37 photos)


Related Projects
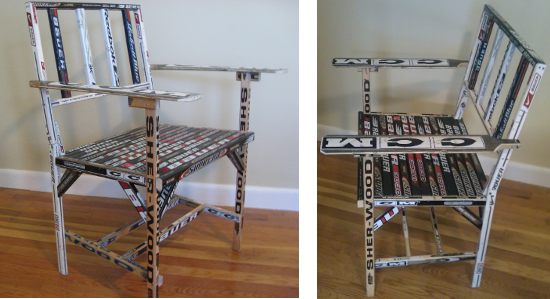
Hockey Stick Chair
The most complex hockey stick build — a full chair with angled back, armrests, and supports. Requires ~20 sticks and precise angle cuts.
 Preview
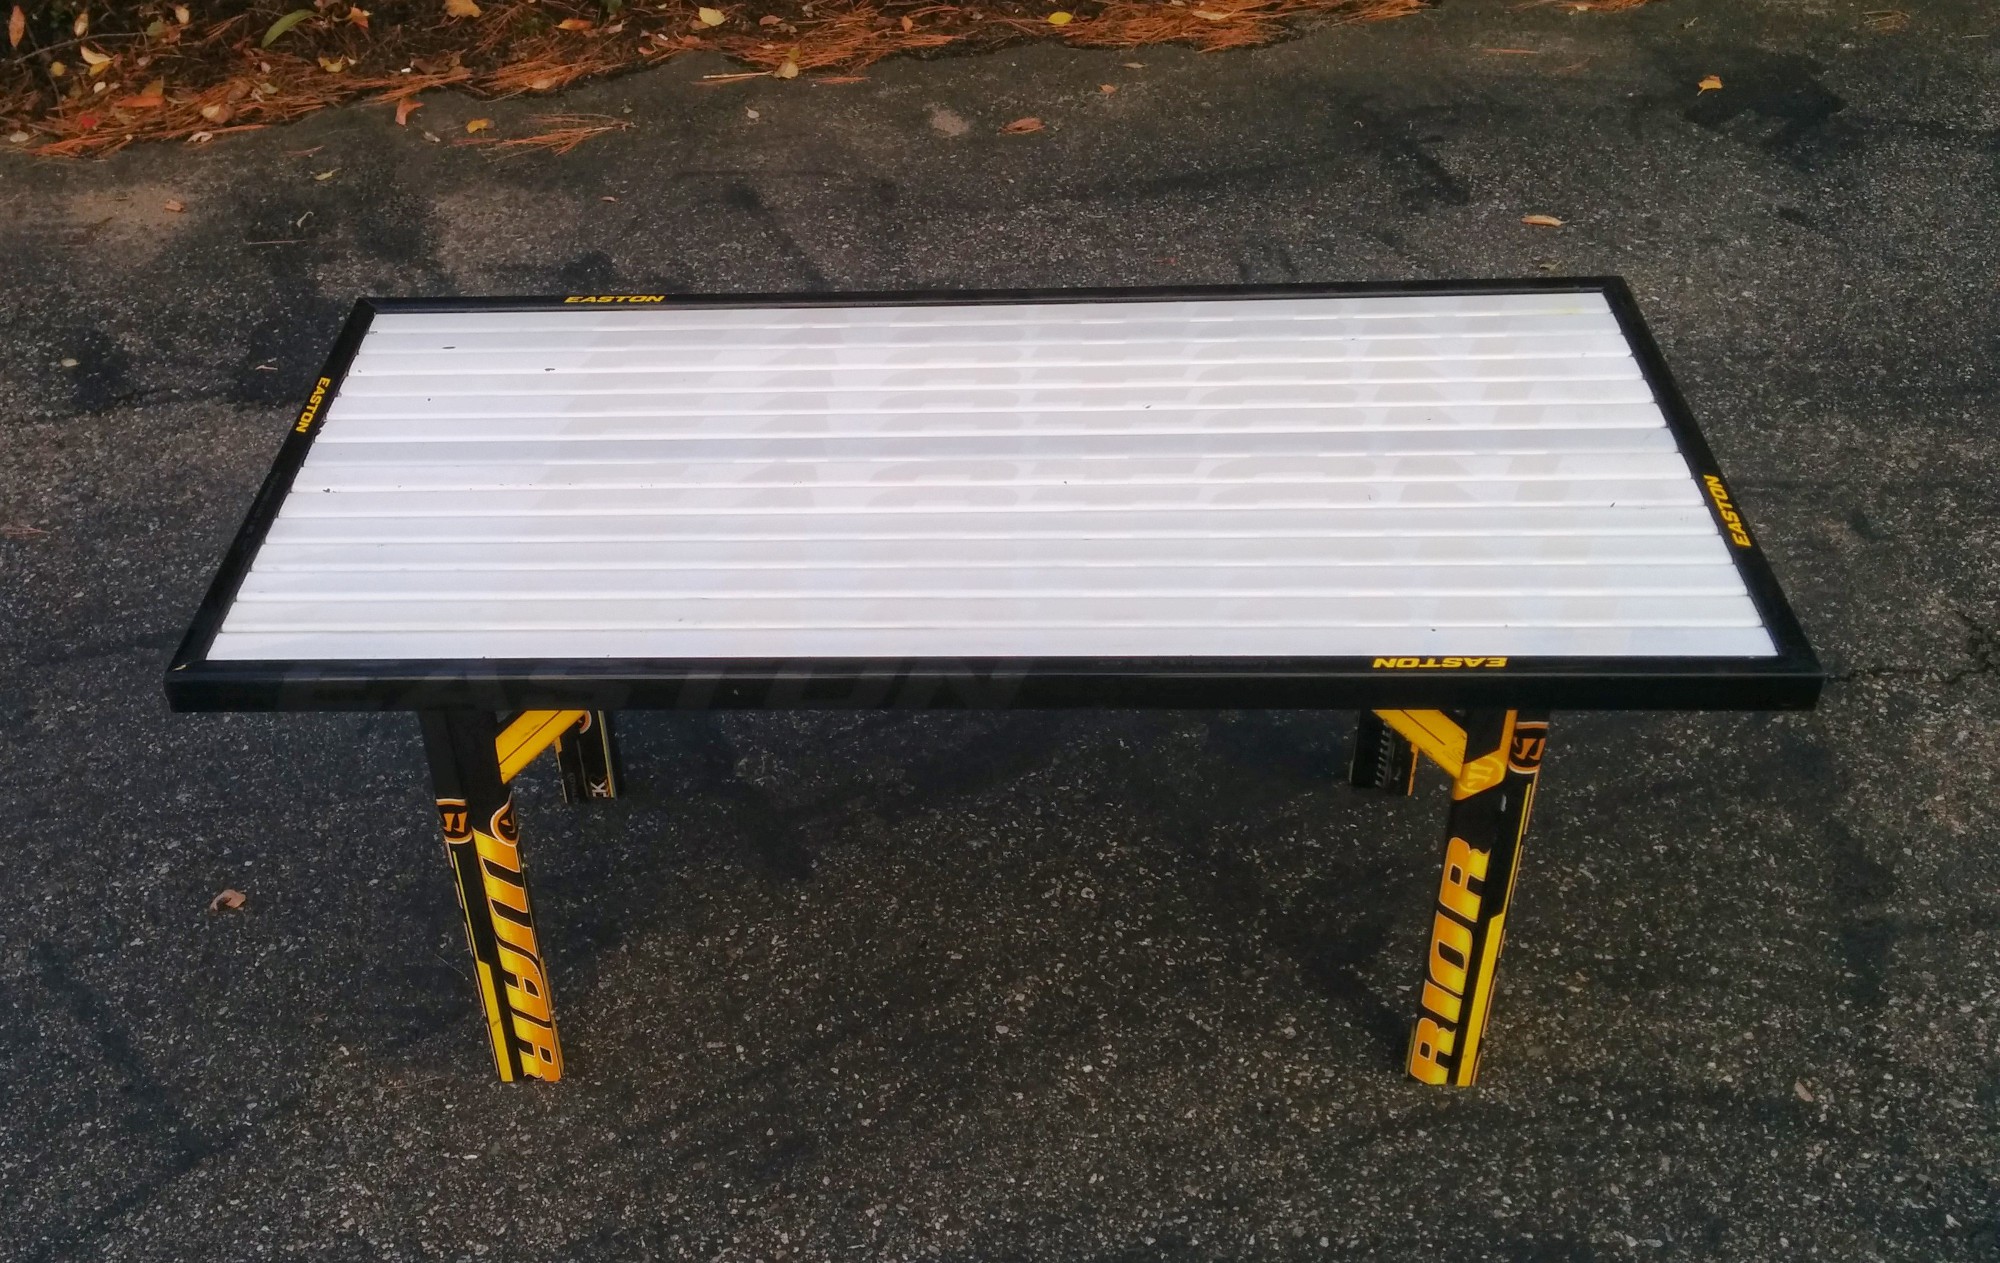
 Coffee Table - Composite
A coffee table built from composite hockey sticks with angled legs. A modern, sleek variation on the classic hockey table.
 Preview
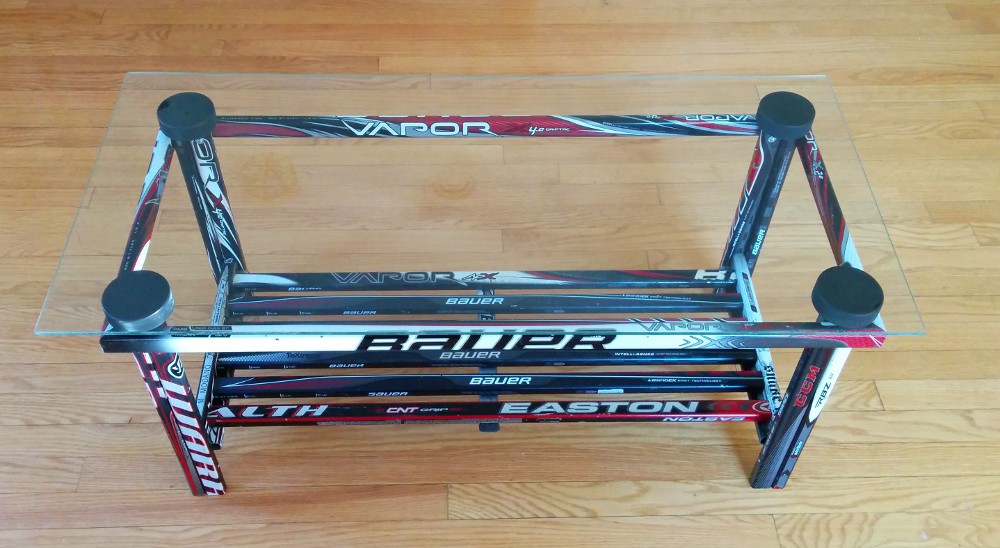
 Coffee Table - Glass Top
A hockey stick coffee table with a glass top, showcasing the stick pattern underneath. Available in multiple color themes.