Building Tips, Tricks, and Approaches
The designs on this website won’t use any primary building materials besides hockey sticks and pucks (with the exception of one of the clock movements). No plywood, no pine, no cheating. It’s a much simpler task to use wood or another material and decorate with hockey sticks. You might as well buy a cheap coffee table, grab some glue and hockey sticks, and follow the two-word instructions of : “Go nuts.” You won’t see that here.
Though I recommend reading this page first, see Building Using Composites for specific details on working with composite sticks.
Safety
Always think safety. Using circular saws, mitre saws, drills, and routers can be dangerous and result in injury. Always follow equipment operation instructions and use gloves, ear plugs, googles, dust masks, and other safety gear when operating and building.
Sticks
Sticks are the standard building block of everything. They come in a variety materials(composite, wood , wood with fiber glass coatings, even aluminum) and shapes (youth, intermediate, junior, and senior). In addition, hockey stick dimensions (width, height, and aspect ratio) vary slightly from stick to stick, even from the same manufacturer. This makes building things slightly more difficult since putting together many sicks with slightly different dimensions can throw measurements off considerably as differences accumulate.
I use the same stick size in all the models; this means that you should take my measurements shown in images on this site with a grain of salt when they cross multiple sticks. As always when building, do your own measurements.
Traditionally I haven’t used the stick blade. They’re usually broken and when they’re not, curve differently for righties and lefties, limiting the usefulness in some way. I’ve seen some cool designs that do use them but I do not.
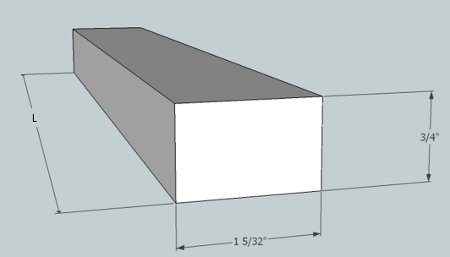
Approximate senior wooden stick:
1 5/32″ wide x 3/4″ tall :: L – max: ~55″ which varies by where & if the stick is broken and height of owner.
Drilling in Screws
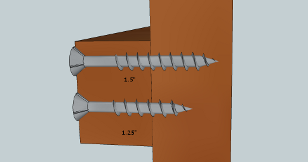
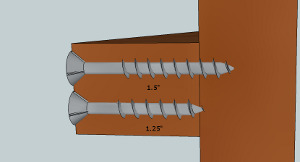
Wood screws are the primary method for attaching sticks together. Depending on what it’s for, I recommend using #4 (clocks), #6 (standard for furniture), or #8 (specific furniture joints) wood screws. The length of the screw to use depends on the orientation of the sticks you’re screwing together. Below left is the standard way of attaching and I highly recommend using 1.25″; little risk exists for accidentally going through both sticks and the screw does not pass the center point, leaving it clear for screwing in sticks from perpendicular directions, unlike 1.5″ length screws. However, the 1.5″ is necessary when attaching sticks as shown in image below right. The extra length is necessary to ensure several of the threads are into the next stick. In summary, if going through shorter part of the stick, use 1.25″. If going through the longer part, use 1.5″.
I reference a “box” of screws in my hardware lists. I think of a box of screws being about 100 to be used, stripped, and lost.
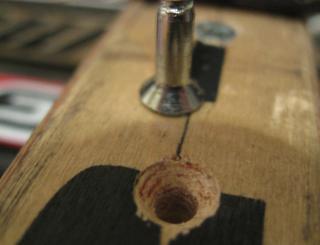
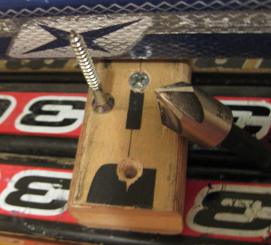
When putting the screws in, make sure you drill a pilot hole and countersink the top so the wood screw sits nice and flush in the stick. See images below for an example and picture of a countersink bit.
Cutting Sticks
There are two primary ways to cut the sticks to be the appropriate length: using a mitre saw before assembly or using a circular saw after assembly. Sticks are generally bowed different amounts after use. Compressing them together with bar clamps will make things look good, but will slightly change the length and angle of how the stick is oriented. Make sure you clamp all sticks together first before screwing in the cross beam attachment pieces to hold them in place. You’ll notice that a lot of the spaces that naturally occur because the sticks aren’t perfectly parallel should disappear. Do everything you can to avoid gaps.
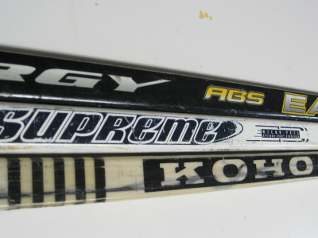
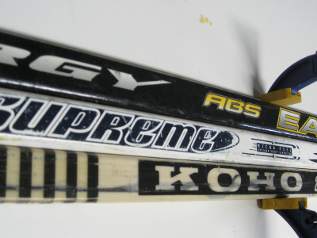
You can see the space between the white Supreme and the Koho on the left. It’s gone after clamping in the right image.
In general, it’s best to use the circular saw for the larger flat surfaces of joined sticks. This is especially true if you’re not going to put a frame around a prominent piece like a top. If you are going to use a frame, you can accomplish the task with just the mitre saw.
When cutting, remember to account for the width of the blade of your circular or mitre saw if you’re making exact measurements.
Mitre Saw
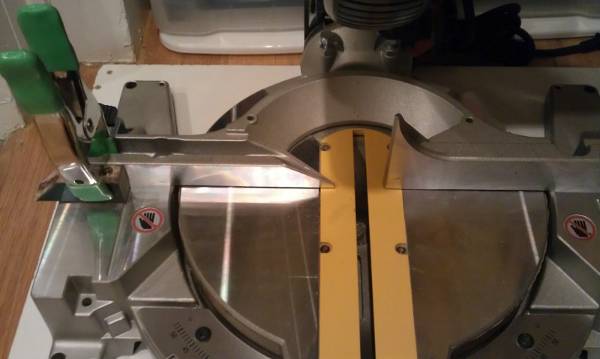
Same as any other woodworking project, the mitre saw has the advantages of being easy to setup and provides highly repeatable cuts. However, its not as clean for cuts on large “flat” surfaces where a circular saw is better. Still, you do a lot with just the mitre saw. When using a mitre saw, the shaft of the stick must be placed firmly across the rail for its entire length when making the cut. Otherwise, when the sticks are compressed together, a bowed stick will have a slightly different length than a shaft that isn’t bowed. This isn’t a huge issue, especially if covering up the edges with a frame, but something you should note.
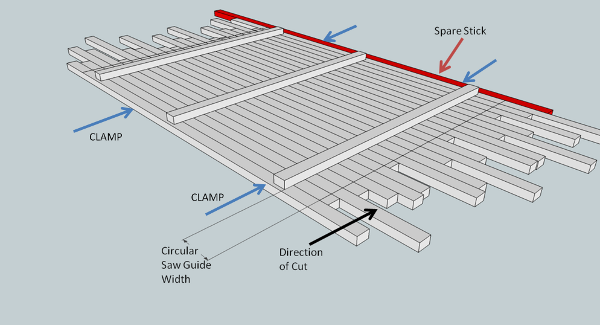
If you decide to only use a mitre saw, especially for the top surfaces of pieces of furniture, use a template. Clamp a spare piece of wood at the appropriate length and make all your cuts. Even if you’re off, you’re consistently off. A template is shown below.
Circular Saw
Clamping and screwing the sticks together and then cutting the two sides gives the best, most even cut. If the attachment shafts are pretty straight, you’re nearly guaranteed a good edge. This processes is highlighted again in Coffee Table, but I repeat some of the material here for completeness.
Know the guide width of your saw. This will enable you to use the attachment piece as a guide as you make the cut if you’re comfortable with that distance setting a parameters of your furniture. For example, this works to set the edge to legs distance for the Coffee Table, but wouldn’t work well for the Nightstand where the legs need to be closer to the top. In those latter instances, you’ll have to use a straight edge or stick you can rely on being straight to act as a guide on the other side of the cut.
As the figure indicates, clamp a spare stick at the of each of your cuts with the circular saw. This prevents blow out of the material when a cut is finished. An example of stick blow out is shown below:
Framing Edges
Framing the top or outer surface really enhances the furniture, but it can be a little tricky. First, be patient. Over size your 45° cuts to make sure you’re in the ballpark for the lengths you need. Then slowly start working your way down in length until all for corners match up. You can’t test enough times! I generally don’t rely exclusively on measurements for this task, but those more adept may be able to. I find the test method results in a cleaner frame.
Another word of caution for framing: use the exact same type of stick, manufacturer and model. Any edges at 45 angles won’t look as good if the aspect ratios of the 2 sticks you’re mating don’t match. Even the same manufacturer, Bauer and Bauer in the picture below, didn’t guarantee it. If you don’t have enough of the same exact stick, go through your stock evaluating the aspect ratios of what you do have and work with the best matches you can find.
Selecting Clock Movements
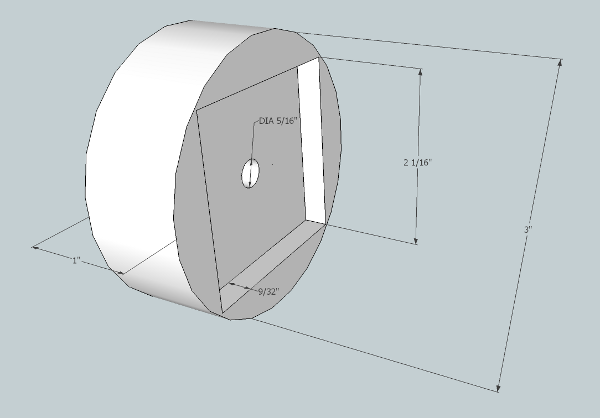
Clock shaft lengths I’ve found generally don’t exceed 15/16″, so dial thicknesses can’t be much more than 3/4″ to include a nut. For us, dials are either pucks or sticks. Since a puck is 1″ thick, the clock movement should be recessed by routing into the puck to give clearance for the hands. You can get away with not routing, as I did for the Puck Wall Clock, the but the nut to hold the movement barely had anything to grab and the hands of the clock were right up against the face. Cheap clocks have cheap (read: bendable) hands, so as soon as they’re bent, it’s hard to keep them from getting stuck on the face as they rotate. Routing 9/32″ of the way into a puck gives a much better result as shown in Desk Clock but again, you can get away with out it. Hand clearance is not an issue when using sticks as the dials/sticks are thinner. See Stick Wall Clock.
The movement used in these projects: MVT7130
As for the length of the hands, the minute hand should go to just about the edge of the face, but not exceed it. The hour usually comes matched and you don’t have to worry about it. Otherwise, 2/3 of the minute is a good number.
Routing
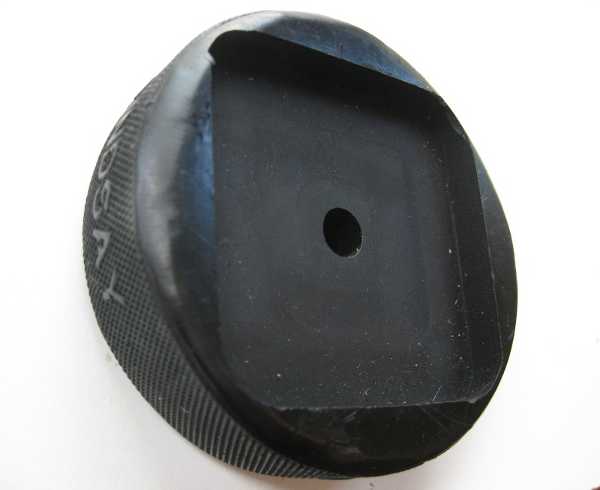
Routing is fairly advanced if you haven’t done it before. I’m not going to go into depth here on how to do it since trying with pucks isn’t probably the best first exposure. I will highlight some notes on it though. First, make sure it’s routed well so it’s nice and even on the inside. If there is a slope or unevenness of the inner plane relative to the face of the puck, the movement shaft might not fit. If it does, it’ll be at an angle which forces the hands toward the clock face for half the time, risking them catching. Second, vulcanized rubber is basically pulverized when being routed and forms a fine dust. Wear a dust mask and follow all necessary safety precautions. Third, you can try to undersize the size of the route for the movement body by about 1/16″. You might be able to press the movement body into the space adding some additional rigidity.
Example routing measurements for the MVT7130 movement:
