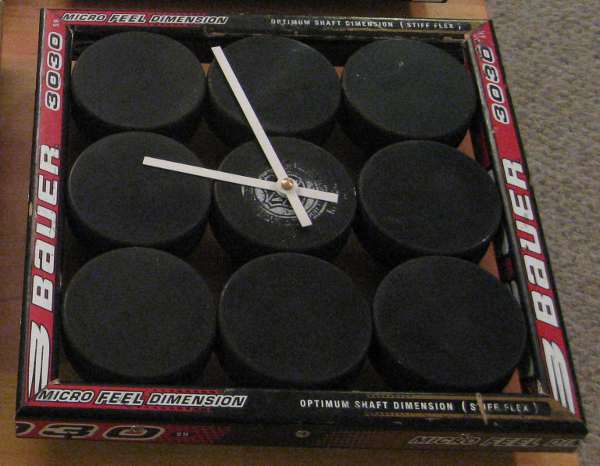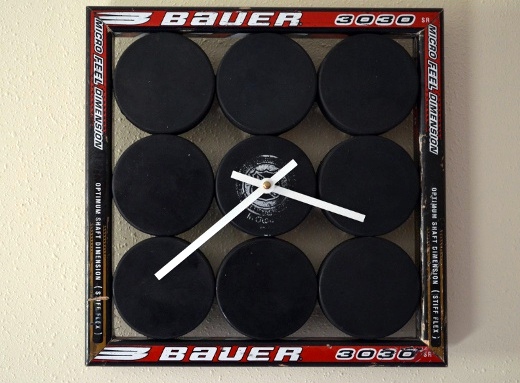
Three hat tricks later…
Definitely the coolest hockey wall clock I’ve seen around, this one isn’t hard to make and uses few (about 1-2) sticks. A win for everyone! The only trick is the use of double point staples to hold the pucks in place and that routing the center puck is a near must. However, this means no glue & no tricky assembly procedure.
Design Approach
This clock breaks down a little differently than one might expect. I did it slightly differently when I actually built the one pictured here, but these directions should head off the issues I ran into.
- Center Puck
- Frame & Remaining Pucks
- Back Supports
- Assembly/Consideration Points
The particular order of some of these steps isn’t as important and making sure you put the back supports on the pucks after you’ve fixed the pucks and frame permanently together. The supports will make putting in the double pointed staples harder if installed first. Routing out the center puck is highly encouraged. I’ll show what the hand clearance will be farther down the page if you don’t. Not routing makes aligning everything so the hands sweep cleanly really challenging. Onto the tools and supplies you’ll need:
Tools
- Miter Saw
- Drill
- Hammer
- 2 bar clamps (2 greater than 1 ft)
Hardware
- About 1-2 sticks
- 1 box of #4, 1.25″ wood screws
- 1 box 9/16″ double point staples
- 2 #212 x 15/16″ screw eyes
- #4 Picture frame wire
- Clock movement, try MVT7130
Build
Center Puck
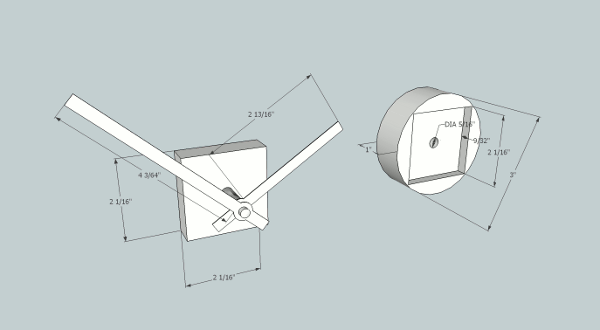
The clock movement, MVT7130, is shown below. These are the basic dimensions and you should measure them yourself to make sure everything fits in your design, etc. Get the clock movement with the thickest dial you can. I routed out 9/32″ of the back to fit the puck. You can do a little more if you want and plug the difference with washers.
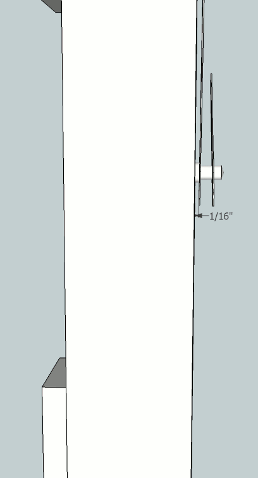
By routing out 9/32″, you get 3/16″ hand clearance from the face, which is plenty good. If you don’t, you’re only going to get about 1/16″. This is a really small distance as you won’t be able to mount the timepiece perfectly flush and the hands tend to bend (read: they’re cheap). Slight bending of the hands and angling of the clock shaft to puck can produce big headaches. Possible? Definitely. Difficult? Quite.
Frame & Remaining Pucks
Next we’ll move to the frame and the pucks themselves. Follow closely…
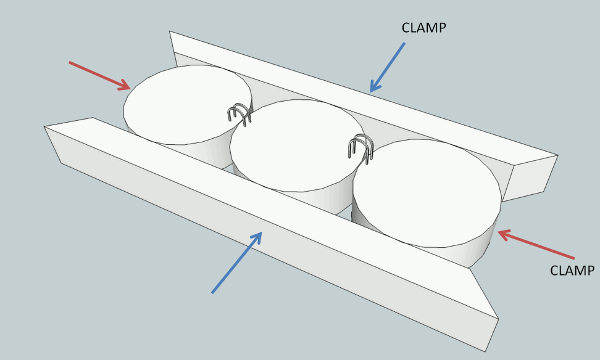
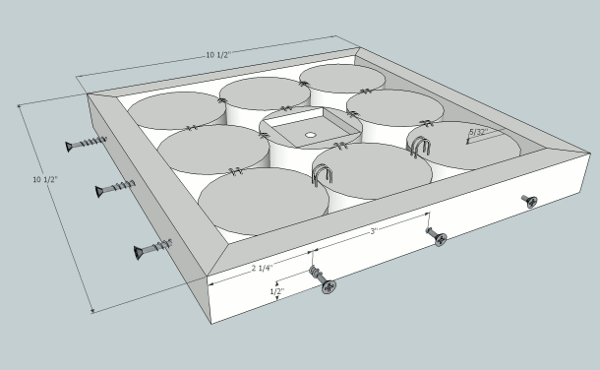
I recommend putting 3 pucks in a 3×1 arrangement. Start without the center puck. We’re going to measure the exact length of the 3 puck arrangement in case they aren’t exactly 1″ x 3″ each. First, cut the 4 frame pieces, about 9″ on the inside dimension, or 10.5″ on the outside if your stick widths are 0.75″. Oversize your cuts by about 1/16″ or 1/8″. Place two of them around the 3×1 arrangement of pucks and clamp them together as shown. This ensures they are in a straight line. Take your other clamp and press them together in the perpendicular direction. Once you’ve done this, hammer two double sided staples into the pucks until they are flush. See the figure.
Repeat this 2 more times with one of the assemblies including the routed center clock puck in the middle.
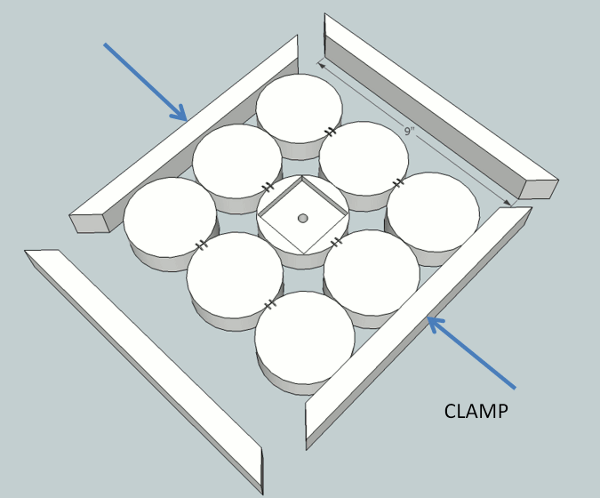
One you have the three 3×1 puck assemblies, place two of the frame pieces along the assemblies to align them. You want one puck from each assembly to touch each of the two sticks. Clamp them together as shown below. Once this is done, you can measure the width of the 3 puck assemblies on the other direction, to check if it is indeed 9″. You can adjust the inner lengths of these pieces with the miter saw to make them the correct length. This is why you oversized your cuts.
Repeat the trimming process in the other direction until all pieces pieces frame together nicely. In the end, because you’re compressing rubber, the inner lengths of the frame pieces will be slightly less than 9″, but the compression is good. It’ll help hold them in place.
Now that all the pieces are cut and the puck subassemblies are together, clamp the entire assembly together face down. This ensures that the entire face of the clock, pucks and sticks, will be flush. Don’t over clamp the assembly or the pucks may buckle but there will likely be some inherent curvature you must remove! Screw the sticks into the frame using #4 1.25″ screws at the center of each puck for a total of 12 screws. Smaller screws are better to keep them from showing. Make sure you counter sink these nicely as they’ll be visible from the outside. Finish by nailing in the complementary double pointed staples so all pucks are connected to their neighbors.
Back Supports
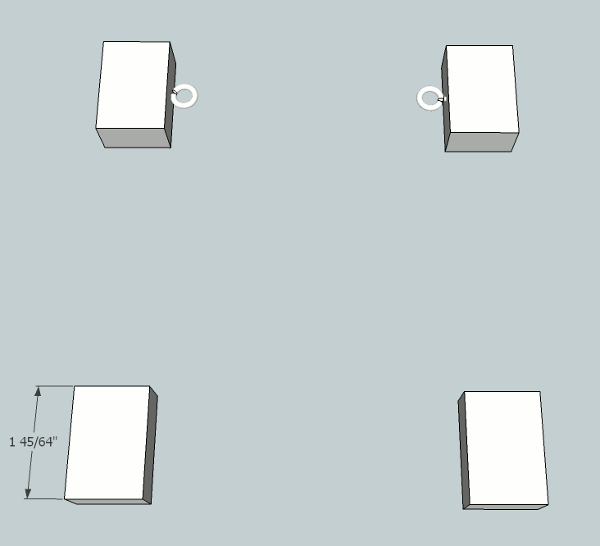
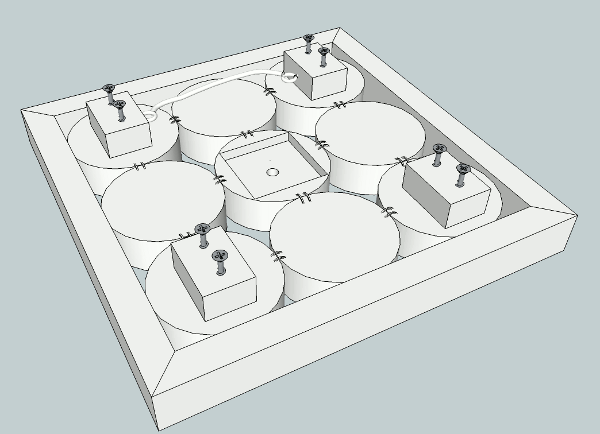
Now that the main portion of the clock has been constructed, we can focus on making the back support pieces. These pieces are necessary to give the rear of the clock some distance from the wall enabling it to be hung. I chose four smaller stick pieces to be centered on each of the corner pucks to provide this distance and to hold the picture frame wire. There is nothing special about the measurement shown below, just make sure it can support two screws to keep the pieces from rotating. Just about anything reasonable will do. Be sure to add the eyelets at this stage in the center of each of two pieces as shown. It’s much easier now than after they’re installed on the back of the pucks.
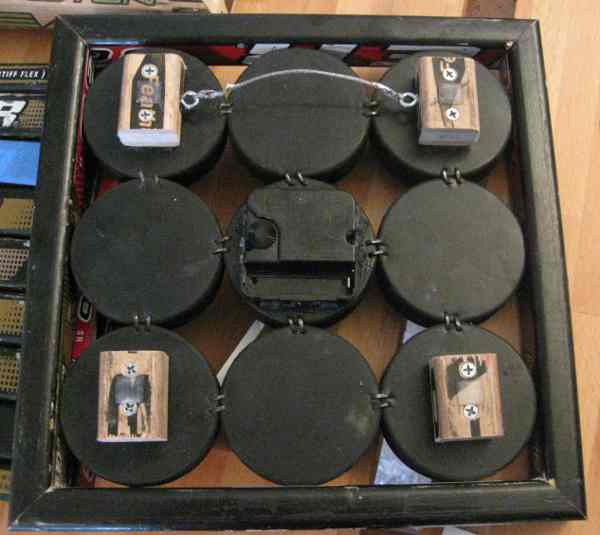
Now you’ve got the 4 pieces, go ahead and attach them to the backs of the pucks. Wire up the picture frame wire as well. Leave some slack for it to hang, but you want it a little taught. You may need some pliers to make a knot or to add a clamp. I chose to solder mine together after a knot, but it shouldn’t be necessary.
Assembly/Consideration Points
Some things to consider when putting the final touches on the clock, some of which I’ve already highlighted. I like soldering the picture frame wire together at the end to ensure it doesn’t fail, but that’s a personal preference. I highly recommend added small rubber feet to the back of the support pieces too to keep from scratching the wall. They can be seen in the picture below as clear squares between the attachment screws.
Finally, screw in the movement using the wrench.
Model
For a full model of the puck wall clock, check Models.


