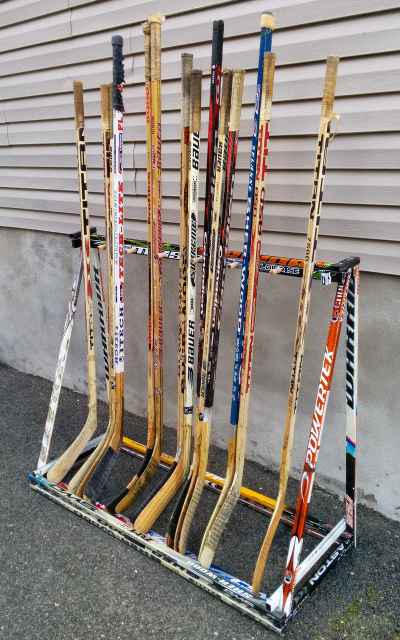
It’s game time!
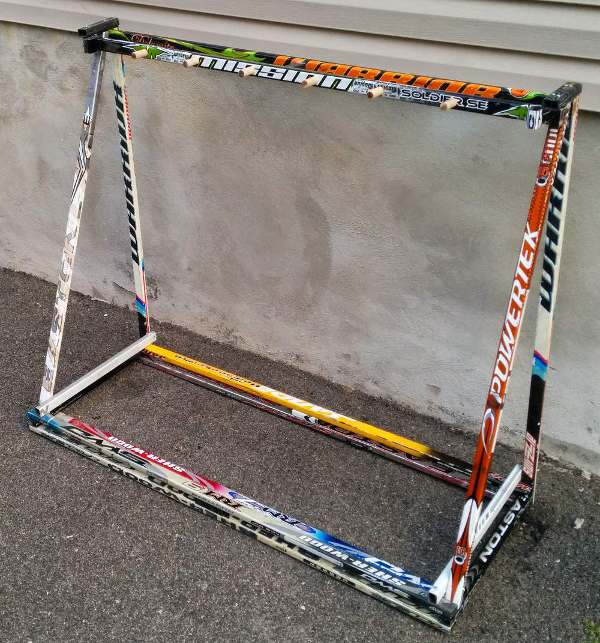
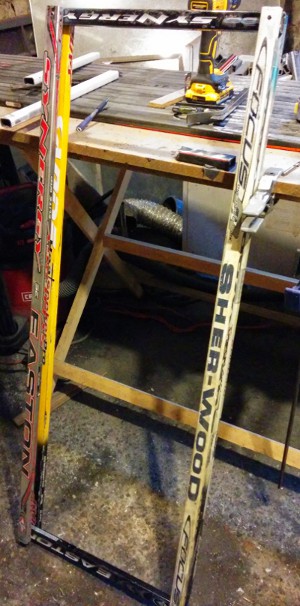
The hockey stick stick rack has a very meta-hockey stick feel to it. Nothing cooler than using old twigs (if you can call them that these days) to hold the next generation of sticks. Ironically, the pictures here show the rack built with composites holding wooden sticks! Regardless of material, this design works great to accompany your outdoor rink or organize all your own sticks.
Design Approach
The hockey stick rack is not difficult to build. It only involves making some careful measurements and trusting the design. The major components of the hockey stick rack:
- Base
- Vertical Supports
- Rack Top
- Finishing Pieces
Tools and hardware for the project:
Tools
- Miter Saw
- Drill
- Tape Measure
- Bar clamps
- Spring clamps
Hardware
- Around 15 sticks
- 4 #6, 1.5″ sheet metal screws
- 40 #6, 1.25″ sheet metal screws
- 5/8″ x 1′ wooden dowel rod
Build
Base
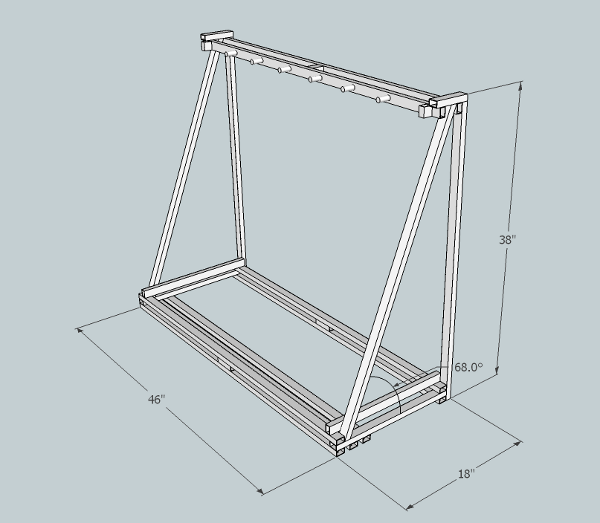
We’ll start by building the base. The base shown here is 46″ in length, however you can change this to fit your desired size. I’ve found that 46″ is right around the sweet spot for guaranteed good length of sticks. Your choice of this length is important since you’ll need 8 sticks that are that length or longer.
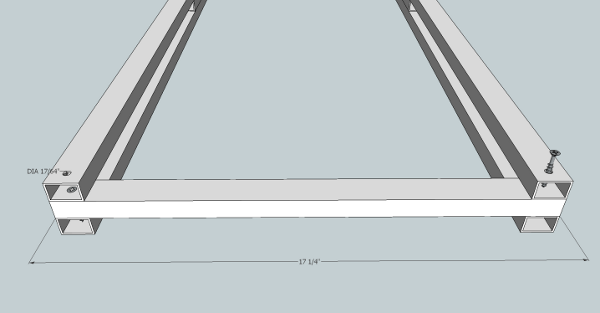
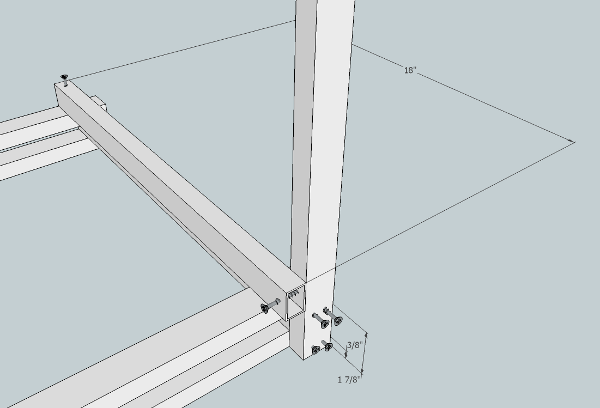
Begin by cutting 4 sticks to a length of 46″ and 2 to 17.25″. For those two sticks 46″ in length that you want to be on the bottom, drill a 17/64″ hole through only ONE side of the stick, about 9/16″ from the outer corner and midway in both dimensions of the long side at each end and at the shown locations. These ones in the middle will be used to attach the extra stiffening pieces later. These are clearance holes for the screw head since we want the stick rack to actually sit on the stick and not on the hardware.
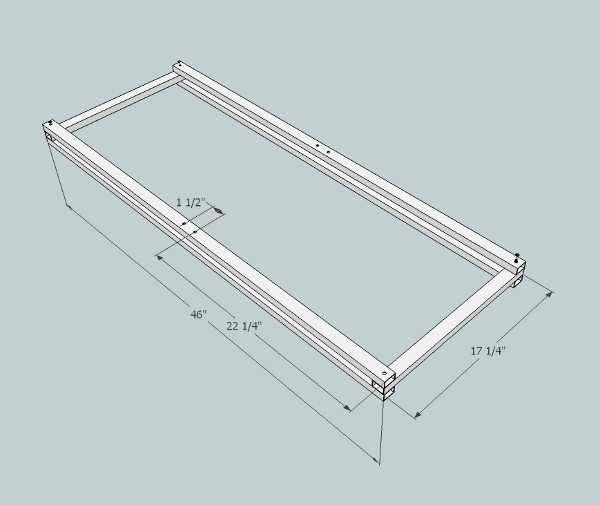
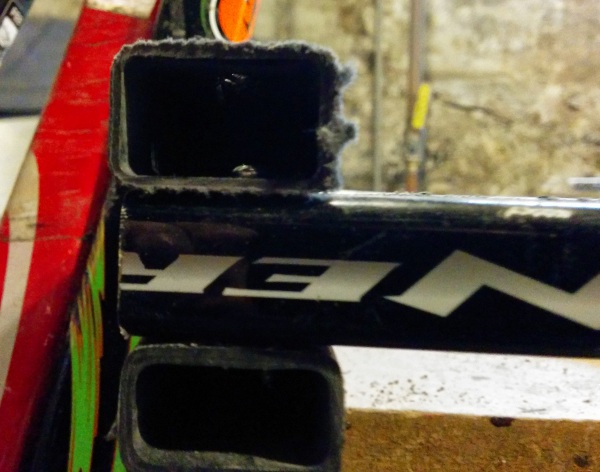
Drill in #6 1.25″ sheet metal screws into the four corners, through the 3 sticks that make up the base as shown in the picture. Don’t touch the 4 holes in the middle; we will use them to add support pieces later. If you know how many and the pitch of bottom support sticks, you can add those screw head clearance holes now as well.
Vertical Supports
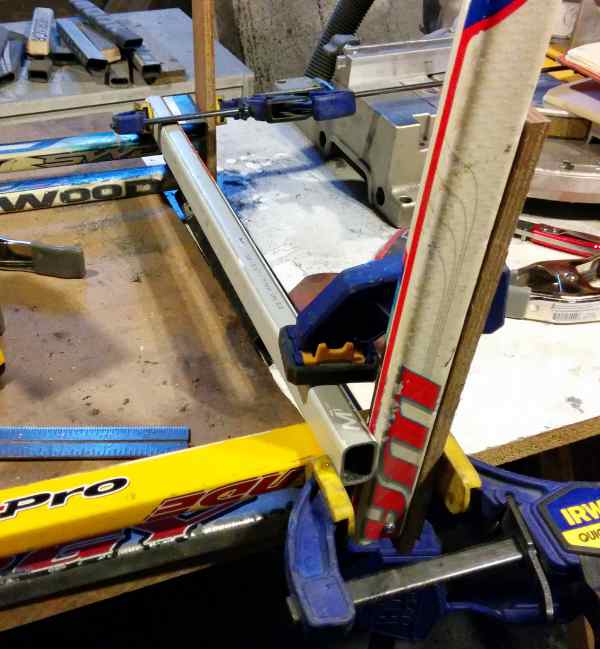
Cut two more lengths of 37.35″ and 18″. Attach each 37.25″ stick vertically to the base by using four #6 1.25″ sheet metal screws into the two base pieces as shown. Ensure that the sticks are nice and orthogonal to the base or there will be a lot of twisting in the overall frame. The other option is to screw one screw into the base at this time and the remaining 3 once the top is attached at the end of assembly.
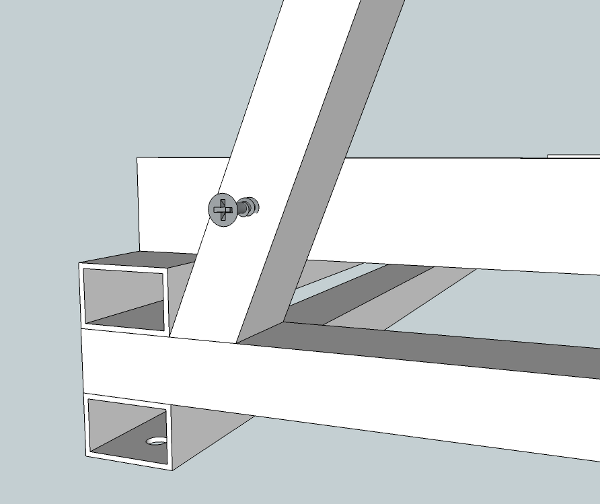
Fix the 18″ length stick to the rack using one #6 1.25″ sheet metal screw to the vertical support as shown and one #6 1.5″ sheet metal screw directly into the base.
Rack Top
To make the top rack, we will start with the small side pieces and the large angle piece that makes the triangle with the base. Cut one piece of stick to a length of 4.5″. Next, cut a stick to have a bevel of 22 degrees on either side and a length of 38 9/16″ on each side as shown in the image below. Note, the overall length is not 38 9/16″. Rather, each side is that specific length. Attach the two pieces by offsetting the beveled stick by 2 7/64″ from the front and attaching with a #6 1.25″ sheet metal screw at an angle. Repeat for the other side of the stick rack.
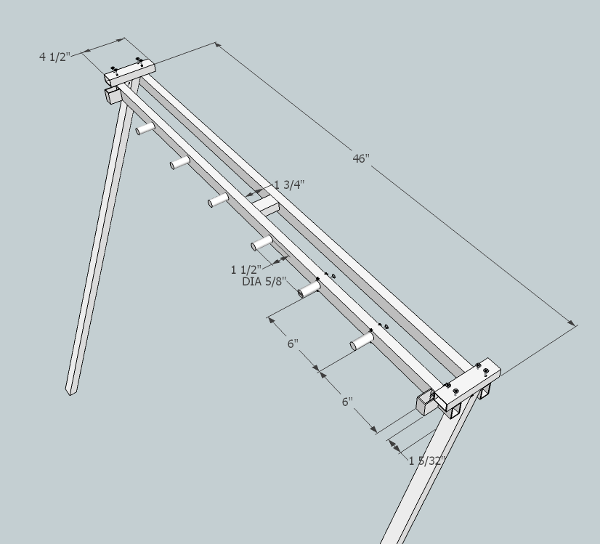
Now you’ll need to cut more sticks to length: two to 46″, one to 1.75″, and two to 1 3/16″. At this point, also cut six 1.5″ lengths of the dowel rod. These will be used as the dividers for the stick and keep them from sliding along the top stick. Attach the small 1 3/16″ stick pieces to the front cross beam stick about 1 5/32″ from the end, the width of a standard stick. Use two #6 1.25″ sheet metal screws for each piece to prevent them from rotating.
Now attach each of the dowel rod pieces by drilling a small hole in the back and fixing to the cross beam stick from behind using a #6 1.25″ sheet metal screw just like the small pieces before. Each dowel rod is located 6″ from the small stick pieces on the outside you just attached and from each other as you go from outside to inside. Ensure the dowel rod is centered nicely in the vertical direction on the stick.
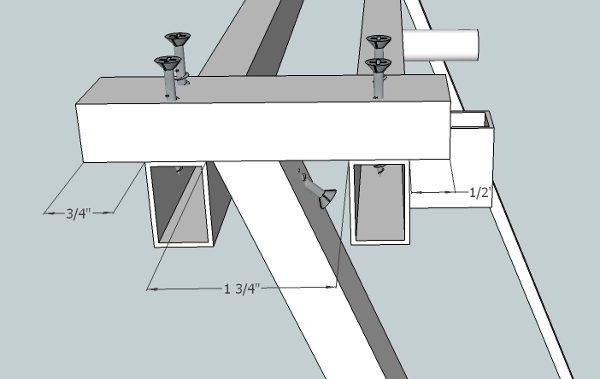
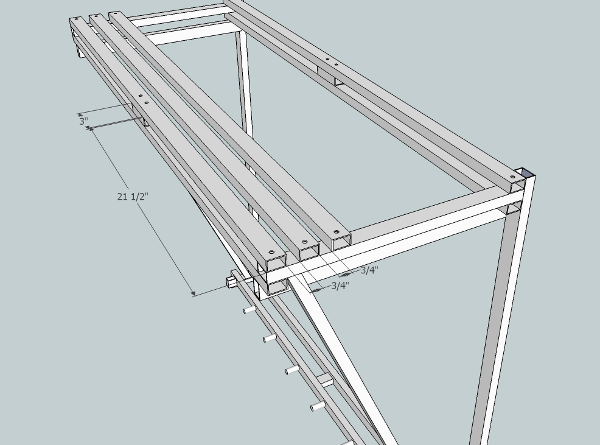
Take this cross beam pieces and attach it to either side/angle pieces with two #6 1.25″ sheet metal screws each as shown below. This cross piece should be 0.5″ from the front of the side pieces. Note that the front is the direction that the angle piece is pointed toward. Now take the second 46″ cross piece and use four of the same sheet metals screws to attach that into place ensuring it is 0.75″ from the back of the side pieces so the vertical support sticks can fit into this spot. To finish off, you can simply glue a 1.75″ piece into the midsection (23″ from the edge) between the two cross pieces. It is not necessary, but will add some additional support for the sticks. Highly recommended.
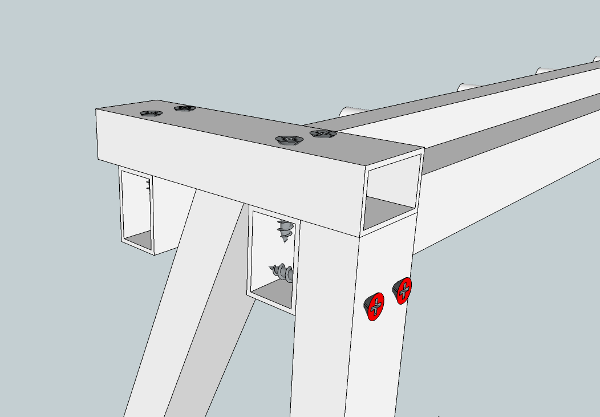
Fix the top with angle pieces to the two vertical sticks and base as shown in the image with #6 1.25″ hardware. The vertical stick should fit nicely behind the side pieces and can be attached with two #6 1.25″ sheet metal screws on each side as shown with red tops here. Be careful not to drill them too high; they could hit the two screws coming in from the top used to attach the cross beam to the side piece.
The overall top will look similar to this when complete:
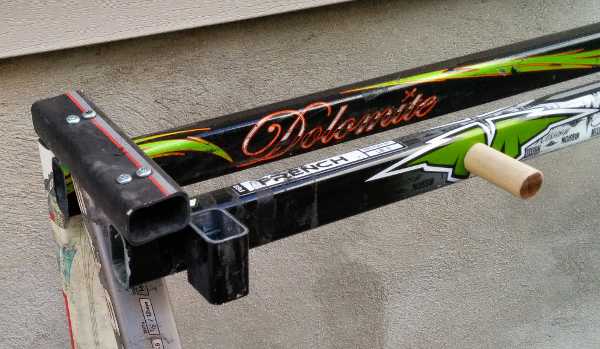
Attach the angle pieces to the base using a single #6 1.5″ sheet metal screw into the side as shown which will really add a lot of rigidity to the entire rack.
Finishing Pieces
The stick rack is completed by adding spacers and additional base sticks. Take two 3″ length of stick and insert them between the two longer sticks in the rack front and back. You’ve already drilled the screw head clearance holes earlier so all you need to do is center them and screw them in with two more #6 1.25″ sheet metal screws each. These add strength to the bottom pieces which are likely to be stepped on the most frequently.
Finally, you can add at 1 or more additional base cross pieces on which the sticks will rest on the base. The model has two spaced to be the width of the short side of the stick here in the model. My actual pictures show a wider gap (the width of a stick) made using only one stick. These final configuration depends on how many sticks you have and how you want it took look. Regardless, you’ll need at least one to ensure a nice flat surface.
Once the glue dries from 1.75″ support piece at the cross beams at the top, you’re all done!
Model
For a full model of the stick rack, visit Models.

